Green Goddess Dressing

green goddess dressing recipe - seasoned with sydney

I’m getting into the dressing game.

After years of relying on the grocery store shelves to determine what I could slather on leaves in an attempt to trick myself into eating vegetables, it’s about time I started taking matters into my own hands by seeing what a few minutes, a handful of common ingredients, and an impossibly large collection of empty jars can do.

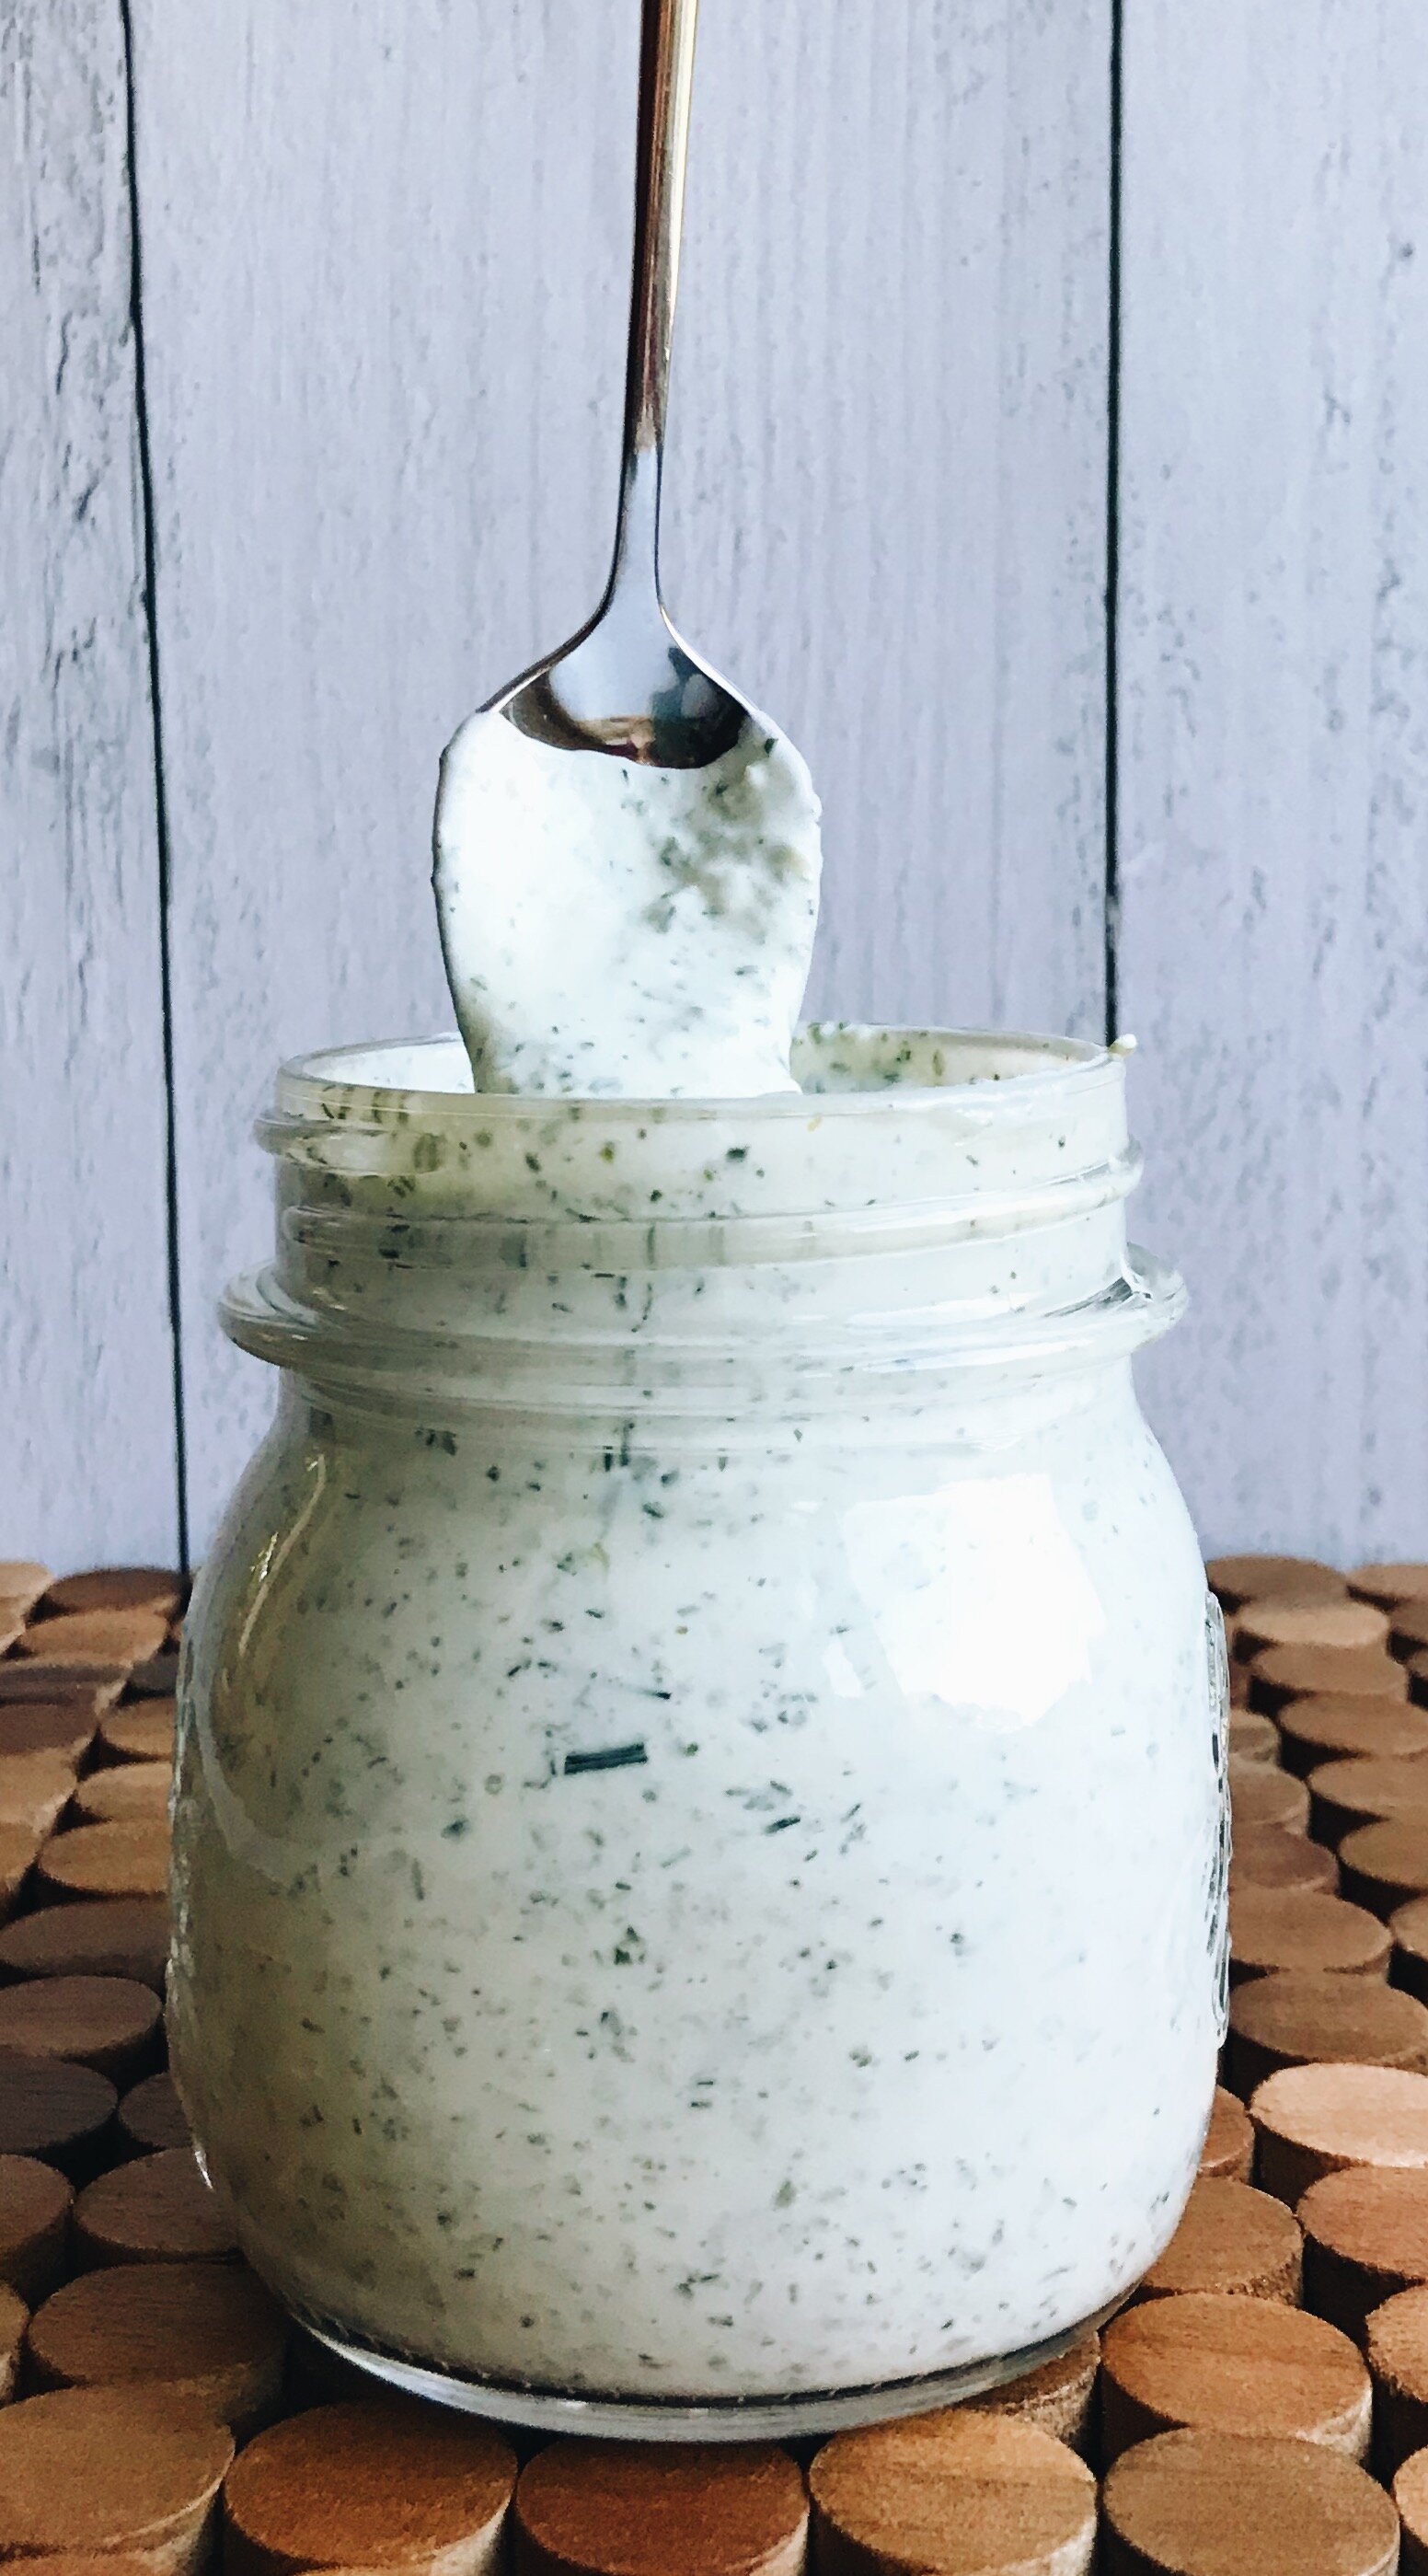
One of my absolute favorite dressings is green goddess. It’s thick and creamy with a deep green hue and a medley of flavors ranging from slightly spicy to a little bit brine-y. Traditionally, green goddess dressing is made with egg yolks, mayonnaise, garlic, anchovies, salt, and pepper - not unlike its fellow dressing, Ceasar. But the addition of a handful of fresh herbs sets it apart (and gives it its lovely green color).

green goddess recipe - seasoned with sydney

While I’m usually not one to shy away from traditional recipe ingredients, for my first foray into dressing-making, I decided to take a few creative liberties. More specifically, I ditched the anchovies and eggs. Don’t get me wrong, I love eggs and tolerate (at best) anchovies, but since there’s no real “cooking” or heat involved, I felt a tad iffy about using them. I also wanted a dressing that was on the lighter side, so I swapped out the mayonnaise for plain, full fat (or whole milk) Greek yogurt. It helps the dressing keep its wonderful viscosity, but doesn’t make it feel quite as heavy.

green goddess recipe - seasoned with sydney

The beauty of this easy homemade dressing is that any herbs will do as long as you’ve got enough for at least one cup. I happened to have on hand tarragon, dill, and cilantro which created a nice mix. But if you’ve only got one bunch of herbs, it’ll still be grand. This is also the perfect way to use up all the herbs in the garden before the big frost of fall sweeps over them for good.

With just a 20-minute prep time this light, spicy, and deliciously herbaceous take on the traditional green goddess dressing is sure to become an instant favorite!

Green Goddess Dressing

green goddess dressing recipe - seasoned with sydney

What You’ll Need:

  • 1 cup plain, whole milk Greek yogurt

  • 1 cup fresh herbs (I used tarragon, dill, and cilantro), roughly chopped

  • 2 garlic cloves

  • 1/2 tsp fine salt like sea salt or kosher salt

  • 2 tablespoons fresh chives, roughly chopped

  • Juice and zest of 1 lemon

  • Freshly ground black pepper

Directions

In the bowl of a food processor, place the Greek yogurt, herbs, garlic cloves, salt, chives, lemon zest, lemon juice, and black pepper. Pulse on low until the ingredients have fully combined, creating a light green sauce that is thick enough to coat the back of a spoon.

Adjust the seasonings with more salt and pepper to taste.

TO STORE: Dressing can be kept in an airtight container in the refrigerator for up to 1 week.

SOURCE: Adapted from Love and Lemons


Review: Stasher Bag

Stasher Bags Review - Seasoned with Sydney

Plastic bags and I have a complicated relationship. Like many children who toted a mom-made lunch to elementary school and beyond, the disposable sandwich and snack bags were ubiquitous in my lunch pale, porting everything from the classic pb&j to later made-from-scratch treats like leftover chicken parm with the perfect amount of mozzarella cheese still stuck to the chicken’s exterior breading. Whatever could fit in those see-through bags made their way out the door everyday. And when the bell rang or I was finished eating, all I’d have to do was simply throw the bags away and they were gone forever. So easy, so convenient. But as I got older (and, let’s be honest, started buying the boxes of plastic baggies for myself), I started to realize that maybe these single-use plastic bags weren’t such a sweet deal after all. If you want the good sandwich bags (i.e. the ones that actually seal and don’t rip open, leaving last night’s pizza slice in your lap instead of your mouth), it’ll cost you. And if you’re packing a lunch five days a week, those boxes add up fast. Way too fast.

So, I started looking for alternatives. I took glass containers with airtight lids and special compartments, but they were just too heavy and clunky. I found cute, patterned sandwich and snack bags online with cloth outsides and water resistant lining on the insides, but a hook and loop closure, no matter how strong, just doesn’t seal in freshness for very long. No solution seemed to be checking all the boxes: reusable, sturdy, stylish, and with a strong seal. I’d given up all hope and had resigned myself to being a single-use plastic bag lady forever. That is, until I stumbled upon Stasher Bag.

Stasher Bags Review- Seasoned with Sydney

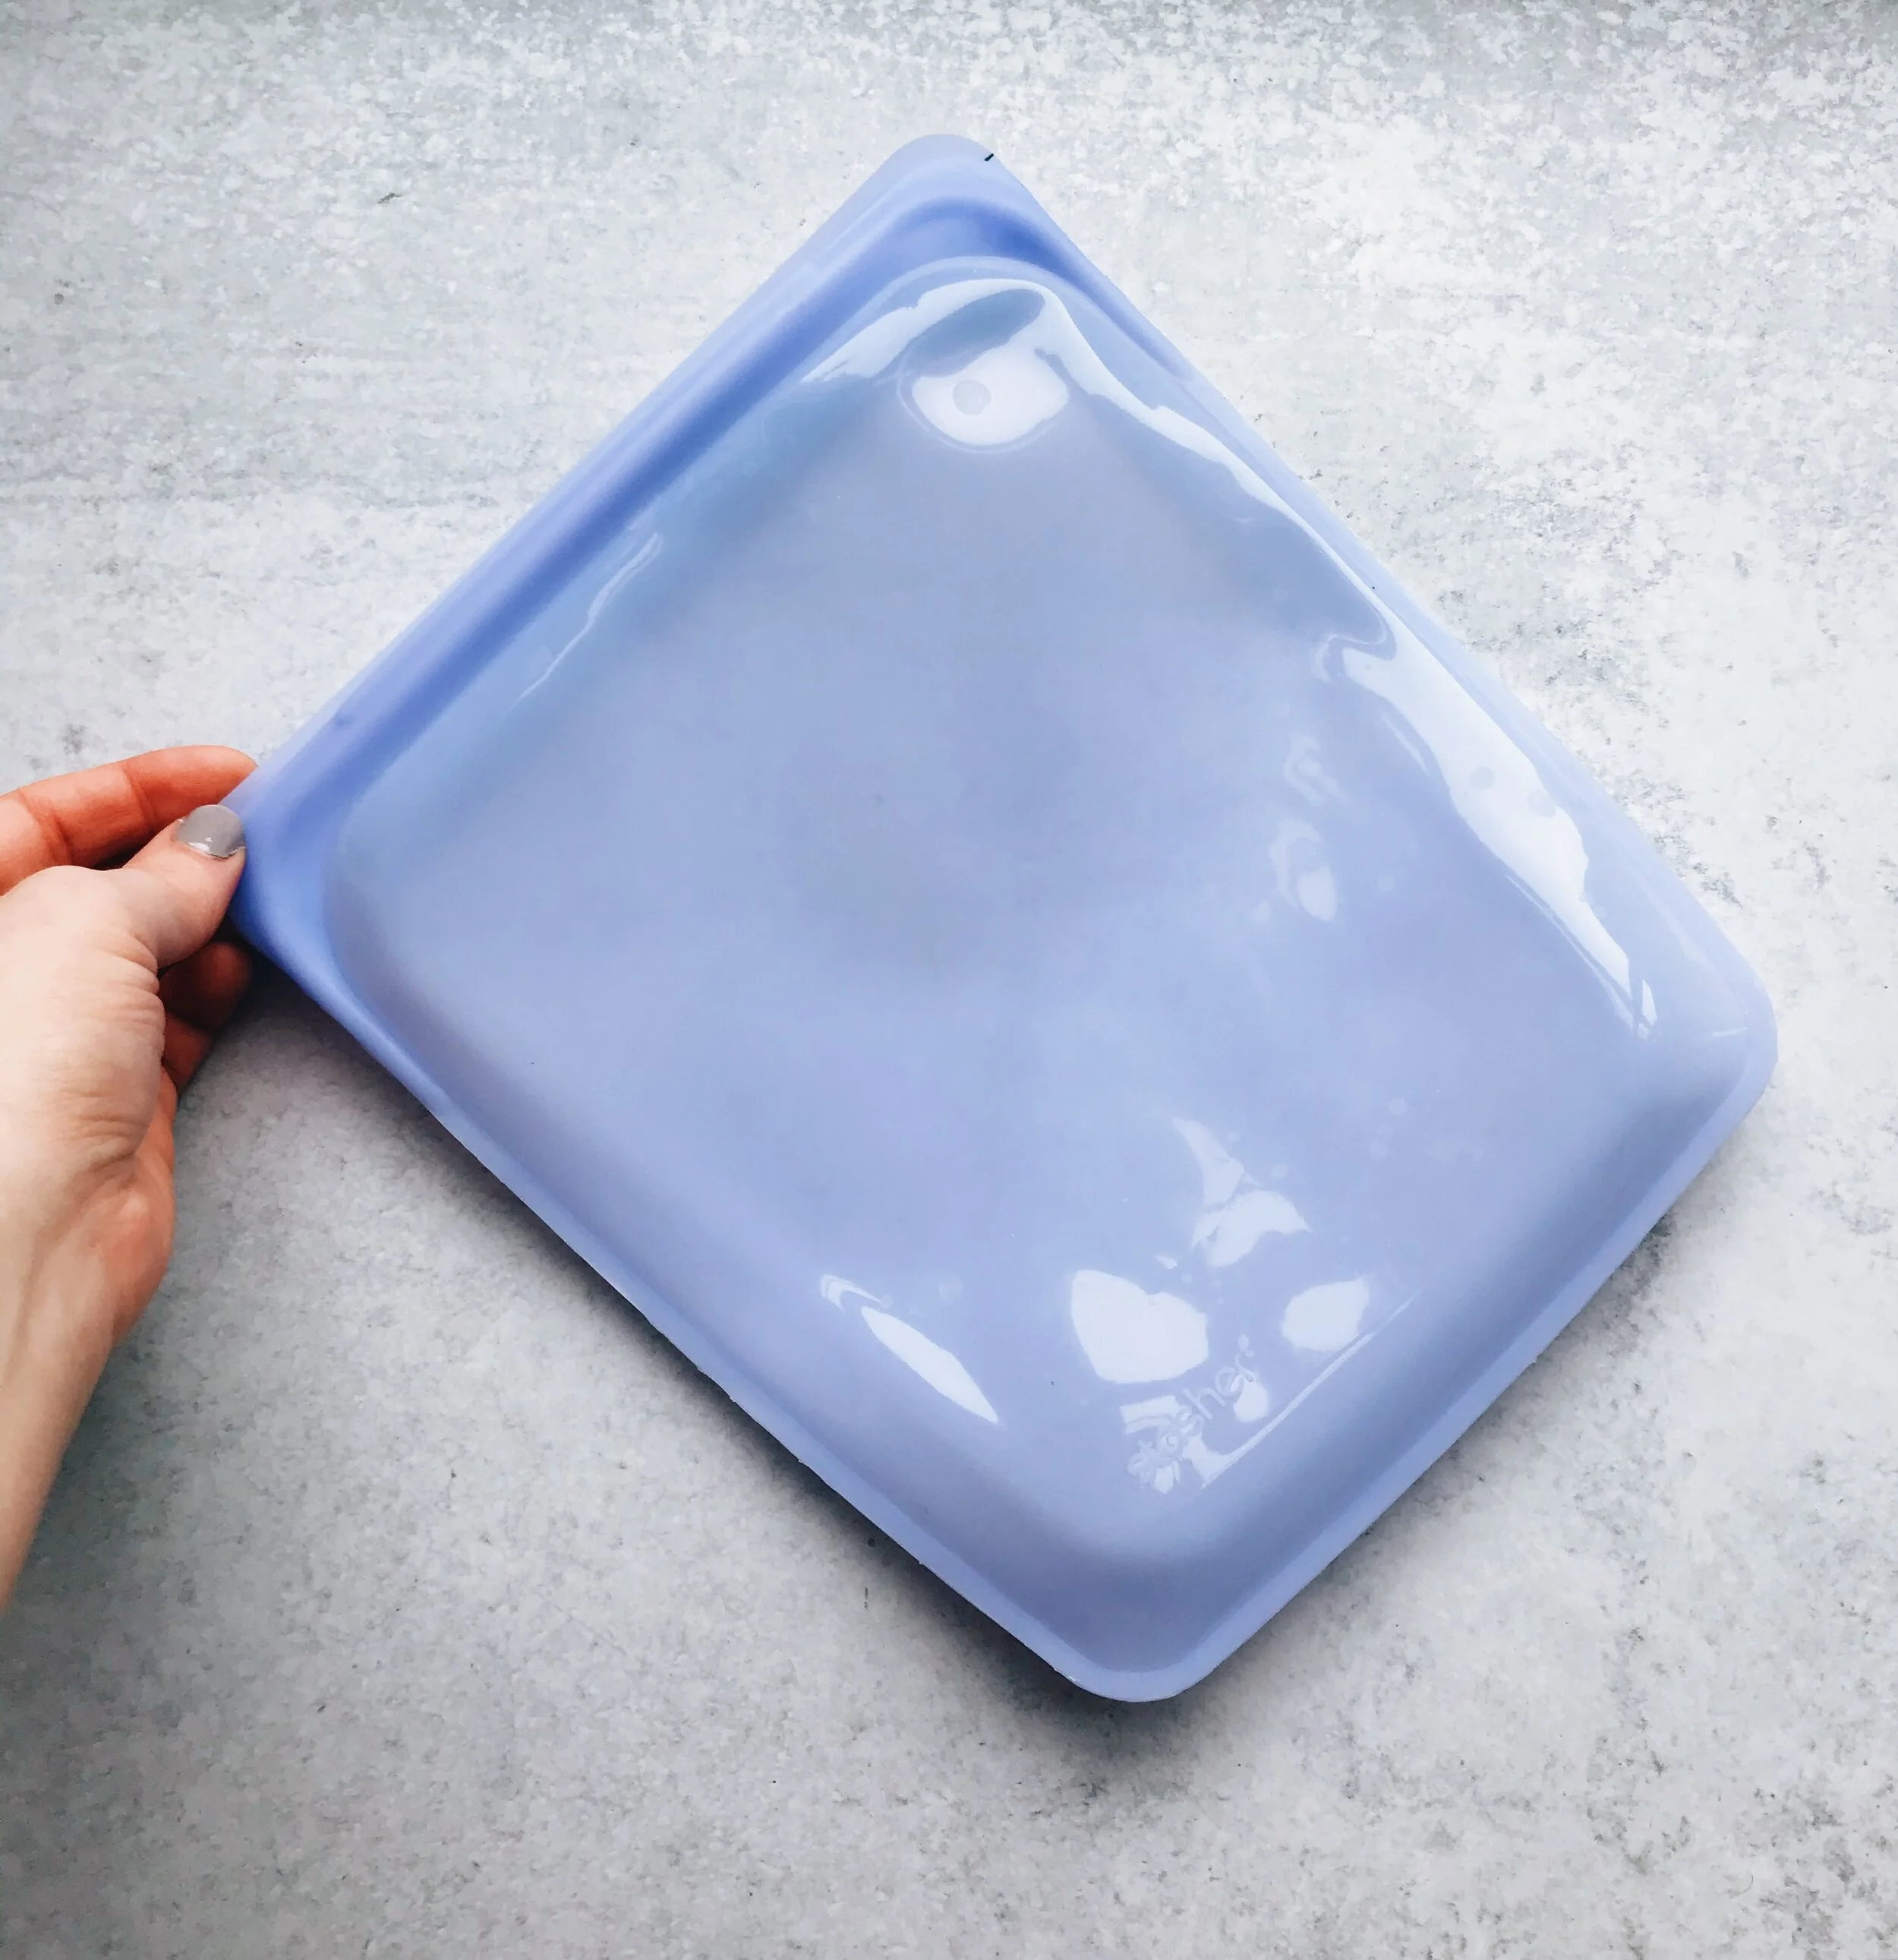
Stasher Bag, founded by Kat Nouri, is a company that makes reusable bags out of food-safe silicone. The bags come in a variety of different sizes from “pocket” to gallon, and have a strong resealable top that keeps whatever is inside the bag from escaping. The lock feature on the top is so strong in fact that I sometimes struggle to get my bags open on the first try. To me though, a little extra effort is worth it because I can trust that leaks will be kept to a minimum. I also love that these come in a TON of different colors. If you want to keep it classic, there’s a clear option in every size. But if you’re like me and want to take things up a notch, there are so many vibrant color options to choose from as well.

Here are a few other things I love:

  • You can cook with them: Stasher bags are microwave and oven safe up to 400 degrees F, and can even be used for sous vide cooking.

  • You can throw them in the dishwasher: I’m not typically one to put other things besides plates and cutlery in the dishwasher, but for those days when I could not possibly wash one more thing by hand, this is a fantastic feature.

  • You can write on them: A clever innovation when single-use plastic sandwich bags took off was to include a little window to write the bag’s contents, the date, or even a cute little message. The silicone material of Stasher bags is also a writable surface.

  • They’re freezer safe: Like many people, I panic-bought a bunch of fruits and vegetables at the start of the pandemic with no real plan for any of it. Luckily, I was able to store the majority of my haul in a few of my larger Stasher bags for future use. These bags are flat to begin with, so they don’t take up much extra room, and the contents have retained their wonderful freshness all these months later.

Stasher Bag Review - Seasoned with Sydney

While I’ll probably never break up with single-use plastic sandwich bags for good, I love that the sturdy and beautifully-colored Stasher bags are pushing me in the right direction towards more sustainable habits. And the fact that I can have style AND function all rolled into one? Well, that’s just the cherry on top.

Check out Stasher Bag HERE!


Sydney's Sunday Reads: #5

Happy Sunday, friends! Have you ever held on to something for way too long? A grudge, a bad experience, a terrible feeling? There’s one that I hadn’t been able to really shake until this week when a bit of news knocked me off my feet. At first, I felt validated because I was no longer alone in how I felt, but as the days passed I started to realize: I had actually moved on more than I thought and it was no longer healthy to put myself back in that headspace. They say that time heals all, and I agree, but there is no one-size-cures-all temporal salve is there? The best medicine I’ve found is just moving on with your life. Show them that you’re thriving by focusing on what makes you happy. You’ve got too much to offer not to share it with the masses.

Sydney's Sunday Reads is a weekly blog series that highlights some of my favorite stories, articles, think-pieces, and more from around the Internet.

Hold on tight because here…we…go!

  • Why the face? - In many countries, but America especially, the more “A-List” you are, the more your face is plastered on the cover of every single magazine known to man. So what happens when you decide to alter that face? Well, millions notice, and because expressing an opinion is free (and they figure they’ll never actually meet the celebrity they’re trashing in real life), they comment on it…a lot. It might seem like a celebrity going under the knife and later making multiple headlines for it is unique to the social media era, but the phenomenon of mega-star celebrities suddenly getting "a new face” and everyone making it their business to talk about it has been a thing for nearly a century. Admit it, you’ve stared way too hard at the pictures in those “Before and After” articles just like the rest of us. (Jezebel)

  • Myth busting a superfood. - Avocados have become my ultimate go-to snack during the pandemic. I put them in grain bowls, on toast, in eggs, and even, occasionally, I eat one half raw with a spoon. But if you’ve ever bought an avocado you know what an incredibly slim window of time you have between under-ripe and ripe: if you wait too long, you’ll open yourself up to more brown spots than green. But as popular as avocados have always been, I bet there are a few things you didn’t know about them. For example, did you know you could freeze them? Real Simple has compiled a list of busted myths we’ve all grown up hearing about our favorite oval-shaped eggs of green goodness. (Real Simple)

  • If I could turn back time… - Fans of time travel fiction should be excited about this one! University of Queensland student Germain Tobar has mathematically proven that time travel is actually possible. His peer-reviewed findings were recently published in Classical and Quantum Gravity. The math is understandably complex but here’s one super interesting takeaway: traveling to the past would more than likely not alter the present as long as at least two major aspects of a scenario remain the same. For instance, you could go back in time to the Titanic, interact with passengers, and even experience the ship hitting an iceberg, but you couldn’t warn the crew of the imminent threat or try to save someone who was meant to perish, as that would drastically change the present. Here’s another example outlined in a statement released by the university: you could go back in time to find Patient Zero before they spread the coronavirus, but by doing so, you would alter your entire motivation for traveling in time to stop Patient Zero at all. A fascinating paradox indeed! (Yahoo Finance)

  • Life’s a picnic! - To me there is nothing more soul uplifting or romantic than dining outdoors. There’s just something about packing a basket to the brim with goodies for yourself or to share and taking in the nature around you that totally puts me at ease. Ever wondered how our friends around the world celebrate dining al fresco? Wonder no more! (Smithsonian Magazine)

  • The New Spice Girls. - We all know how vital spices are for elevating literally any food, but how often do we take the time to learn exactly where the jarred spices on our rack come from or who’s growing them? In this article on MarthaStewart.com, you’ll meet a group of female entrepreneurs who are disrupting the spice trade by bringing small batch, high-quality spices directly to consumers, while also empowering growers and harvest teams around the world! (Martha Stewart)

  • I always cry at weddings. - Just when I thought I had gotten every Zoom-hosted television and movie reunion I could ever want or ask for this year, romantic comedy queen and superfan of the sun-soaked coastal kitchen aesthetic Nancy Meyers goes and makes Father of the Bride 3 (ish). Not only were we blessed with an update on the beloved Banks family during quarantine, we were also treated to a super sweet surprise event! Best of all? This was done to raise awareness for a nonprofit I love, World Central Kitchen, which provides meals to those in need in the wake of natural and man-made disasters. Get your tissues ready for all the happy-crying you’re about to do!

What are YOU reading and watching today? Let me know in the comments below!

P.S. Let’s connect! Follow me on Facebook, Twitter, and Instagram!

Power Bowl: Red Qunioa with Tahini Sauce, Avocado, and Fried Egg

Grain Bowl Recipe: Tahini Sauce, Avocado, and a Fried Egg - Seasoned with Sydney

Quinoa came into style right around the time I started taking cooking and food more seriously, around 2013 or so I’d say. It was the big super-food of the moment and much like kale a few years later, everyone on the television shows I watched and food blogs I followed were crazy about it. And even though it seemed like a pretty interesting ingredient to try, it wouldn’t be until MUCH later in my life that I would eat it, and later still, that I would finally understand what all the fuss was about. Quinoa, with its slightly earthy taste and chewiness, is one of the most versatile and relatively inexpensive grains you could possibly find. But if you ask me, nothing is more fun to make with quinoa than the infinitely-customizable grain power bowl. No matter how you build it, there’s just no wrong way to go!

Here are a couple notes about this particular grain bowl combination:

  1. While this recipe calls for red quinoa, any quinoa will work fine! I just happen to love the taupe color of the tahini sauce, bright yellow of the fried egg yolk, and luscious deep green of the avocado mixed together.

  2. The tahini sauce might seem a little intimidating to make at first, but the hardest part about it is honestly just cleaning the food processor afterwards. Trust me though, a little extra cleanup is TOTALLY worth it. (Tahini, a ground sesame paste, can be found at most grocery stores, usually in the international section, though I’ve found it at my local market with the nut butters!)

  3. Another thing about the sauce: my recipe calls for 1 teaspoon of za’atar, a Middle Eastern spice blend that contains sumac, salt, sesame, thyme, hyssop, and oregano, but if you don’t have it on hand and don’t plan on getting it, I’ve also used 1 teaspoon of cumin in the past with good results. Keep in mind, the flavor will differ ever so slightly. If you prefer a more nutty taste, go for the za’atar. For more bittersweet, go for the cumin.

  4. One more thing about the sauce: When assembling your bowl, you may feel tempted to take it easy with the sauce so as not to drown out the taste of everything else, but don’t do it! “Less is more” may be a good approach to some things, but without enough sauce, your quinoa might become too dry. No one wants dry quinoa. No one.

If you’re looking for a new way to jazz up your lunch or dinner hour, this red quinoa power bowl with tahini sauce, avocado, and fried egg is sure to fit the bill!

Power Bowl: Red Quinoa with Tahini Sauce, Avocado and Fried Egg

Recipe: Red Quinoa Grain Bowl with Tahini Sauce, Avocado, and Fried Egg - Seasoned with Sydney

What You’ll Need:

  • 1 cup dried red quinoa, cooked according to package instructions

  • 1 avocado half, cut into slices lengthwise

  • 1 egg

  • 1 cup tahini

  • 2 lemons, juiced, plus 1 more lemon juiced as needed for flavor adjustments

  • 4 cloves garlic

  • 1 teaspoon za’atar

  • 1/4 cup extra virgin olive oil, plus 1 tablespoon

  • 1/2 cup water, plus more as needed

  • Fine sea salt

Directions

Make the Tahini Sauce

Place the tahini, juice of 2 lemons, garlic, za’atar, and 1/4 cup olive oil in a food processor and pulse to fully combine.

With the motor running, add about 1/4 cup water to create a tahini mixture that’s just thick enough to spread and coat the back of a spoon. To adjust the thickness, slowly add more water in small increments with the motor running until it has reached your desired consistency. Be careful not to make it too thin or you’ll run the risk of a watery sauce that won’t hold up well when eaten with the rest of the bowl ingredients.

Adjust your sauce with more lemon juice, salt, or za’atar as needed.

Fry Your Egg

Preheat a small skillet on medium-low for two minutes, then add the remaining tablespoon of olive oil. When the olive oil has taken on a slight shimmer in the pan, it’s time to add your egg.

Carefully crack an egg into the skillet and immediately season well with salt and freshly cracked pepper. Some crackling noises from the egg as it cooks are normal but if the egg starts loudly popping and oil starts going everywhere, adjust your heat closer to low. Do not touch your egg while it’s frying.

You’ll know your egg is ready when the egg whites have fully cooked, the edges of the egg whites have crisped up and turned golden brown, and the egg yolk is still shiny and jiggles slightly when you shake the pan. The frying process should take about 5 minutes.

Assemble Your Bowl

While your egg is frying, place your preferred amounts of quinoa, tahini sauce, and avocado slices in a bowl. Once the egg is ready, carefully transfer it from the skillet to the top of your bowl. Season with a little more salt and serve.

TO STORE: Tahini sauce can be stored in an airtight container in the refrigerator for 4-7 days.

SOURCE: Adapted from The Haven’s Kitchen Cooking School


Book Review: The Vanishing Half

book review: the vanishing half by brit bennett - seasoned with sydney

Running away is easy, but staying gone? That takes work.

The Vignes twins have lived in Mallard, a Black town in the deep South so small that you can’t even find it on a map, all their lives. Everyone knows everyone, and no one has a complexion darker than a blonde latte. Like many sets of identical twins, Stella and Desiree are seldom seen as individuals - most commonly referred to instead as “the twins”. But the two girls couldn’t be any more different. Desiree is loud, reactive, and in a perpetual state of motion. Stella is quiet, contemplative, and deeply intelligent. Each has dreams of a bigger life outside of Mallard, a place that seemed to them to be stuck in a postbellum time warp.

As the twins get older and a sudden family tragedy forces them to mature overnight, a plan is hatched to leave Mallard and all that it represents behind. But there’s a catch: in order to go, they must completely vanish without a trace, a decision not taken lightly. So under the cover of darkness, the Vignes twins leave Mallard for New Orleans with lofty dreams and a resolve to start anew. And for a while, life is good, or at least, better than it was before. But as the girls mature, Stella realizes that the light complexion the two share could open up doors for them they had never dared try. On several occasions, white people had assumed Stella’s identity before she could correct them. She had been able to enter establishments in the “main” entrance, had been treated with respect. What if she could live that life forever? What if she could “cross over”? What if one day she could just…turn white? And when an opportunity arises, Stella does just that, vanishing again, but this time, she leaves her sister Desiree behind.

Years pass and the Vignes twins are living separate lives as wives and mothers - Desiree as a Black woman in Mallard, and Stella as a white woman thousands of miles away. Neither sister fully grieves the loss of the other, but life moves on. It isn’t until decades later, after a chance encounter between the daughters of Stella and Desiree, that the twins are finally confronted by the decisions of their past. Little by little, the pieces to a puzzle long since abandoned start coming together…for better or for worse.

The Vanishing Half by Britt Bennett is a powerful story of the detrimental effects of colorism on the Black self-esteem, the importance of acceptance, and the power of love in all of its forms.

The Good: From the very first chapter Bennett was able to pull me into a multi-decade story without missing a beat. I loved how she was able to develop the characters in a way that didn’t seem rushed, but also didn’t seem super drawn out. The dialogue was strong, and I felt that every character introduced not only had a strong, distinctive voice, but a well thought out backstory. Bennett’s superpower is her ability to create rich details.

The Bad: There’s not much about this book that I would change. If anything, it would have been nice to see some relationships in the book developed as well as others, but overall, I was really happy with what was presented.

Bottom Line: The Vanishing Half raises some uncomfortable questions for all readers, but especially readers of color. In times of desperation, what would you do to survive? Bennett’s well-written story is not just about a broken family, it is also the perfect example of how a snap decision made by one can have lasting effects on generations to come. A definite must-read.

Read it for yourself HERE.

Sydney's Sunday Reads: #4

Happy Sunday, friends! What’s new? This morning I woke up with a pep in my step because the sun was shining brightly through the windows and I could feel a little nip in the air. Autumn in New England is my absolute favorite season of them all, and I plan to do as much as I can to celebrate it. If you’re looking for some fun things to do you could: find an orchard open to pick apples for ciders, caramels, and pies, go for a hike in a forest full of brilliantly-hued leaves, make the best, most spectacular-looking fall porch display, or even fix yourself a cuppa, open the windows, and let the smells of nature carry you away for a moment. Life might seem a little dreary right now, so find what makes you happy. There will always be beauty around you, even if you have to make it yourself.

Sydney's Sunday Reads is a weekly blog series that highlights some of my favorite stories, articles, think-pieces, and more from around the Internet.

Here we go!

  • What the Peep? - Say what you will about our little marshmallow friends who taste like raw sugar, chemicals, and all the dyes your mother ever worried about: Peeps are a holiday staple every year. And as if 2020 couldn’t get any worse (who are we kidding, it seems like it tops itself every week), Just Born Quality Confections, the company that owns and makes Peeps, recently announced that their Halloween, Christmas, and even Valentine’s Day ‘21 collections won’t be released! They have a good reason though: production was halted n in March at the start of the pandemic shutdown to put safety first for their staff. While I’ll miss seeing miniature fluorescent fowl on my local supermarket shelves this year, you just can’t argue with the reason why. Still, I know there’s an old graduate professor of mine, a true fan of Peeps despite all the gourmet food he’s exposed to, who is somewhere deeply lamenting this loss. (Real Simple)

  • Cuisines that connect us. - When Durkhanai Ayubi and her sisters traveled back to their native Afghanistan in 2012 after being away for 27 years, the first thing they noticed was its beauty - the beauty of nature, and the beauty of its people. The second thing they noticed was the cuisine, richly-steeped in history, and a true celebration of foodstuffs both native and imported. The sisters were touched by the enthusiastic and generous hospitality of relatives they had not seen in decades, and in those decades, their relatives had seen more than their fair share of hardships. Yet the need to give their guests the best that they could offer signified a lasting sense of pride. Inspired both by the magnitude of generosity bestowed upon them, and the food that had instantly resonated with them, the Ayubi sisters returned to their home in Australia ready to share their culture with the world by opening a restaurant, then opening another. In doing this, they found a way to stay deeply connected to two homes at once. (Travel + Leisure)

  • Don’t rain on my (virtual) parade! - In 2020 it seems that almost every fun in-person event has gone virtual and the Macy’s Thanksgiving Day Parade will be no exception. According to a rep from Macy’s, this television-only special event will not feature the traditional 2.5-mile parade route, but will feature many of the parade’s signature character balloons, as well as street performers and other attractions. While we might miss seeing the crowds cheering with joy (and also looking like they’re about to freeze their fingers off. Seriously, doesn’t it always look SUPER COLD there?), Mayor Bill de Blasio promises that this reinvented take on a holiday tradition will still “really give us that warmth and that great feeling we have on Thanksgiving day”. (Rolling Stone)

  • How COVID-19 has made us better cooks. - All this extra time at home has given seasoned and novice home chefs alike the opportunity to get creative in the kitchen, whether we wanted to or not! In this fun article, Dakota Kim talks about her quarantine cooking journey to discover new ingredients and strengthen her connection with other food lovers! (Food and Wine)

  • Dear Diary… - Dwell magazine wants to know: is it time to start journaling again? Like many writers and stationery lovers, I am guilty of buying many, MANY pretty journals in which I planned to pen all of my deepest thoughts. What ends up happening instead is my chicken scratch gets scribbled into the same tattered notebook on my desk again and again and my pile of beautifully-bound journals grows, but the pages remain untouched. Perhaps if I had one of these beautiful babies I’d be inspired to switch over! (Dwell)

P.S. Let’s connect! Follow me on Facebook, Twitter, and Instagram!

Pasta al limone e prosciutto

pasta al limone e proscuitto recipe - seasoned with sydney

Weeknight dinners are always the most challenging, between work and school and everything else you’ve got going on in your life, there’s very little time to lay out a meal everyone will love. But just because you’re limited on time (has anyone noticed the days are just getting shorter and shorter!?), doesn’t mean that what you put together in the kitchen has to be dull. What if I told you that you could get a sophisticated pasta dish on the dinner table in less than an hour without sacrificing flavor OR flair?

Are you as excited as I am? Cool, keep reading!

pasta al limone e proscuitto recipe - seasoned with sydney

Pasta al limone is an absolute classic, known for the zippiness of the citrus mixed with the slight saltiness of the parmesan cream sauce. But what if we could elevate that flavor even more?

A couple weeks ago, while conducting a routine raid of the refrigerator to make room for the upcoming bi-weekly grocery trip, I thought about what I could add to the near-perfect pasta dish I was about to make that wouldn’t take away from any of its unique flavor. There in front of me, a package of prosciutto presented itself, leftover from making a big batch of collard greens (more on those at Thanksgiving!) earlier in the week. About 1.5 ounces remained of the 3 oz package, so I cut it up into 1-inch pieces, and tossed them in at the end. I wanted an element of smokiness to round out the other flavors, but didn’t want to overwhelm the dish with too much saltiness (parmesan cheese is naturally salty, plus coarse kosher salt is added in for additional seasoning). What I ended up with in each bite was salty-meaty bits of prosciutto, savoriness from the creamy cheese sauce, and a big hit of brightness coming not only from the lemon zest and juice in the sauce, but the long strips of lemon zest added on top. It was, in a word, perfetto!

This recipe is quick, easy, and can feed a family of four with the possibility of leftovers for lunch the next day. A delicious win-win if you ask me!

Pasta al Limone e Prosciutto

pasta al limone e prosciutto recipe - seasoned with sydney

What You’ll Need:

  • 1 lemon

  • 16 oz spaghetti

  • Coarse kosher salt

  • 3/4 cup heavy whipping cream

  • 6 tablespoons unsalted butter

  • 1 cup finely grated parmesan cheese

  • 1.5 oz prosciutto, cut into 1-inch pieces

  • Freshly ground black pepper

Directions

Using a vegetable peeler or very sharp knife, cut 4 2-inch long strips of lemon zest. Slice each strip lengthwise into thin strands, then set aside for later. Using a microplane, finely zest the rest of the lemon into a large pot that can withstand high temperatures (like a dutch oven). Into a small bowl, juice the lemon until you’ve got about 2 tablespoons. Set aside for later.

In a large pot of boiling, liberally-salted water (the pasta water should taste like the ocean) cook the pasta following the package directions for al dente.

While the pasta is cooking, add the heavy whipping cream to the pot with the grated lemon zest and cook over medium heat, whisking often. Do this until the cream has come to a simmer (this should take about 2-4 minutes). Reduce the heat to medium-low, then whisk in the butter 1 tablespoon at a time, making sure each addition of butter has completely melted before adding another. Once all the butter has been added and the sauce looks thicker and creamier, remove the pot from the heat.

Just before removing the pasta from the pot of boiling water, carefully ladle about 1 cup of pasta water into a clean measuring cup. Add about 3/4 of the pasta water to the cream sauce and return the cream sauce to medium heat. Use tongs to transfer the pasta from the pot with boiling water to the pot of the cream sauce. Cook the pasta in the cream sauce, making sure to toss often. At this point, begin adding the grated parmesan in small increments until the cheese is fully melted and the sauce is creamy. Next, add the prosciutto and continue to cook, tossing the pasta often, until the prosciutto has had a chance to warm up, about 2 minutes. Stir in the lemon juice and season with kosher salt to taste.

Transfer the pasta to bowls and season with freshly ground black pepper. Top with the lemon zest strips and sprinkle on a little more parmesan cheese if preferred.

Source: Adapted from Bon Appetit

P.S. Let’s connect! Follow me on Facebook, Twitter, and Instagram!

Why I Love Cross-Back Aprons

picture of.a sydney in a crossback apron - seasoned with sydney

To know me is to know that I am crazy about aprons. From the moment I started really cooking for myself (and let’s be honest, way before that), I’ve been collecting them. Once in college, on a routine visit to my local Marshall’s to see what was new in the home goods section, I looked down to find three (3) aprons in my basket at checkout and purchased them without even batting an eye. Some aprons I own still have the tags intact because they’re just too pretty to put on. But as I find myself in the kitchen more and more these days, concocting recipes and making a general mess of my surroundings, I’ve grown rather attached to a specific type of apron: the cross-back. It’s a smock of sorts that lets me unleash my messiness without fear of ruined clothes underneath. Life is beautiful when I can save money on stain removers.

sydney in a crossback apron - seasoned with sydney

Sometimes referred to as “Japanese-style” aprons, cross-back aprons are soft, comfortable, flexible, and the type of outfit-saver perfect for practically any creative task you could get into. As I was shopping for my small but mighty collection of stylish smocks, I found many made out of linen. Linen’s a great breathable fabric, but if you ask me, cotton (or, at least a good cotton-linen mix) is your best bet. It’s just as breathable, but also incredibly sturdy, and less-prone to wrinkles. I’m not fussy when it comes to wrinkles - most aspects of life require movement - but even I have my limits!

why i love crossback aprons - seasoned with sydney
sydney in an apron, why i love crossback aprons- seasoned with sydney

After years of buying based on style alone (the prettier the pattern, the more likely it would find itself in my shopping cart), I’ve come to realize there are specific things I need out of my aprons from now on:

  1. Coverage: Can we be real for a second, ladies? How confident are you that your apron’s actually covering your top half? For those of us with more ample bosoms, those cutesy pieces of fabric designed to create a more feminine shape with a narrow top and a full skirt just don’t cut it! On many, MANY occasions, I’ve found myself smack-dab in a sauce splash zone with one or both of the gals completely unprotected. Have you ever tried getting tiny, red dots (which seem to dry as fast as lightning!) off of a button-down in a hurry? Not fun, and next to impossible.

  2. Comfort: When you think of an apron, what comes to mind? A long swatch of fabric with one neck strap and ties at the waist? It’s classic, and a style you see in kitchens, bakeries, and workshops worldwide. But have you ever noticed much strain that type of apron can put on your neck? And how tightly sometimes you have to secure the apron ties at your waist to make sure it fits properly? I’m over it all! On big cooking days I practically live in my apron, so I’m calling for comfyness over everything. The very essence of cross-back aprons is the crisscross style in the back, ensuring an even distribution of weight on your shoulders and alleviating any pressure on your neck and waist.

  3. Pockets: Just like my dresses, my favorite aprons have pockets galore! One for my cellphone (for snapping quick Instagram pictures), one for my pencil to jot down notes in the margins of my books and recipe sheets, one for my spoon or other quick-grab kitchen items, and one for snacks. An apron can offer full coverage, comfort, and style, but without pockets, it just won’t make it in my kitchen…or life!

why i love crossback aprons - seasoned with sydney
sydney wearing an apron - why i love crossback aprons - seasoned with sydney

In the end, it’s about finding an apron style that works for you. Much like your trusty chef’s knife, your kitchen shoes (PLEASE! Heed my advice: invest in comfy shoes for your cooking adventures!), and your favorite pots and pans, your apron is a constant cookery companion. Donning one signifies there’s work to be done, something new to create. Make sure that whatever style you choose, it feels like you. After all, a confident cook (or artist, or woodworker, or any other apron-wearing creative type) is totally unstoppable!

(Aprons featured: 1. Claire Saffitz for Alex Mill Herringbone Apron, 2. Pink Linen Apron, Stacy’s Kitchen Decor, 3. Corduroy Smock, Hedley & Bennett (Currently sold out. Similar)

Sydney's Sunday Reads: #3

Happy Sunday, friends! What’s been on your mind lately? For me, it’s been the power of friendship. Dating can be a bit of a mixed bag, made even worse by a global pandemic and a total dependency on technology to build connections you hope will last. But when times are tough, and you think it’s next to impossible to meet someone you truly vibe with, turn to your friends, the ride or die companions who have been with you since Day One. They’ll laugh with you, listen to you, and make you remember that there are people in the world who get you. Sometimes the most meaningful relationships (romantic and platonic) are just under our noses, whether we realize it or not.

Sydney's Sunday Reads is a weekly blog series that highlights some of my favorite stories, articles, think-pieces, and more from around the Internet.

Ready? Let’s get into it!

  • What a thrill! - If you’re a 90s kid like I am, then you might remember the magical fierce fabulousness of Shelley Long in Troop Beverly Hills. The fashion, the lingo, the female empowerment; it’s one of my favorite movies of ALL TIME. So imagine my shock and glee this week when I found out that there’s a sequel in the works! Dust off that DVD and your best 90s-era khaki fashion throwbacks - 2021 is about to be (campfire) lit! (Elle)

  • A family that cooks together… - What are some traditional recipes in your family? The recipes passed down to you from your elders, or the ones you and your siblings clipped out of magazines years ago and are now so crinkled and tattered you can barely make out the instructions? In this sweet piece by Abigail Raminsky, the power of a handmade cookbook filled with memories in the form of recipes has helped her stay close to family throughout the years, even when she was thousands of miles away, or now, as she shelters in place with the new family she made with her husband. (The Week via Food52)

  • Food for friends. - When writer Lisa Donovan learns the news that her two best friends are divorcing each other in the height of the pandemic, she’s devastated. Her first instinct is to invite her closest friend over for a socially-distant meal on the porch. But three hours before their visit, Lisa cancels. She wants to lend a healing hand, but she’s still healing herself - quarantining alone in her home for two months had led her to a resolve: she had to quit drinking, and she had to confront her depression. But that proves to be no easy feat. Finally, she turns to cooking, a practice meant at first to produce a soul-nourishing ginger-based soup for her friend, but ends up becoming her saving grace as well. A really powerful essay. (Lithub)

  • Seeing blue. - When it comes to selling a product, or encouraging engagement, color - specifically the color blue - matters. The folks over at Travel + Leisure took a deep dive into how their readership ticks based on the way they click, and their findings went well beyond what was expected. According to the Insititute for Color Research, which is cited in the article, we all make initial snap judgments about people, places, and products within 90 seconds, and 60-90% of that is based on color alone. And since the color blue promotes productivity, a sense of calmness, and inner peace, it’s no wonder that readers, social media users, and even in-person impulse shoppers respond exceptionally well to it. But it doesn’t end there: research has also shown that adding ANY bit of color to an image will increase the amount of time a viewer will pay attention to it. Color science is fascinating! (Travel + Leisure)

  • 🎶 My girlfrieeeends. 🎶- - In more 90s/00s entertainment news, did you know that Girlfriends, the hit Tracee Ellis Ross-led sitcom about four twentysomething Black women navigating life, love, and friendship in Los Angeles is now on Netflix, 20 years to the day it originally aired? You know what I’ve been doing since Friday. But if you’re looking for even more content, check out this cast reunion interview with Elle! (Elle)

  • Literacy Matters. -In honor of International Literacy Day (September 8th), here’s a handy way to locate independent bookstores in your area. And if you’re specifically looking for Black-owned booksellers to support, here’s a list for that, too!

P.S. Let’s connect! Follow me on Facebook, Twitter, and Instagram!

Quick(er) + Easy Skillet Pizza

skillet pizza recipe - seasoned with sydney

I’ve reached the pizza-making part of quarantine.

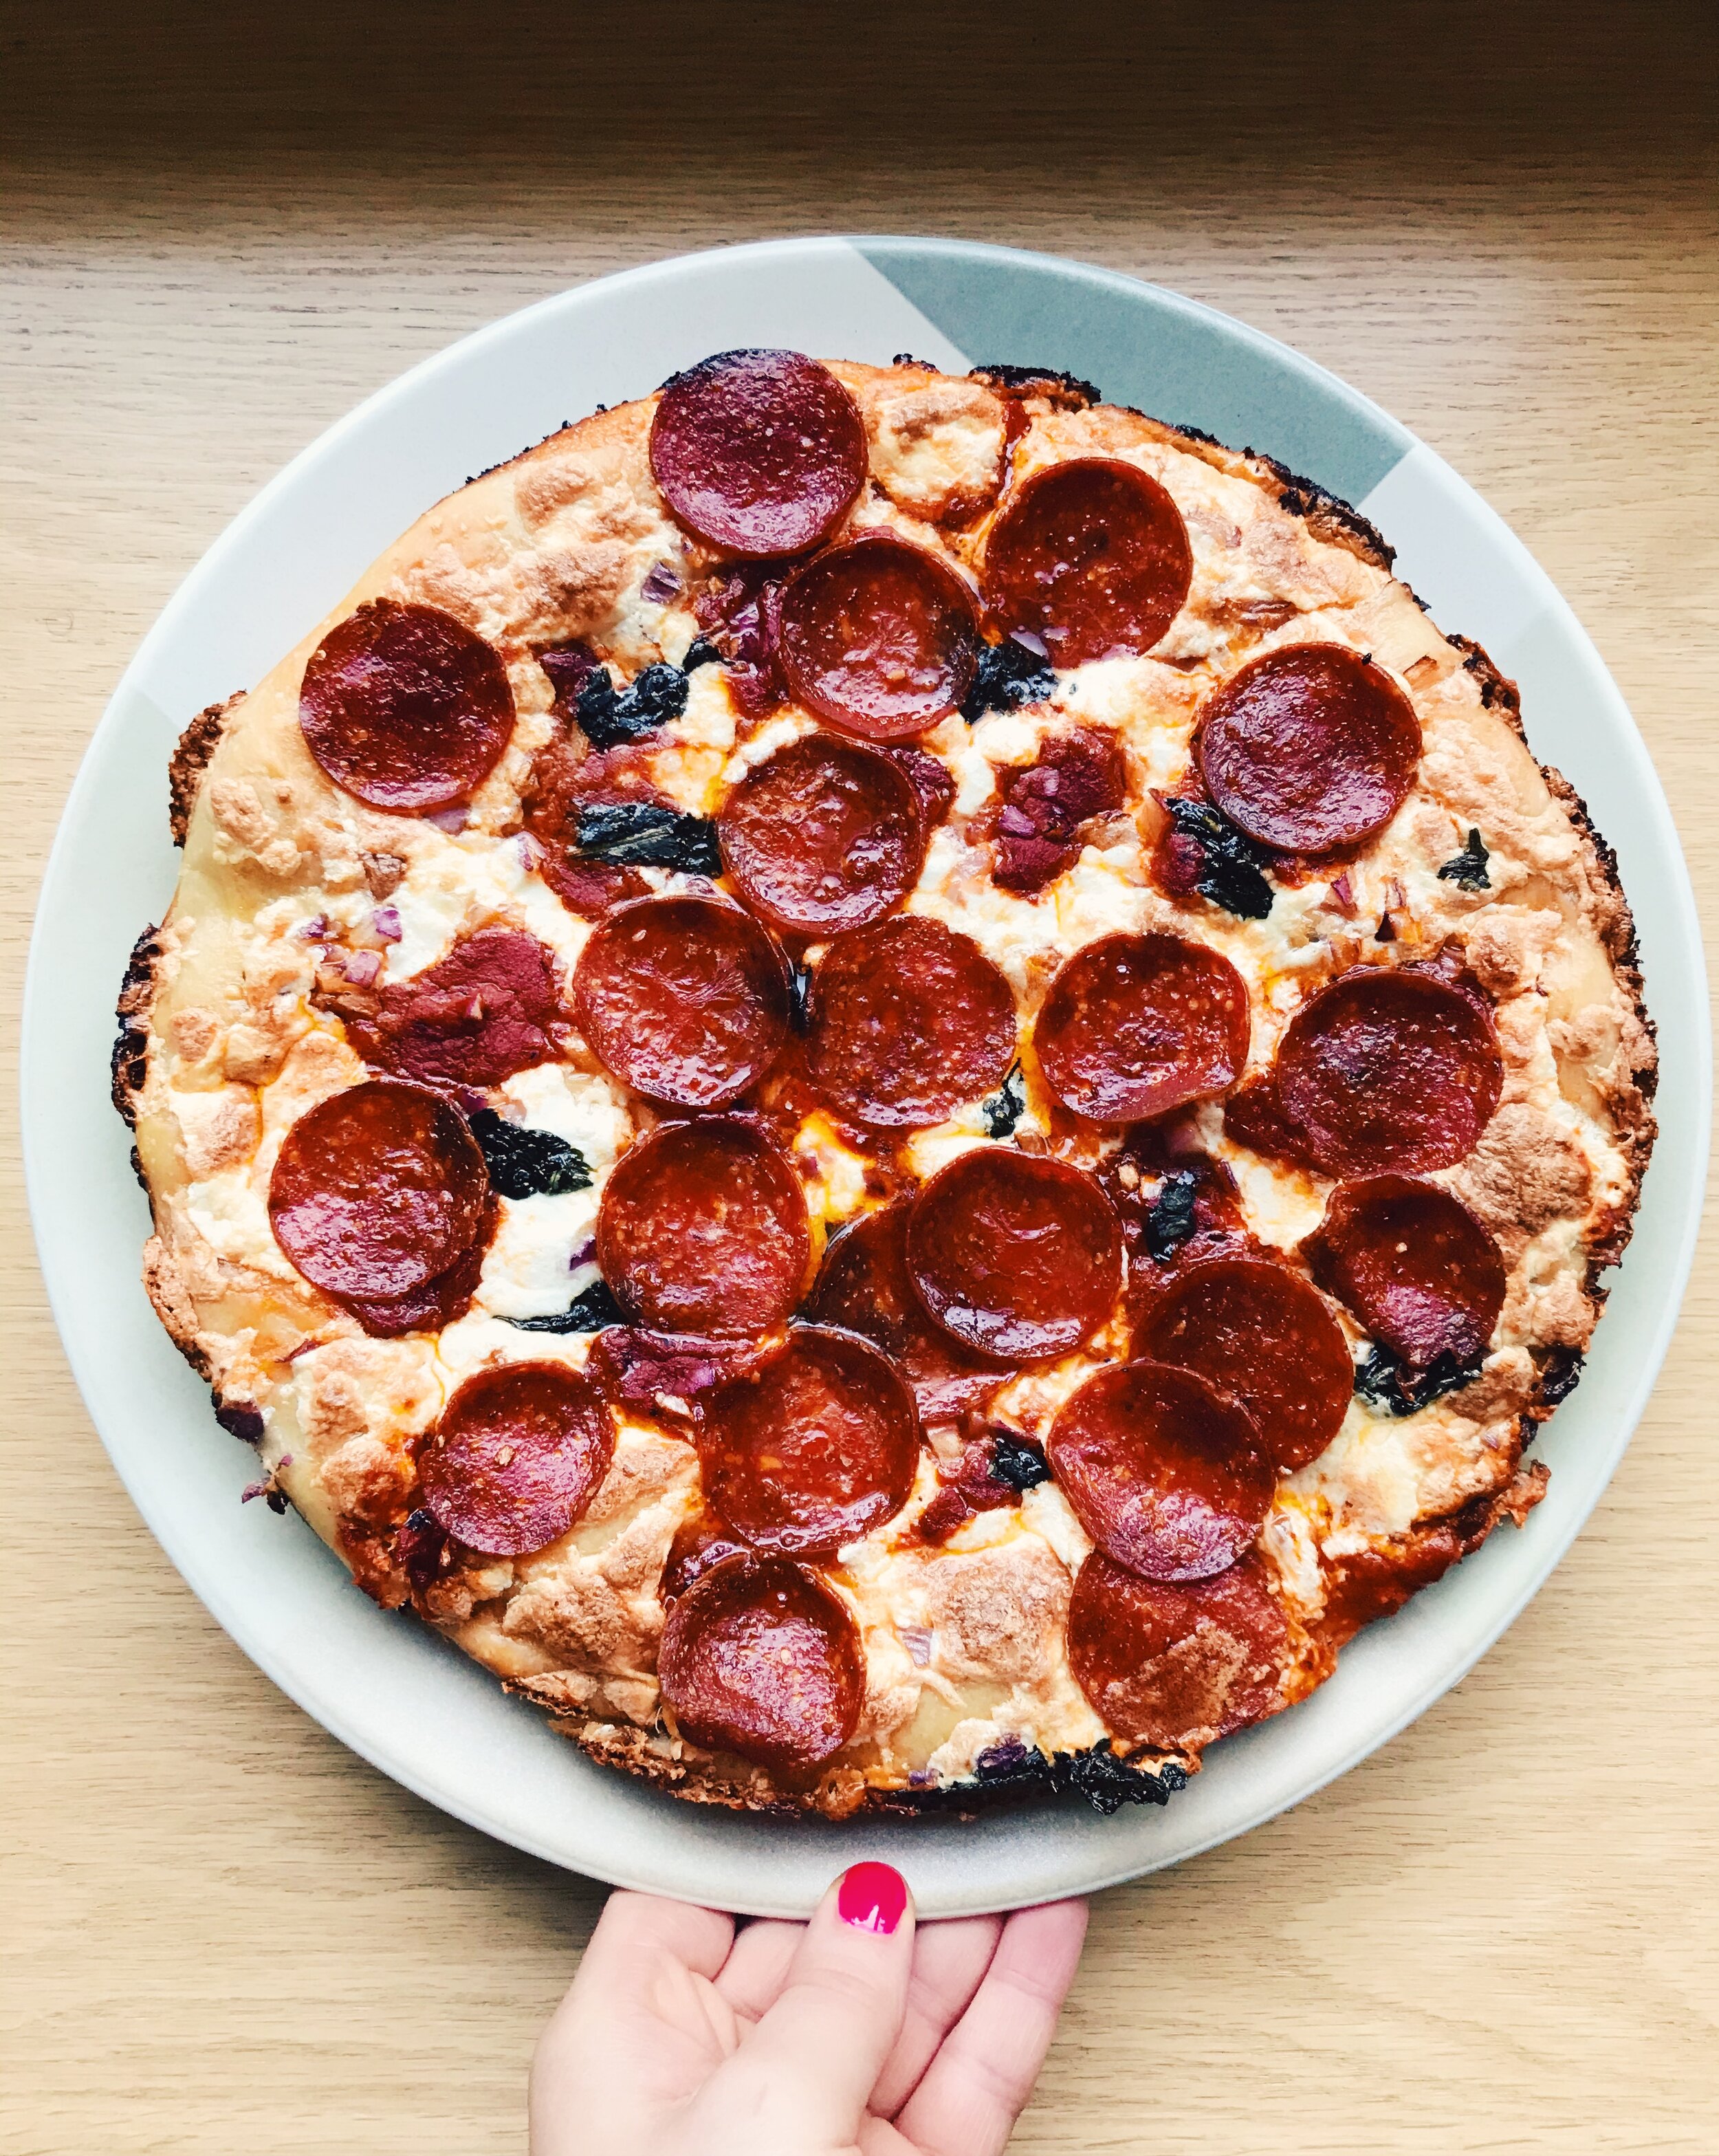
It all started a few months ago when I came across this article from Food52 touting a quick and cost-effective way to make a pizza at home using a regular cast-iron skillet instead of a fancy pizza stone. I gave it a try and was absolutely amazed by the results: a crispy crust with delightfully-cheesy edges (with supreme caramelization), a pillowy soft center, and a (relatively) quick and uncomplicated preparation process.

skillet pizza recipe - seasoned with sydney

I have been known in the past to try my hand at making pizza at home, but the process always seems so long - one of the biggest parts of making your own pizza is the waiting. Some recipes I’ve tried have called for two hours of active dough-making, and 24 hours of refrigeration for the dough to fully develop. Who has that kind of time? This recipe calls for an hour of dough-making, a less-strenuous kneading process, and only a 12-hour waiting period. Any homemade pizza worth eating will require some planning (a small inconvenience for a custom pie you’ve made yourself), but I love that the wait time is instantly cut in half! And because we’re using a skillet instead of a sheet pan (my old go-to), heat distribution is even, leading to a crispy, pan-style pizza crust.

skillet pizza recipe - seasoned with sydney

My favorite part about this pizza dough is that once you’ve got the basics down (cheese first, then the tomato sauce to prevent a soggy crust), the pizza toppings are SUPER customizable! I even suspect that with the right cheese blend, you can even convert this pizza dough into the perfect vehicle for white pizza as well! (I smell a future recipe on the way…)

skillet pizza recipe - seasoned with sydney

Sick of the soggy and disappointing store-bought pizzas stacked up in your freezer? I think it’s time you took pizza night into your own hands with this versatile, non-fussy skillet pizza recipe!

Quick(er) + Easy Skillet Pizza

Skillet Pizza recipe - Pinterest.png - seasoned with sydney

What You’ll Need:

  • 2 cups all-purpose unbleached flour

  • 3/4 teaspoon fine sea salt

  • 1/4 teaspoon sugar

  • 1/2 teaspoon active dry yeast

  • 3/4 cup lukewarm or room temperature water

  • 1 tablespoon olive oil, plus 2 tablespoons olive oil for the pan

  • 2 cups low-moisture mozzarella, grated

  • 1/2 cup marinara sauce

Optional (My personal favorite toppings!):

  • 1 cup thin pepperoni slices (or more, depending on your preference)

  • 2 tablespoons red onion, finely diced

  • Fresh basil, lightly chopped

Directions

In a large mixing bowl, place flour, salt, sugar, yeast, water, and 1 tablespoon of the olive oil. Mix together well to form a shaggy, slightly sticky mass of dough with no dry spots.

Scrape down the sides of the bowl to create a rough ball of dough, then cover the bowl for five minutes.

After five minutes, uncover the bowl and, with a slightly wet hand, reach between the side of the bowl and the dough and lift, stretching the bottom of the dough up and over itself in one motion. Repeat this process three more times, rotating the bowl 90 degrees each time.

Re-cover the bowl and let the dough rest for five minutes. After five minutes, wet your hand again and repeat the stretching and folding process, then re-cover the dough and let it rest again for five minutes. Repeat the folding and resting two more times. After the final fold, cover the bowl and let the dough rest for 45 minutes. (I have found the best results by placing the dough in a proofing bucket with an airtight lid, but covering with a kitchen towel or cling wrap works too.)

After 45 minutes, transfer the dough to a gallon-sized resealable storage bag lightly coated with olive oil. Once the dough is in the bag, be sure to drizzle a little more olive oil over the top to prevent the dough from drying out. Refrigerate the dough for as little as 12 hours, or as long as 72 hours. At this stage, the dough will slowly rise and begin to develop its flavor.

About 2.5 hours before you’re ready to make your pizza, place two tablespoons of olive oil in a large (preferably 10-inch) cast-iron skillet, making sure the bottom is fully coated. Using a pastry brush, a paper towel, or even your fingers, apply additional olive oil up the sides of the pan to prevent the pizza from sticking later.

Transfer the dough from the fridge to the pan, flipping in once on each side to make sure it’s evenly coated in olive oil. Slowly, using the tips of your fingers, begin spreading the dough to the edges of your pan. As you do it, you should see yourself lightly creating dimples in the dough. If you experience any resistance from the dough, such as shrinking back, wait a few minutes and try again.

Cover the dough with plastic wrap and let it rise for 2 hours at room temperature. The final result should be a pillowy-soft dough full of tiny air bubbles.

30 minutes before you’re going to start making the pizza, place oven racks in the bottom and upper third of the oven, then pre-heat to 450 degrees Fahrenheit.

Once you’re ready to bake your pizza, sprinkle the mozzarella evenly over the dough, making sure that the dough is entirely covered from edge to center, meaning no bare spots.

Next, dollop small spoonfuls of the marinara sauce all over the top, but do not spread. The sauce will spread as the dough bakes. At this point, add all other pizza toppings evenly (see my personal favorites above!).

Bake the pizza on the bottom rack for about 20 minutes, until the cheese is bubbling and the crust has taken on a golden brown hue. Quickly remove from the oven. Using a small spatula, check the bottom. If the bottom is golden brown, but the top is still pale, place the pizza back in the oven for another 2-4 minutes (i usually have to leave mine in for the full 4 minutes. This will depend on your oven). Use your own intuition to discern when the pizza has reached your definition of doneness.

Remove the pizza from the oven and carefully and quickly run a table knife or small spatula along the edge between the pizza and the pan to ensure that the pizza doesn’t stick to the pan via the cheese hardening as it cools. Wait for about 2 minutes, then carefully lift and transfer the pizza from the skillet to a cooling rack (I like to place something under the cooling rack to catch any runaway toppings or leaks) to finish cooling (this will prevent a soggy bottom).

Serve the pizza while it’s still warm, but not screaming hot. Enjoy!

TO STORE: Any leftovers can be stored in an airtight container for up to one week. To return it to its crispy glory, heat it in a 350 degree Fahrenheit oven for about 10 minutes.

SOURCE: Adapted from Food52 via King Arthur Baking Co.