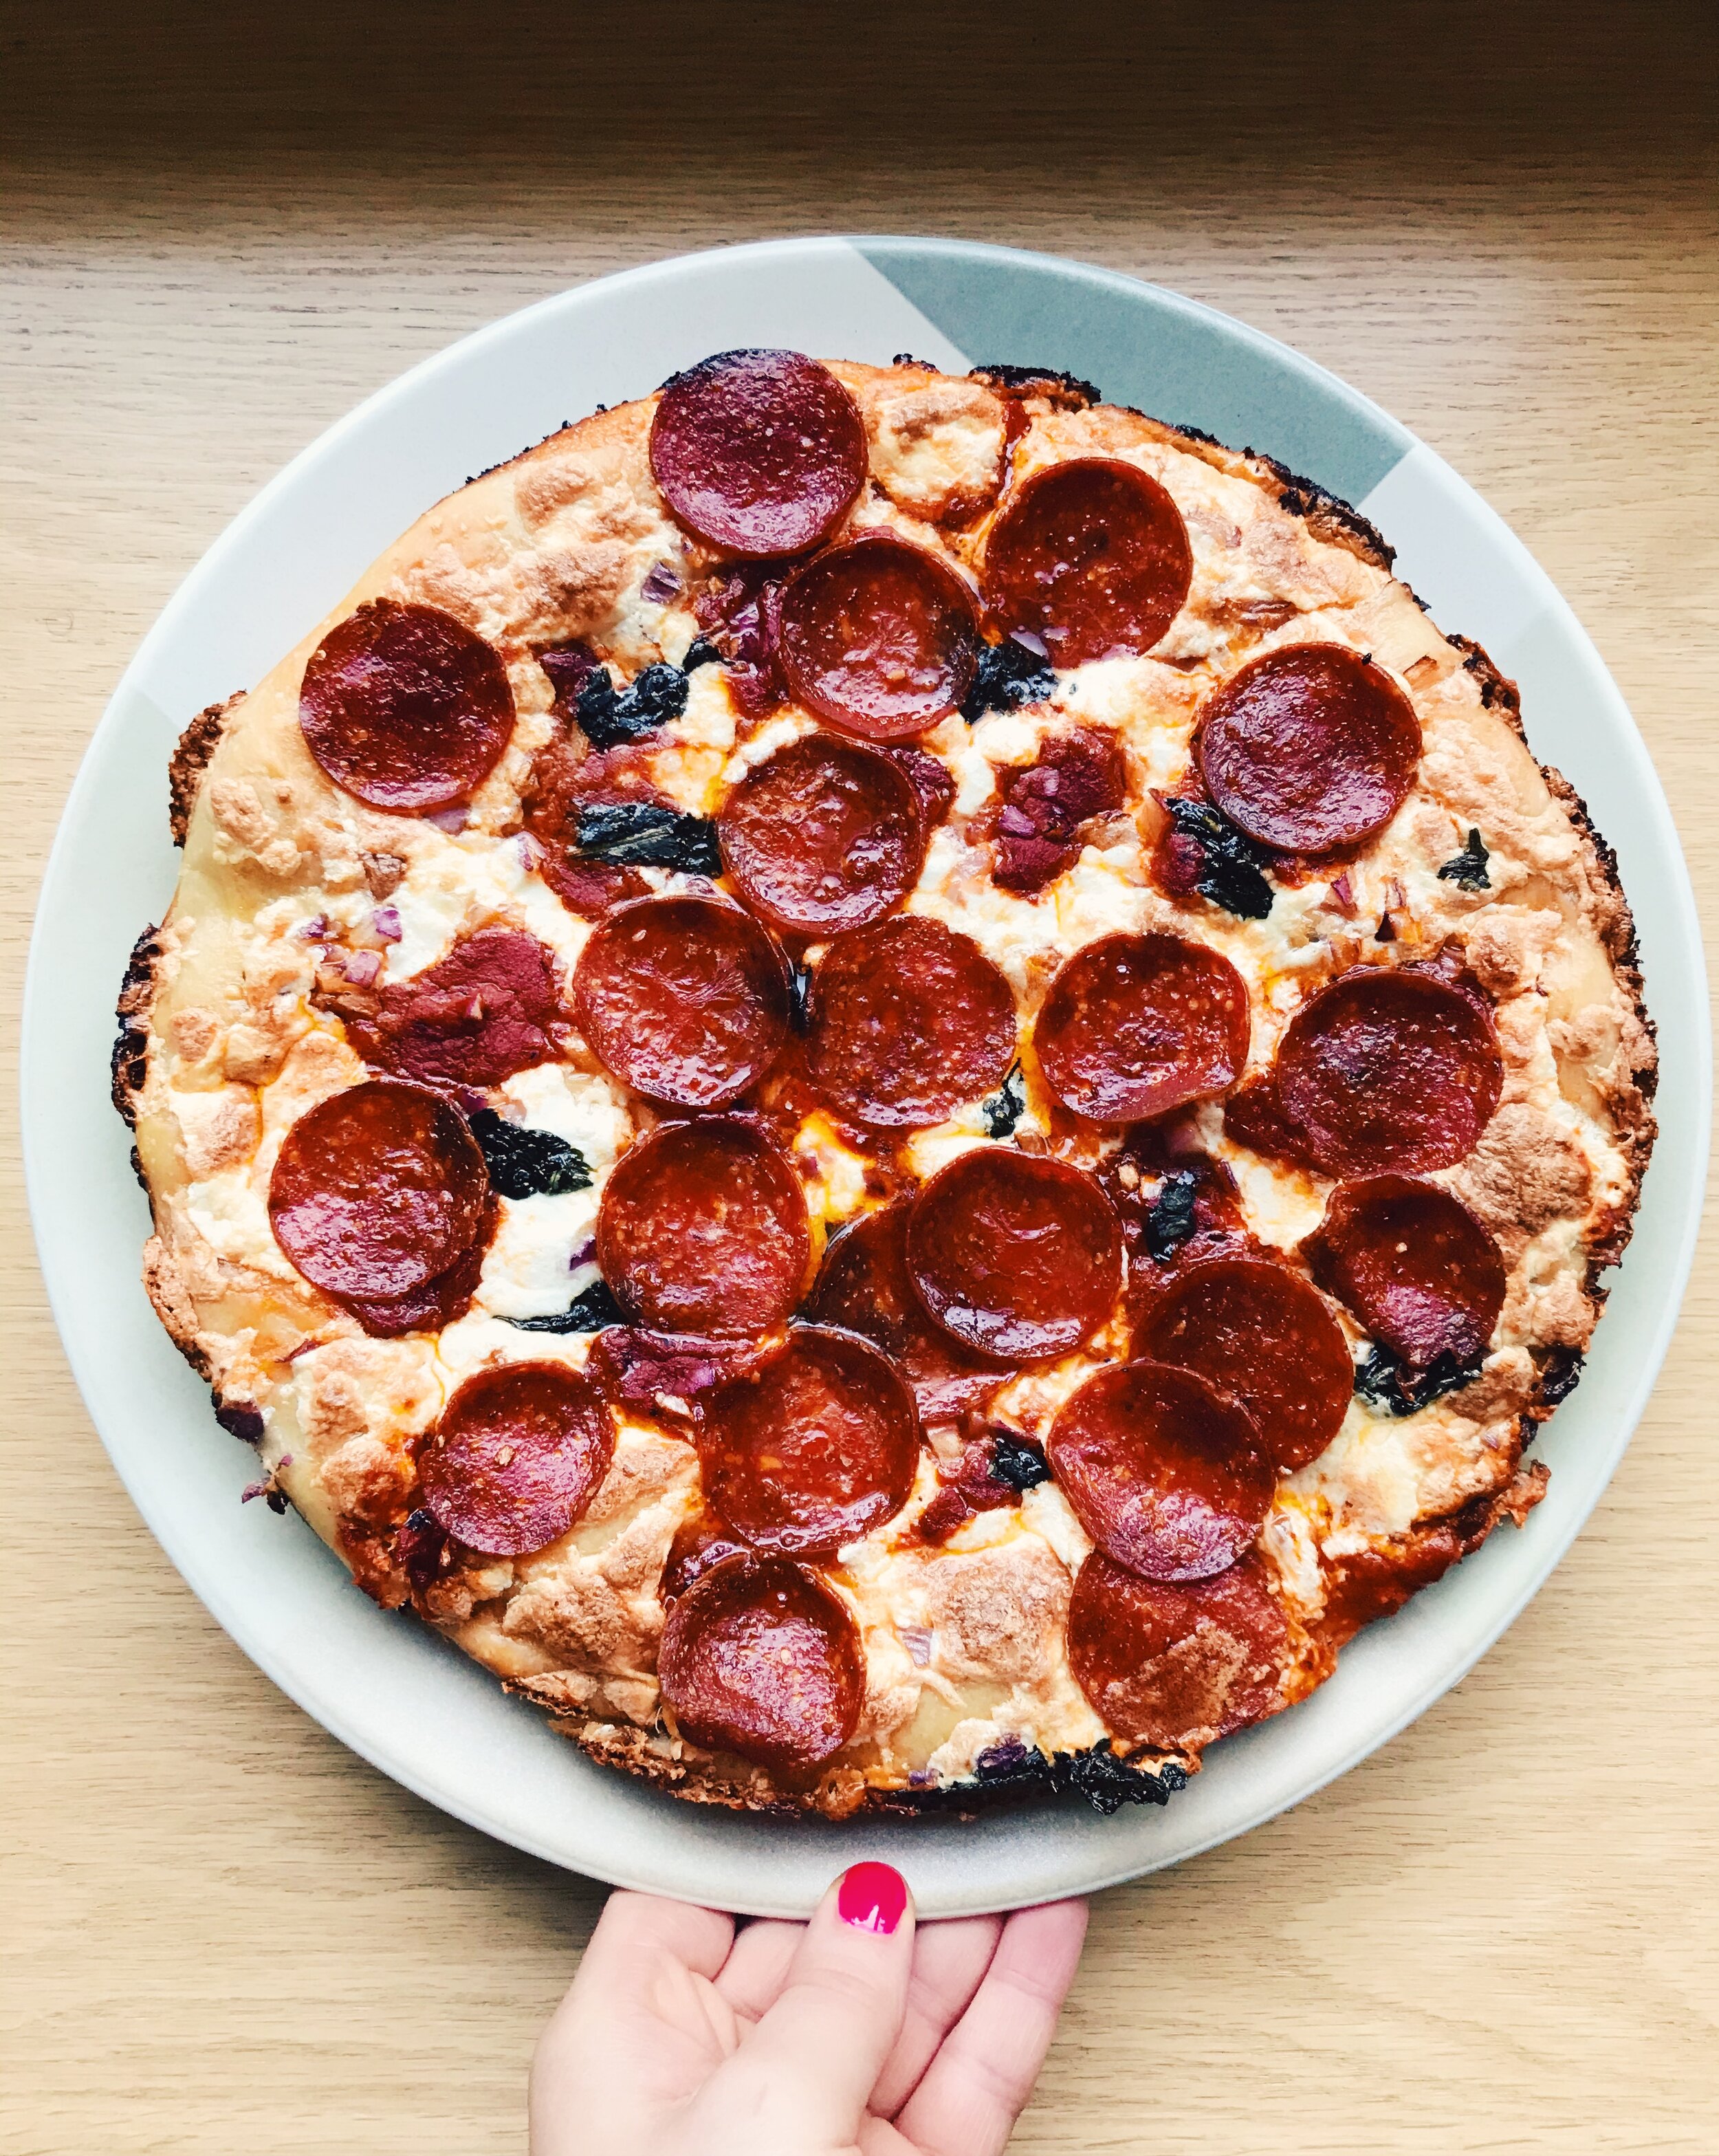
Quick(er) + Easy Skillet Pizza

skillet pizza recipe - seasoned with sydney

I’ve reached the pizza-making part of quarantine.

It all started a few months ago when I came across this article from Food52 touting a quick and cost-effective way to make a pizza at home using a regular cast-iron skillet instead of a fancy pizza stone. I gave it a try and was absolutely amazed by the results: a crispy crust with delightfully-cheesy edges (with supreme caramelization), a pillowy soft center, and a (relatively) quick and uncomplicated preparation process.

skillet pizza recipe - seasoned with sydney

I have been known in the past to try my hand at making pizza at home, but the process always seems so long - one of the biggest parts of making your own pizza is the waiting. Some recipes I’ve tried have called for two hours of active dough-making, and 24 hours of refrigeration for the dough to fully develop. Who has that kind of time? This recipe calls for an hour of dough-making, a less-strenuous kneading process, and only a 12-hour waiting period. Any homemade pizza worth eating will require some planning (a small inconvenience for a custom pie you’ve made yourself), but I love that the wait time is instantly cut in half! And because we’re using a skillet instead of a sheet pan (my old go-to), heat distribution is even, leading to a crispy, pan-style pizza crust.

skillet pizza recipe - seasoned with sydney

My favorite part about this pizza dough is that once you’ve got the basics down (cheese first, then the tomato sauce to prevent a soggy crust), the pizza toppings are SUPER customizable! I even suspect that with the right cheese blend, you can even convert this pizza dough into the perfect vehicle for white pizza as well! (I smell a future recipe on the way…)

skillet pizza recipe - seasoned with sydney

Sick of the soggy and disappointing store-bought pizzas stacked up in your freezer? I think it’s time you took pizza night into your own hands with this versatile, non-fussy skillet pizza recipe!

Quick(er) + Easy Skillet Pizza

Skillet Pizza recipe - Pinterest.png - seasoned with sydney

What You’ll Need:

  • 2 cups all-purpose unbleached flour

  • 3/4 teaspoon fine sea salt

  • 1/4 teaspoon sugar

  • 1/2 teaspoon active dry yeast

  • 3/4 cup lukewarm or room temperature water

  • 1 tablespoon olive oil, plus 2 tablespoons olive oil for the pan

  • 2 cups low-moisture mozzarella, grated

  • 1/2 cup marinara sauce

Optional (My personal favorite toppings!):

  • 1 cup thin pepperoni slices (or more, depending on your preference)

  • 2 tablespoons red onion, finely diced

  • Fresh basil, lightly chopped

Directions

In a large mixing bowl, place flour, salt, sugar, yeast, water, and 1 tablespoon of the olive oil. Mix together well to form a shaggy, slightly sticky mass of dough with no dry spots.

Scrape down the sides of the bowl to create a rough ball of dough, then cover the bowl for five minutes.

After five minutes, uncover the bowl and, with a slightly wet hand, reach between the side of the bowl and the dough and lift, stretching the bottom of the dough up and over itself in one motion. Repeat this process three more times, rotating the bowl 90 degrees each time.

Re-cover the bowl and let the dough rest for five minutes. After five minutes, wet your hand again and repeat the stretching and folding process, then re-cover the dough and let it rest again for five minutes. Repeat the folding and resting two more times. After the final fold, cover the bowl and let the dough rest for 45 minutes. (I have found the best results by placing the dough in a proofing bucket with an airtight lid, but covering with a kitchen towel or cling wrap works too.)

After 45 minutes, transfer the dough to a gallon-sized resealable storage bag lightly coated with olive oil. Once the dough is in the bag, be sure to drizzle a little more olive oil over the top to prevent the dough from drying out. Refrigerate the dough for as little as 12 hours, or as long as 72 hours. At this stage, the dough will slowly rise and begin to develop its flavor.

About 2.5 hours before you’re ready to make your pizza, place two tablespoons of olive oil in a large (preferably 10-inch) cast-iron skillet, making sure the bottom is fully coated. Using a pastry brush, a paper towel, or even your fingers, apply additional olive oil up the sides of the pan to prevent the pizza from sticking later.

Transfer the dough from the fridge to the pan, flipping in once on each side to make sure it’s evenly coated in olive oil. Slowly, using the tips of your fingers, begin spreading the dough to the edges of your pan. As you do it, you should see yourself lightly creating dimples in the dough. If you experience any resistance from the dough, such as shrinking back, wait a few minutes and try again.

Cover the dough with plastic wrap and let it rise for 2 hours at room temperature. The final result should be a pillowy-soft dough full of tiny air bubbles.

30 minutes before you’re going to start making the pizza, place oven racks in the bottom and upper third of the oven, then pre-heat to 450 degrees Fahrenheit.

Once you’re ready to bake your pizza, sprinkle the mozzarella evenly over the dough, making sure that the dough is entirely covered from edge to center, meaning no bare spots.

Next, dollop small spoonfuls of the marinara sauce all over the top, but do not spread. The sauce will spread as the dough bakes. At this point, add all other pizza toppings evenly (see my personal favorites above!).

Bake the pizza on the bottom rack for about 20 minutes, until the cheese is bubbling and the crust has taken on a golden brown hue. Quickly remove from the oven. Using a small spatula, check the bottom. If the bottom is golden brown, but the top is still pale, place the pizza back in the oven for another 2-4 minutes (i usually have to leave mine in for the full 4 minutes. This will depend on your oven). Use your own intuition to discern when the pizza has reached your definition of doneness.

Remove the pizza from the oven and carefully and quickly run a table knife or small spatula along the edge between the pizza and the pan to ensure that the pizza doesn’t stick to the pan via the cheese hardening as it cools. Wait for about 2 minutes, then carefully lift and transfer the pizza from the skillet to a cooling rack (I like to place something under the cooling rack to catch any runaway toppings or leaks) to finish cooling (this will prevent a soggy bottom).

Serve the pizza while it’s still warm, but not screaming hot. Enjoy!

TO STORE: Any leftovers can be stored in an airtight container for up to one week. To return it to its crispy glory, heat it in a 350 degree Fahrenheit oven for about 10 minutes.

SOURCE: Adapted from Food52 via King Arthur Baking Co.


Mini Atlantic Beach Pies

Living a stone's throw away from the Atlantic Ocean now has gotten me thinking about beach town culture. The locals around these parts are very set in their ways when the sun is shining and you haven't seen a thermometer drop past 80 degrees in a week. They get up when the sun rises, slather on a healthy coating of sport sunblock, then set up shop at the beach until the sun goes down. And once the sun goes down, if they've planned correctly, they'll have a bonfire on that very same beach. Lather, rinse, repeat.

They're fueled by frozen lemonades and hot dogs, and vow to be olympic-level good at beach volleyball and sailing everyday until their feet hit the pavement and reality sets in. Every minute is water, sand, and sun, and it's all incredibly new to me. Sure, in the town I grew up in, in the Midwest, we were lucky enough to live right by the Lake with beautiful beaches and our own fair share of summertime rituals, but it's just not the same. In the Midwest, fairs and festivals are the name of the game, and stuffing yourself to the very brim with authentic foods of many cultures is how you play to win. But not here. Here, ne'er a pretty Summer day is squandered indoors, and every moment a bull is taken by the horns and ridden all the way to where life begins and ends: the beach. I'll tell you what, it'll certainly take a little getting used to (first things first, I'll have to order a vat of SPF 70 off Amazon), but I plan to be alll about that life one day. Provided there are snacks. And the weather stays between 75 and 79 degrees, as I am prone to fits of hot weather-related complaining.

Can you believe that Summer is unofficially officially over?? Three months just whizzed past. If the humidity hadn't had its way with my hair from May to present day, I could almost tell you that it never happened at all. And while I'm more than delighted to welcome in my favorite season, Fall, with as many apple cider doughnuts, hay rides, pie baking, and cardigans and flannel as my lil' heart can take, I'm also a sucker for goodbyes. Why, it wasn't a mere seven months ago that I was tightly bundled up in a heavy winter coat, greedily bathing my face in the glow of a sun that only gave a whisper of warmth. And the days were short and dark, and I wished for Summer with every breath I took. But you can never appreciate or miss something until it's gone, so it's time for Summer to TTFN so I can remember what it was like to love it once more. To give it a proper adieu, I chose to make my favorite dessert: pie, in miniature form because who doesn't love a PERSONAL PIE, with a little wink and nod to my new-ish new home. Hello, Atlantic Beach Pie.

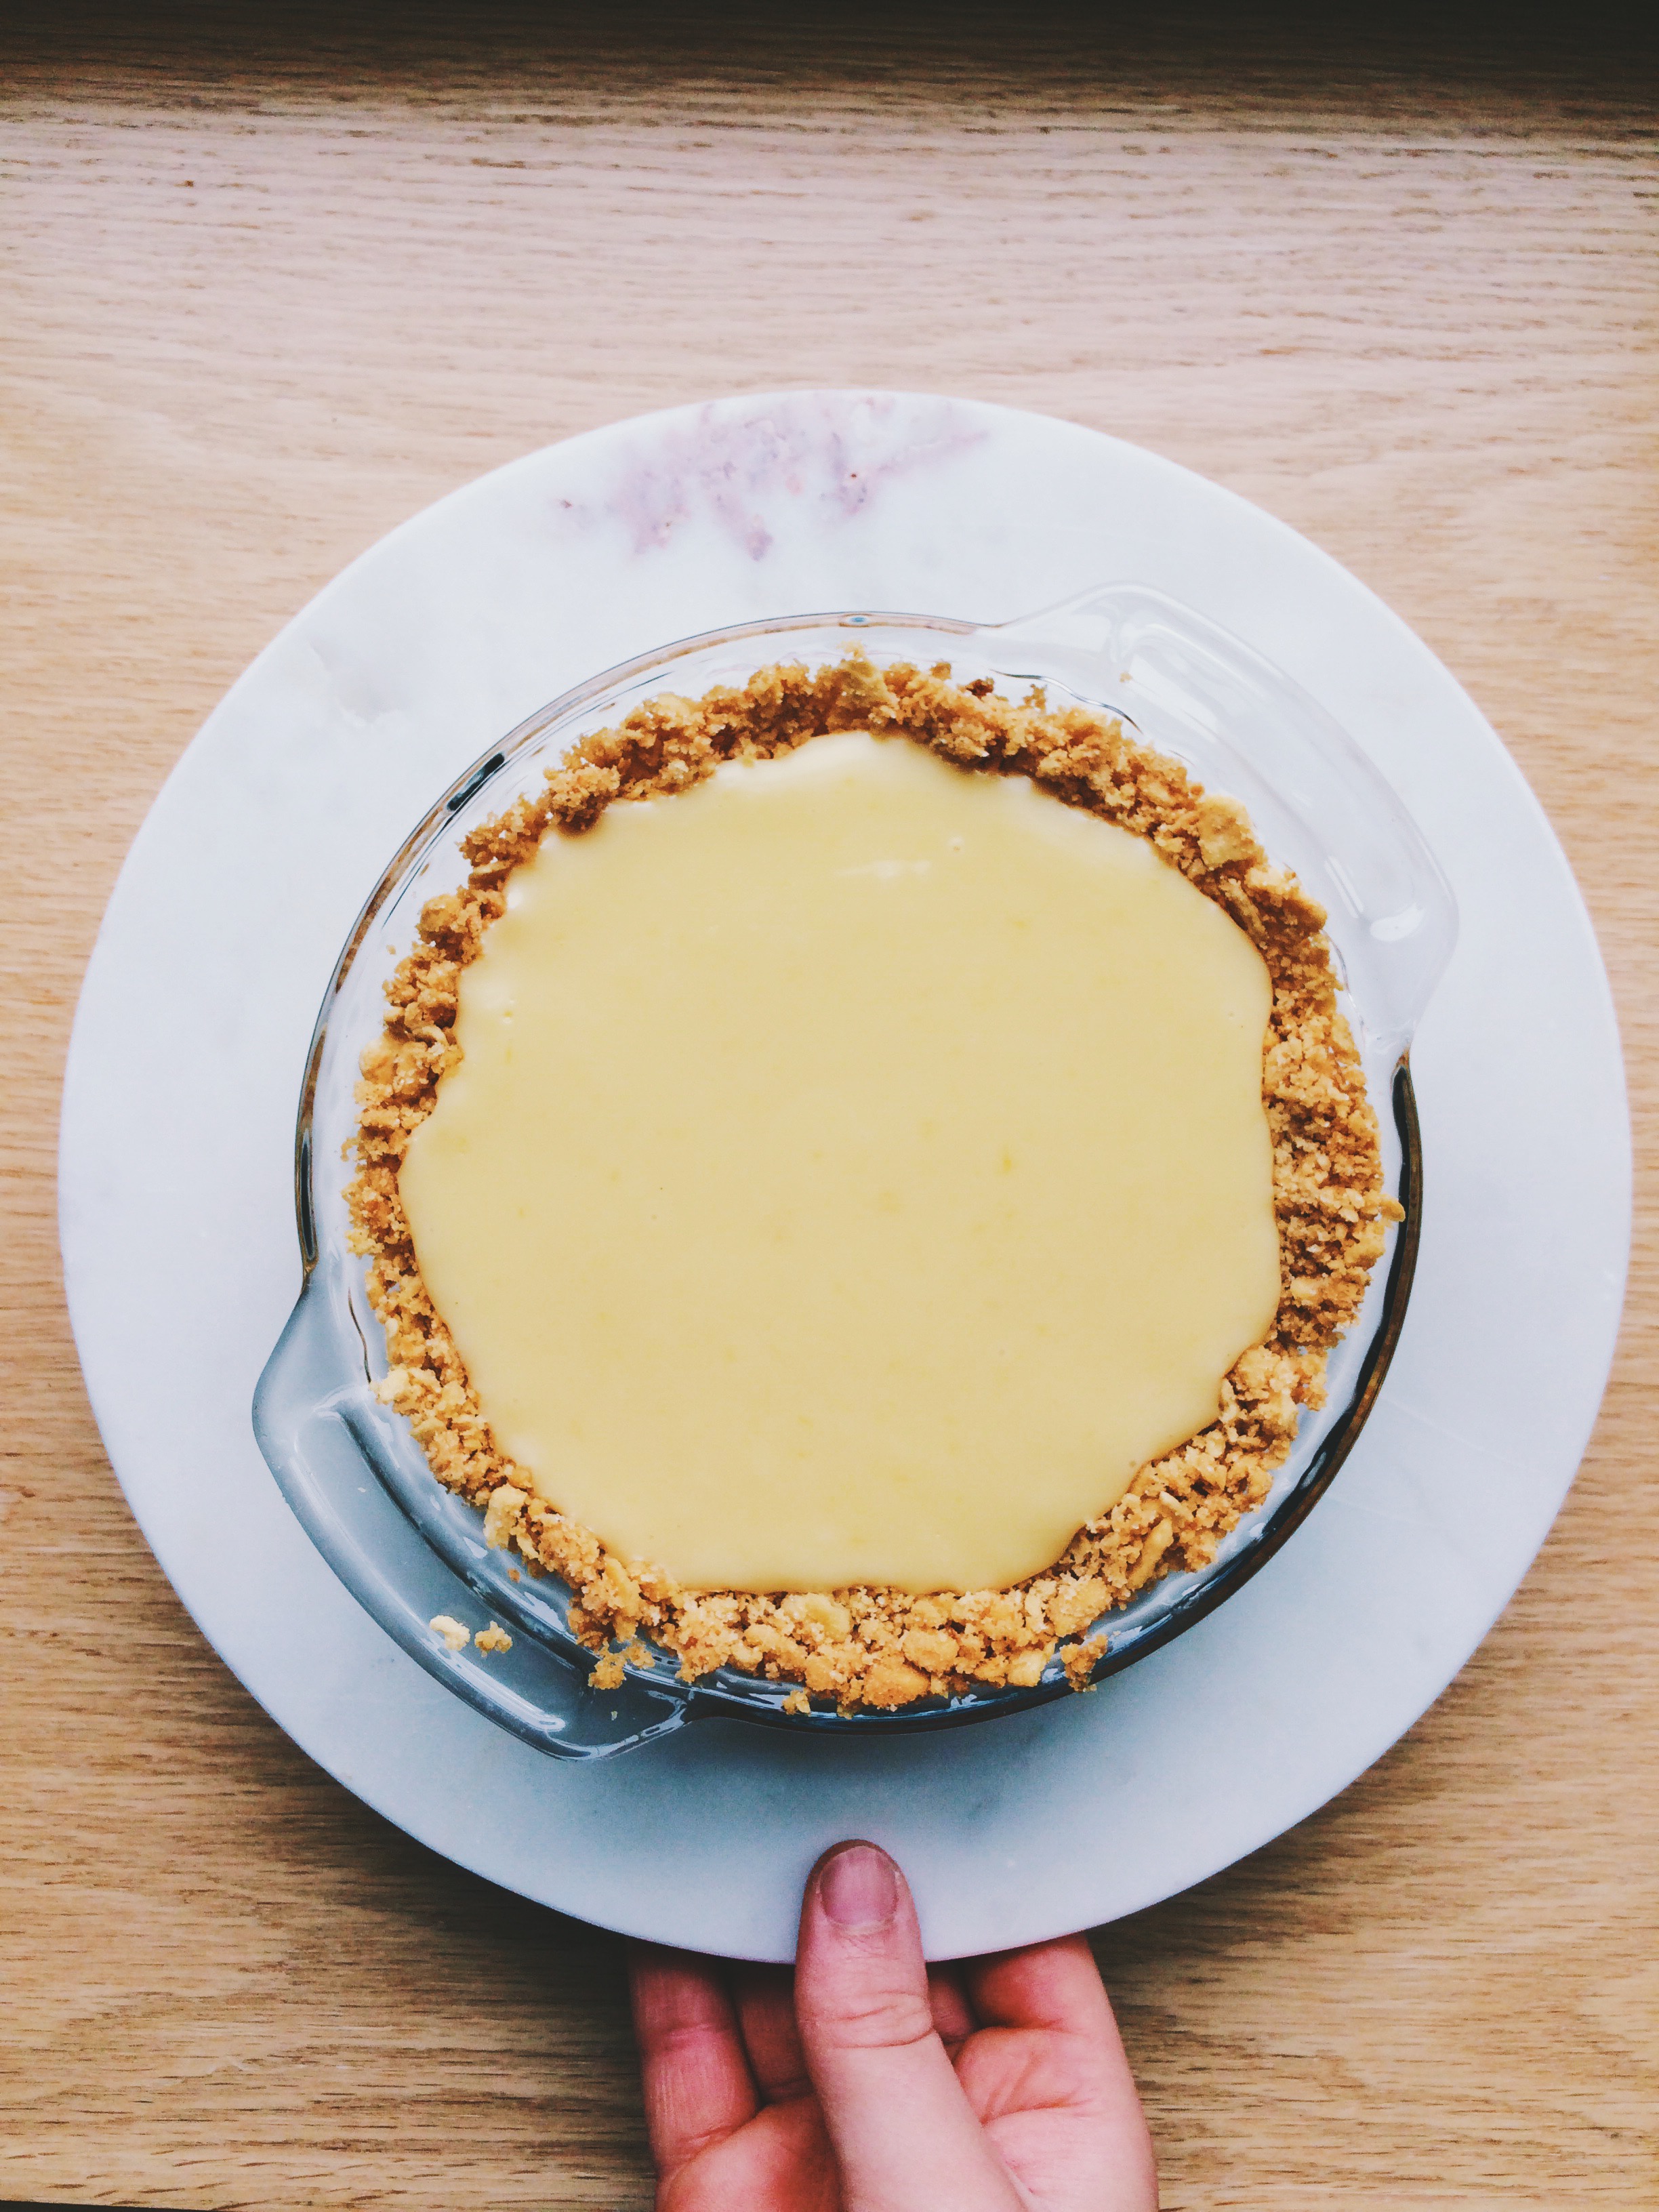
At its core, this Atlantic Beach Pie is the baby of a Key Lime pie and a Lemon Meringue pie. It has both lemon and lime juice, a saltine cracker crust, and delicious, over-the-top, fluffy and puffy meringue; if so you choose to whip up a batch and use it. (P.S. You'll have so many egg whites leftover. Make the meringue.)

There are many, many things that I love about these baby Atlantic Beach pies. For starters, the saltine cracker crust, a detour from the usual graham cracker crust found in basic Key Lime and Lemon Ice Box pies, reminds me of the beach, and transports me to those sunny sand-filled days everyone from my neighbor to the bank teller are always raving about. I love the freshness and brightness that the just-squeezed citrus juices bring to the table. The pies are so fragrant that even a quick whiff of one in passing can wake me right up. And most of all, these are pies that I can not only give to those friends and loved ones who absolutely adore citrus desserts, but also to those friends who *GASP* aren't dessert people. They're sweetened by a few tablespoons of sugar in the crust, and the sweetened condensed milk, and that's it. There's enough sweetness to keep your sweet-tooth happy, but overly-sweet they are not. It's a win-win for every party, and I can go to bed at night knowing that even the most savory-oriented people can compromise every once in a while. Plus, and I've said it before but I'll say it again: WHO DOESN"T LOVE PERSONAL PIES? They're just too cute to resist.

In conclusion, now is the time to raise our forks to a lovely, hot, and humid summer by digging into petite summer-tastic citrusy pies, and reminiscing about the good times. Cheers, Summer '16. It's been real.


Now, pass me that can of pumpkin, would ya? We've got work to do.


MINI ATLANTIC BEACH PIES

Makes 4 6-inch pies (these are the ones I use from WS!) 

What You'll Need:

For the crust:

  • About 2 1/2 sleeves of salted saltine crackers, or about 120 crackers
  • 1 cup unsalted butter, softened
  • 6 tablespoons granulated sugar

For the pies:

  • Two 14-ounce cans of Eagle Brand sweetened condensed milk
  • 8 egg yolks (save the whites to make a tasty meringue!)
  • 1/2 cup lime juice, freshly squeezed
  • 1/2 cup lemon juice, freshly squeezed
  • Lime zest, for garnish

DIRECTIONS 

Preheat your oven to 350 degrees F. Take out two baking sheets, set them aside.

Finely hand-crush the saltine crackers in a large bowl, but be careful not to crush them so much that they become cracker dust. Add the sugar and stir to mix. Next, add the butter and knead it in until the cracker crumbs come together like a dough. Take out your four mini pie plates, then press the dough evenly into each. (Note: You may end up with more pie dough than pie plates to press it into, and that's perfectly fine. Better to have too much than not enough when it comes to mini pies!)

Chill in the refrigerator for 15 minutes, or freeze for 10-12. Once your pies have chilled, place two on each baking sheet and bake in the oven for 18-20 minutes, or until the crusts have gotten nice and golden brown. Let them cool slightly.

While your pie crusts are cooling, it's time to make the filling. Start off by beating the egg yolks into the milk until everything is completely combined. Next, add the citrus juice. At first, the  juice may sit right on the top and make your custard look very thin and watery. It is very, VERY important that you stick with it and carefully stir it (it tends to splash all around at first) until all of your ingredients are completely combined. You'll start to see it thicken to a normal consistency again, just give it a little time.

Once your custard has come together, pour it into each pie plate, making sure to avoid overfilling them. Carefully set your pie plates (if you haven't already) back on their baking sheets, then bake the pies for 16 minutes until the filling has set.

Let your pies cool on cooling racks for 15-20 minutes, then pop them into the fridge to chill completely (they must be absolutely cold in order to be sliced.)

When you're ready to serve, top each with a lovely meringue using your leftover egg whites (here's a great tutorial from The Kitchn!), or freshly whipped cream, then top with a lemon or lime wedge, citrus zest, or coarse sea salt as a garnish.


SOURCE: Adapted from Food52

Food 52's Quick Blueberry Jam

Jam1 I think I spoke too soon about Spring. My bad. Historically, when I've made decorations of Spring, and thrown my winter coat into the closet abyss until the next season, that was usually that. I may shiver a bit, but there's usually no turning back. This year, not so much. No sooner had I stopped wearing stockings with my sneakers again that it snowed. Mind you it was a just dusting, but there was snow on the ground again, and a frost in the air that was totally and completely unwanted. Usually I relish in the sound of freshly fallen snow under my boots, but not when those boots were meant to be tucked away in exchange for attractive flats and sandals. Thankfully, it's already melting. Melt faster!

At any rate, despite the fact that I've had to put up with the winter coat for the time being, I've decided to ignore these winter-like conditions where it counts: in my heart. And to that effect, I've continued on in my quest to re-introduce warm weather fruits back into the kitchen any way I can. And I'm still on a blueberry kick. So, this week I've made Food 52's Quick Blueberry Jam. And it was, by all accounts, a real JAM to make....I LIKE PUNS, SUE ME.

Jam2

Jam has been on my extended To-Make List for several years now, but I hadn't gotten around to doing it, nor did I have all the proper accouterments it takes to effectively get the job done. While I still have long-term plans to fill my life and the lives of my loved ones with all the jams you could possibly imagine, until I have all the tools of the trade, this wonderful and easy quick jam is going to do very nicely in the meantime.

Quick Blueberry Jam Goes Well: on toast, rolls, biscuits, crackers, spoons, fingers, straight out of the pan, etc.etc. etc.

What You'll Need:

  • 1 cup fresh or frozen blueberries (if using frozen, make sure that they have completely thawed and come to room temperature)
  • 1/3 cup granulated sugar
  • 1/16 teaspoon kosher salt
  • 1/2 teaspoon lemon zest
  • 1 teaspoon lemon juice (I used upwards of 2 tablespoons, but I like a little bit more lemon with blueberries)
  • 2 tablespoons water

Directions:

Add all ingredients to a medium-sized pan.

Turn the heat to medium, and bring the mixture to a boil, stirring occasionally. As soon as it has come to a boil, turn the heat down to a simmer. The fruit will start to release its juices, and soften.

Cook up to 30 minutes (though I did a few minutes longer). The longer it simmers, the smoother the result at the end.

Store in fridge, and eat within a week.

Note: Because I upped the lemon juice, I also had to adjust the sugar by a few tablespoons, and add a dash more salt. Make sure to alter this to your taste preferences. ABT= Always be tasting. Think it needs a pinch more salt? Go for it! Want a little more acidity? Squeeze it in. It's your jam after all!

SOURCE: Food 52 via Phyllis Grant 

Shopping Wishlist

I have a complicated relationship with shopping. In real life, I subscribe to the "Fill up the cart!" philosophy. Especially at Target. ESPECIALLY if I have friends with me who'll say, "Why not? Get it!" That is very dangerous for me to hear. But online, if I find something I like, I very rarely purchase it. I pour over it for days, do as much research as I can, dissect the reviews, and then, after all of that, if I still want it, then I get it. Here are a few things I've been crushing on lately:

Screen Shot 2014-02-27 at 9.10.50 AM

Red Flower Coasters from DecoyLab on Etsy // Quilted Picnic Blanket from Provisions by Food52 // Spiced Pomegranate Pear Molly Hatch from TeaGuys // Fairmount Park Telephone Salt and Pepper Shakers from Kate Spade New York

I just want them all.

singature gray