Prepping for Valentine's!
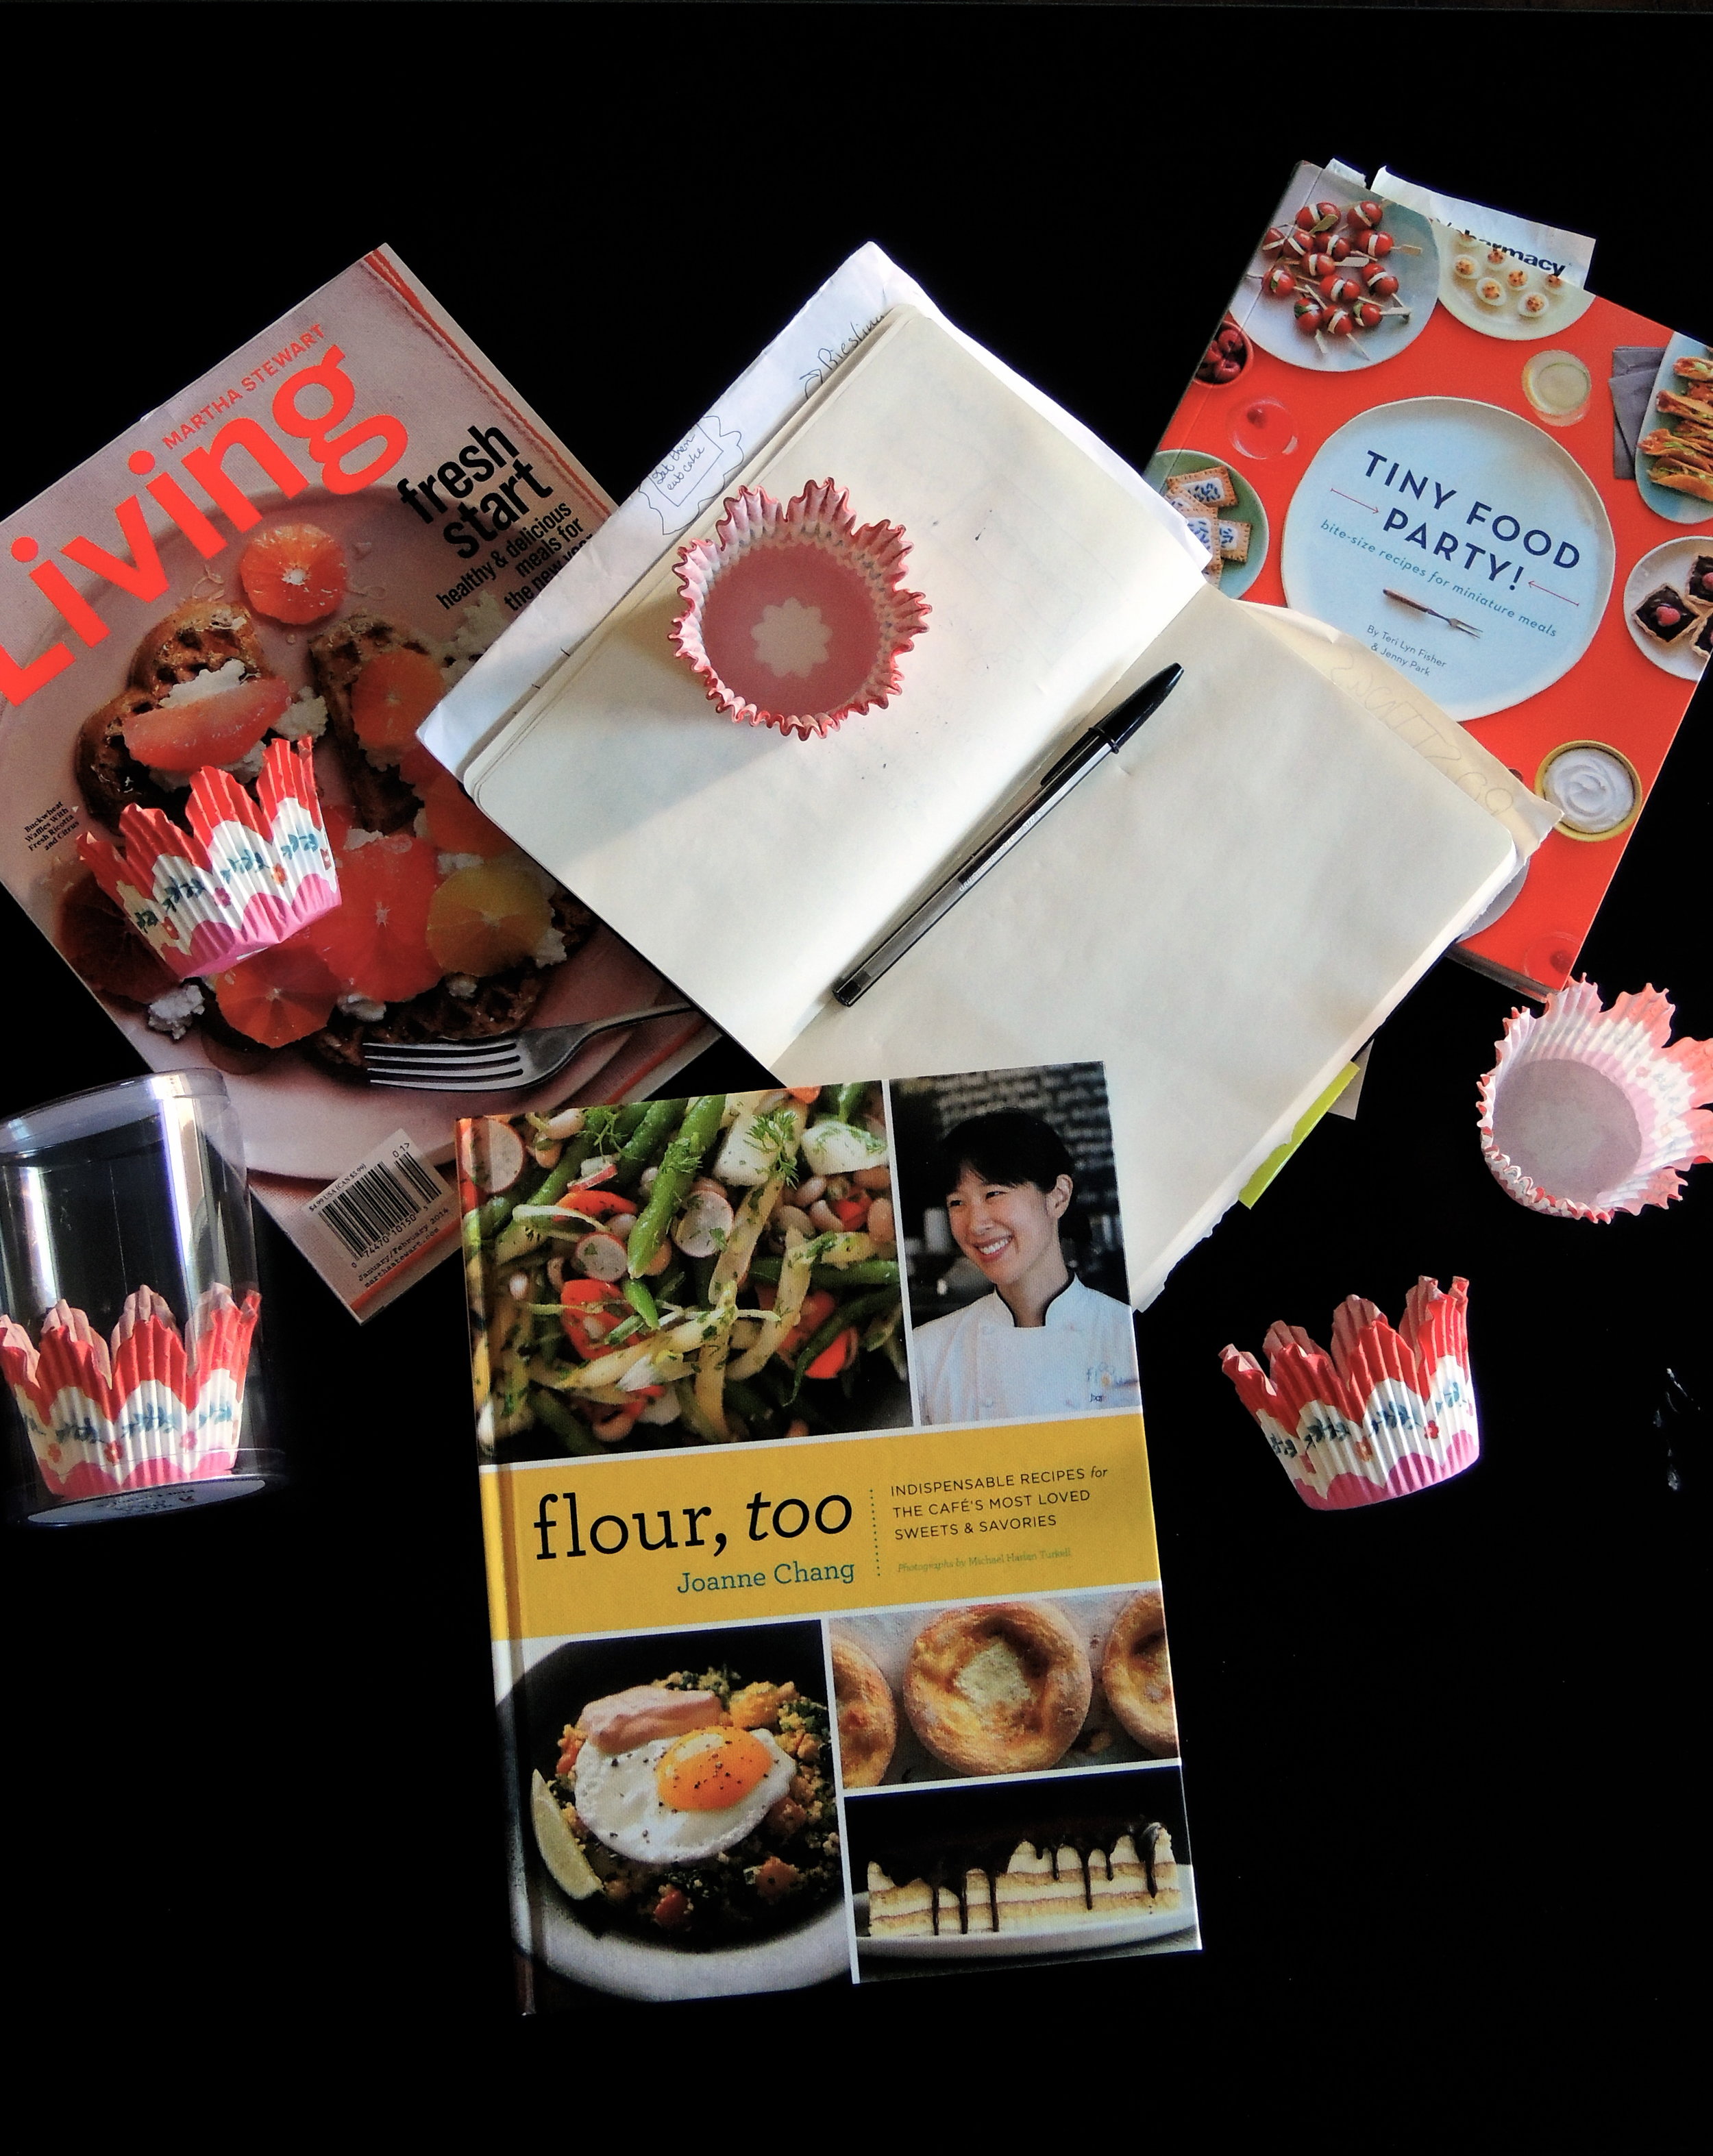 Today is the day that I start finalizing my Valentine's Day treats for my work chums!
I'm down to either heart-shaped cupcakes, or Lofthouse Style cookies with buttercream frosting...
Today is the day that I start finalizing my Valentine's Day treats for my work chums!
I'm down to either heart-shaped cupcakes, or Lofthouse Style cookies with buttercream frosting...
Stay tuned!

Today is the day that I start finalizing my Valentine's Day treats for my work chums!
I'm down to either heart-shaped cupcakes, or Lofthouse Style cookies with buttercream frosting...
Stay tuned!
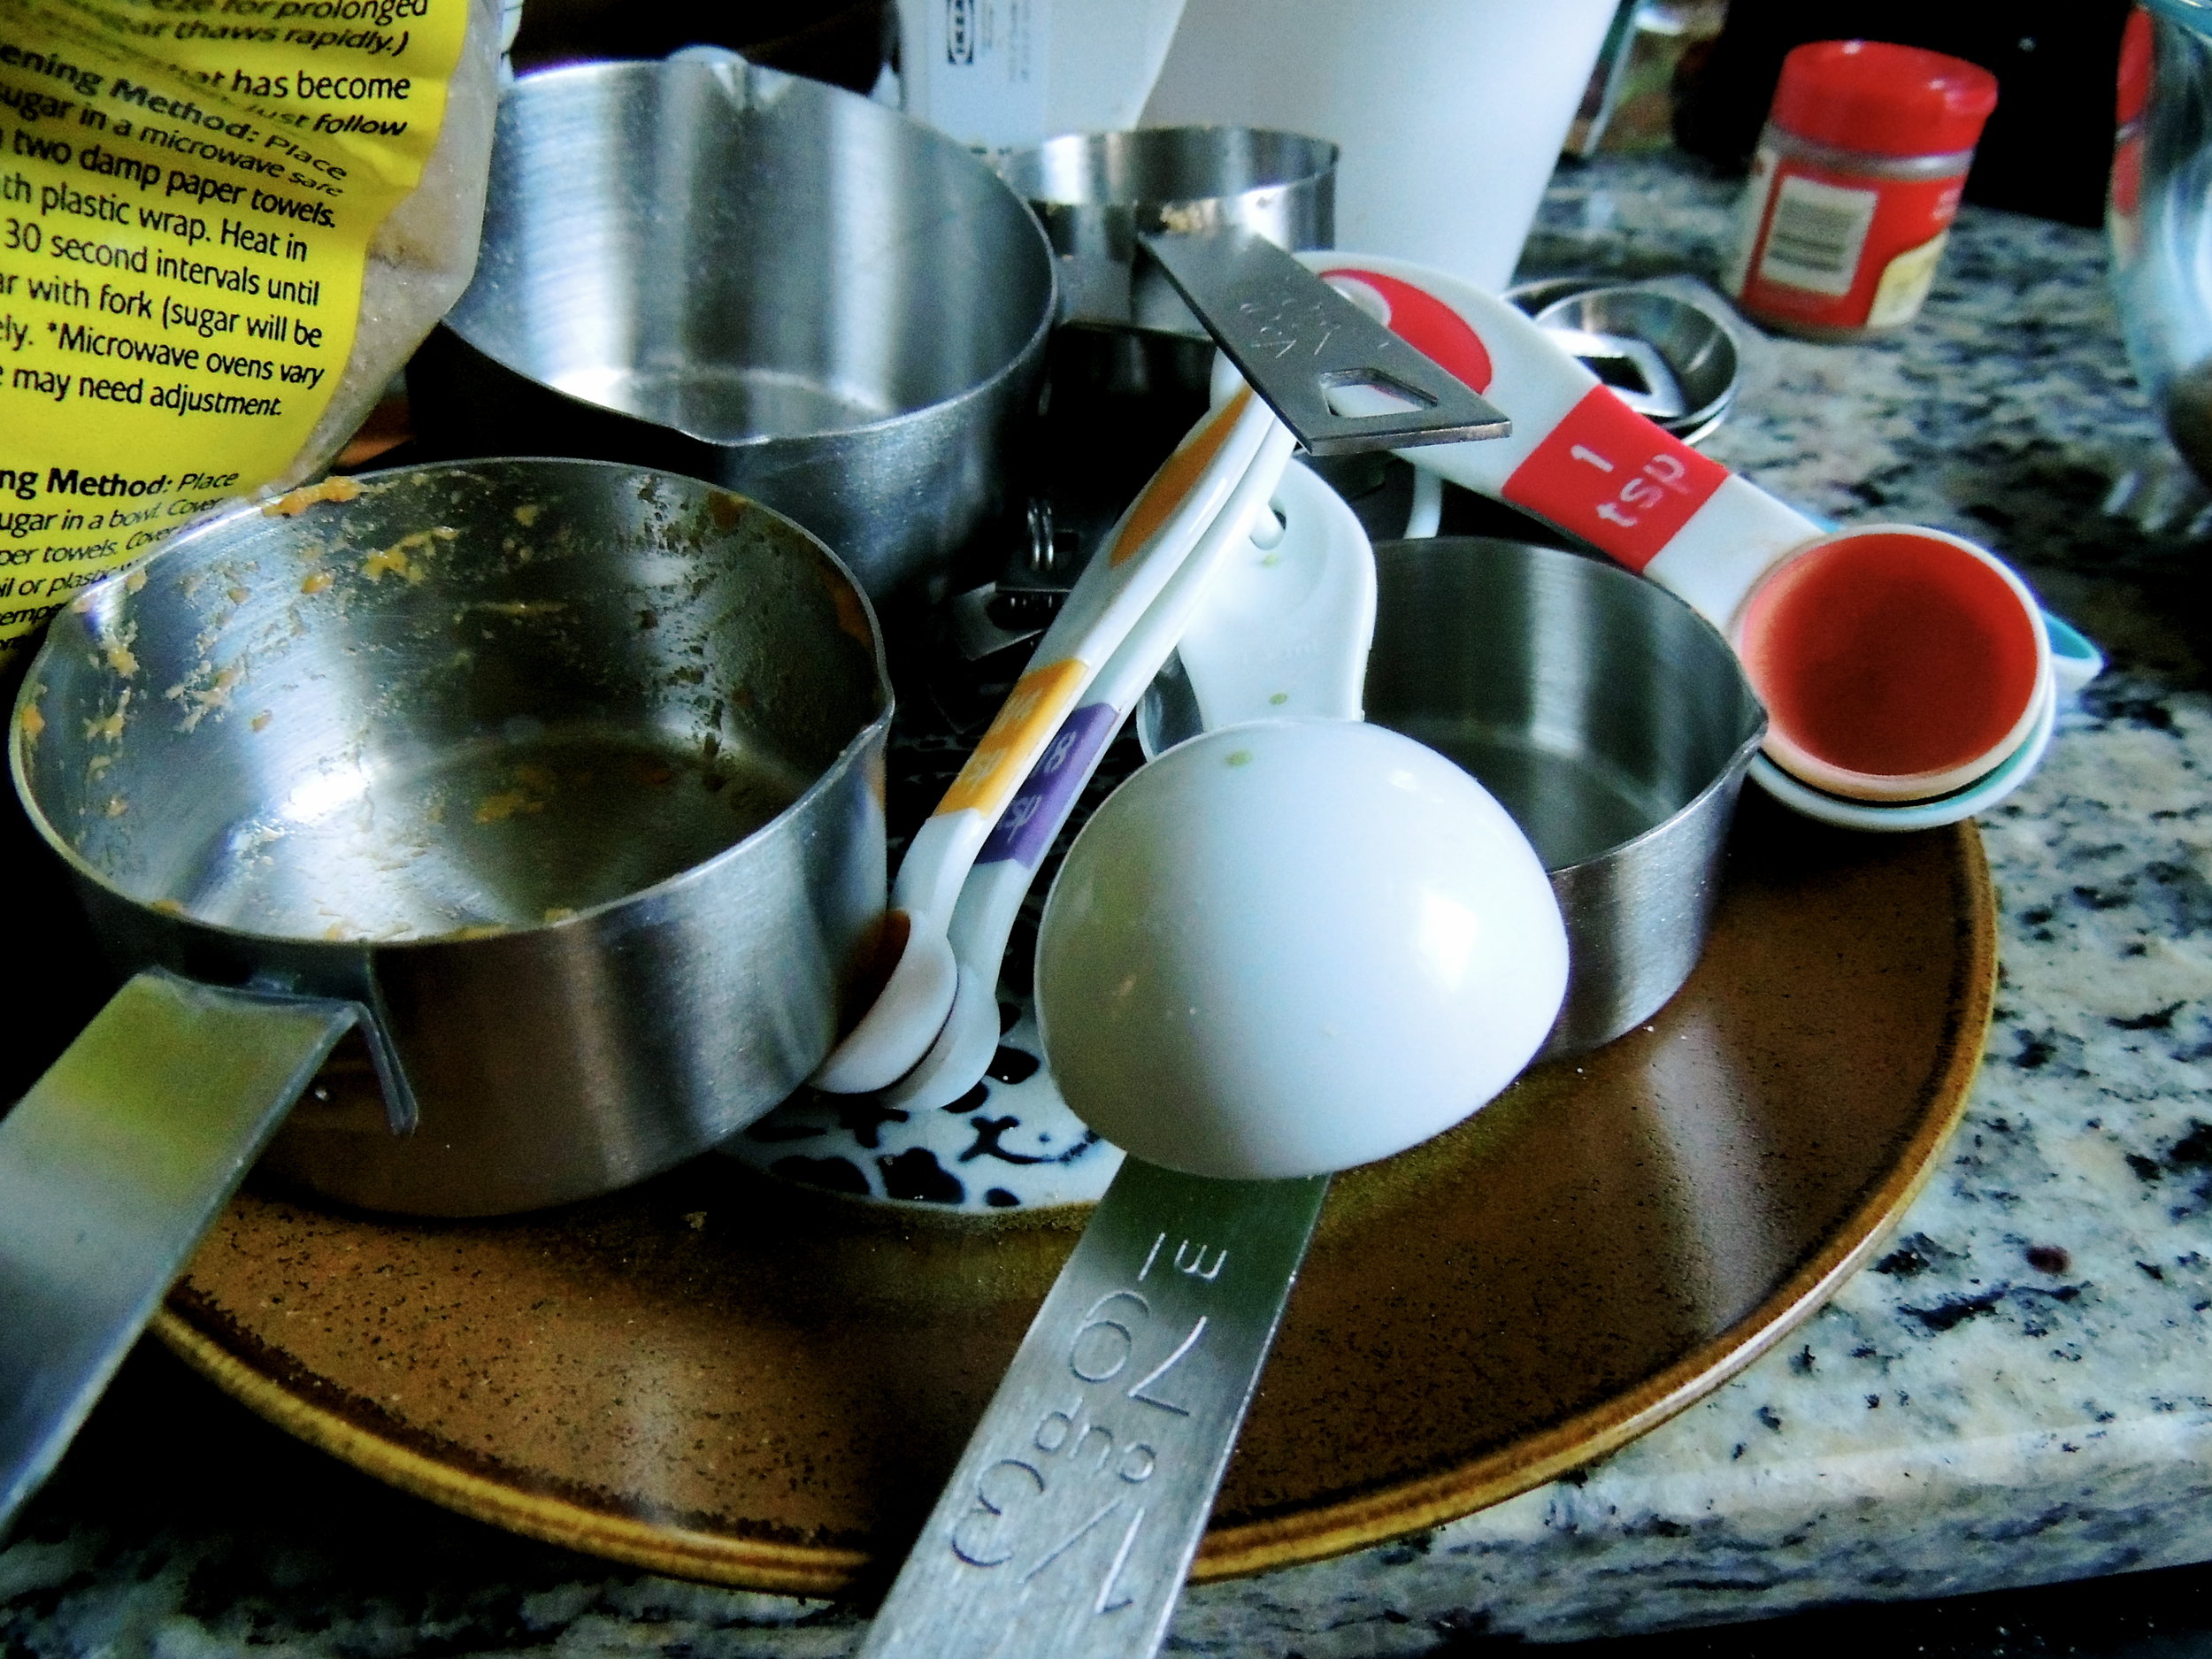
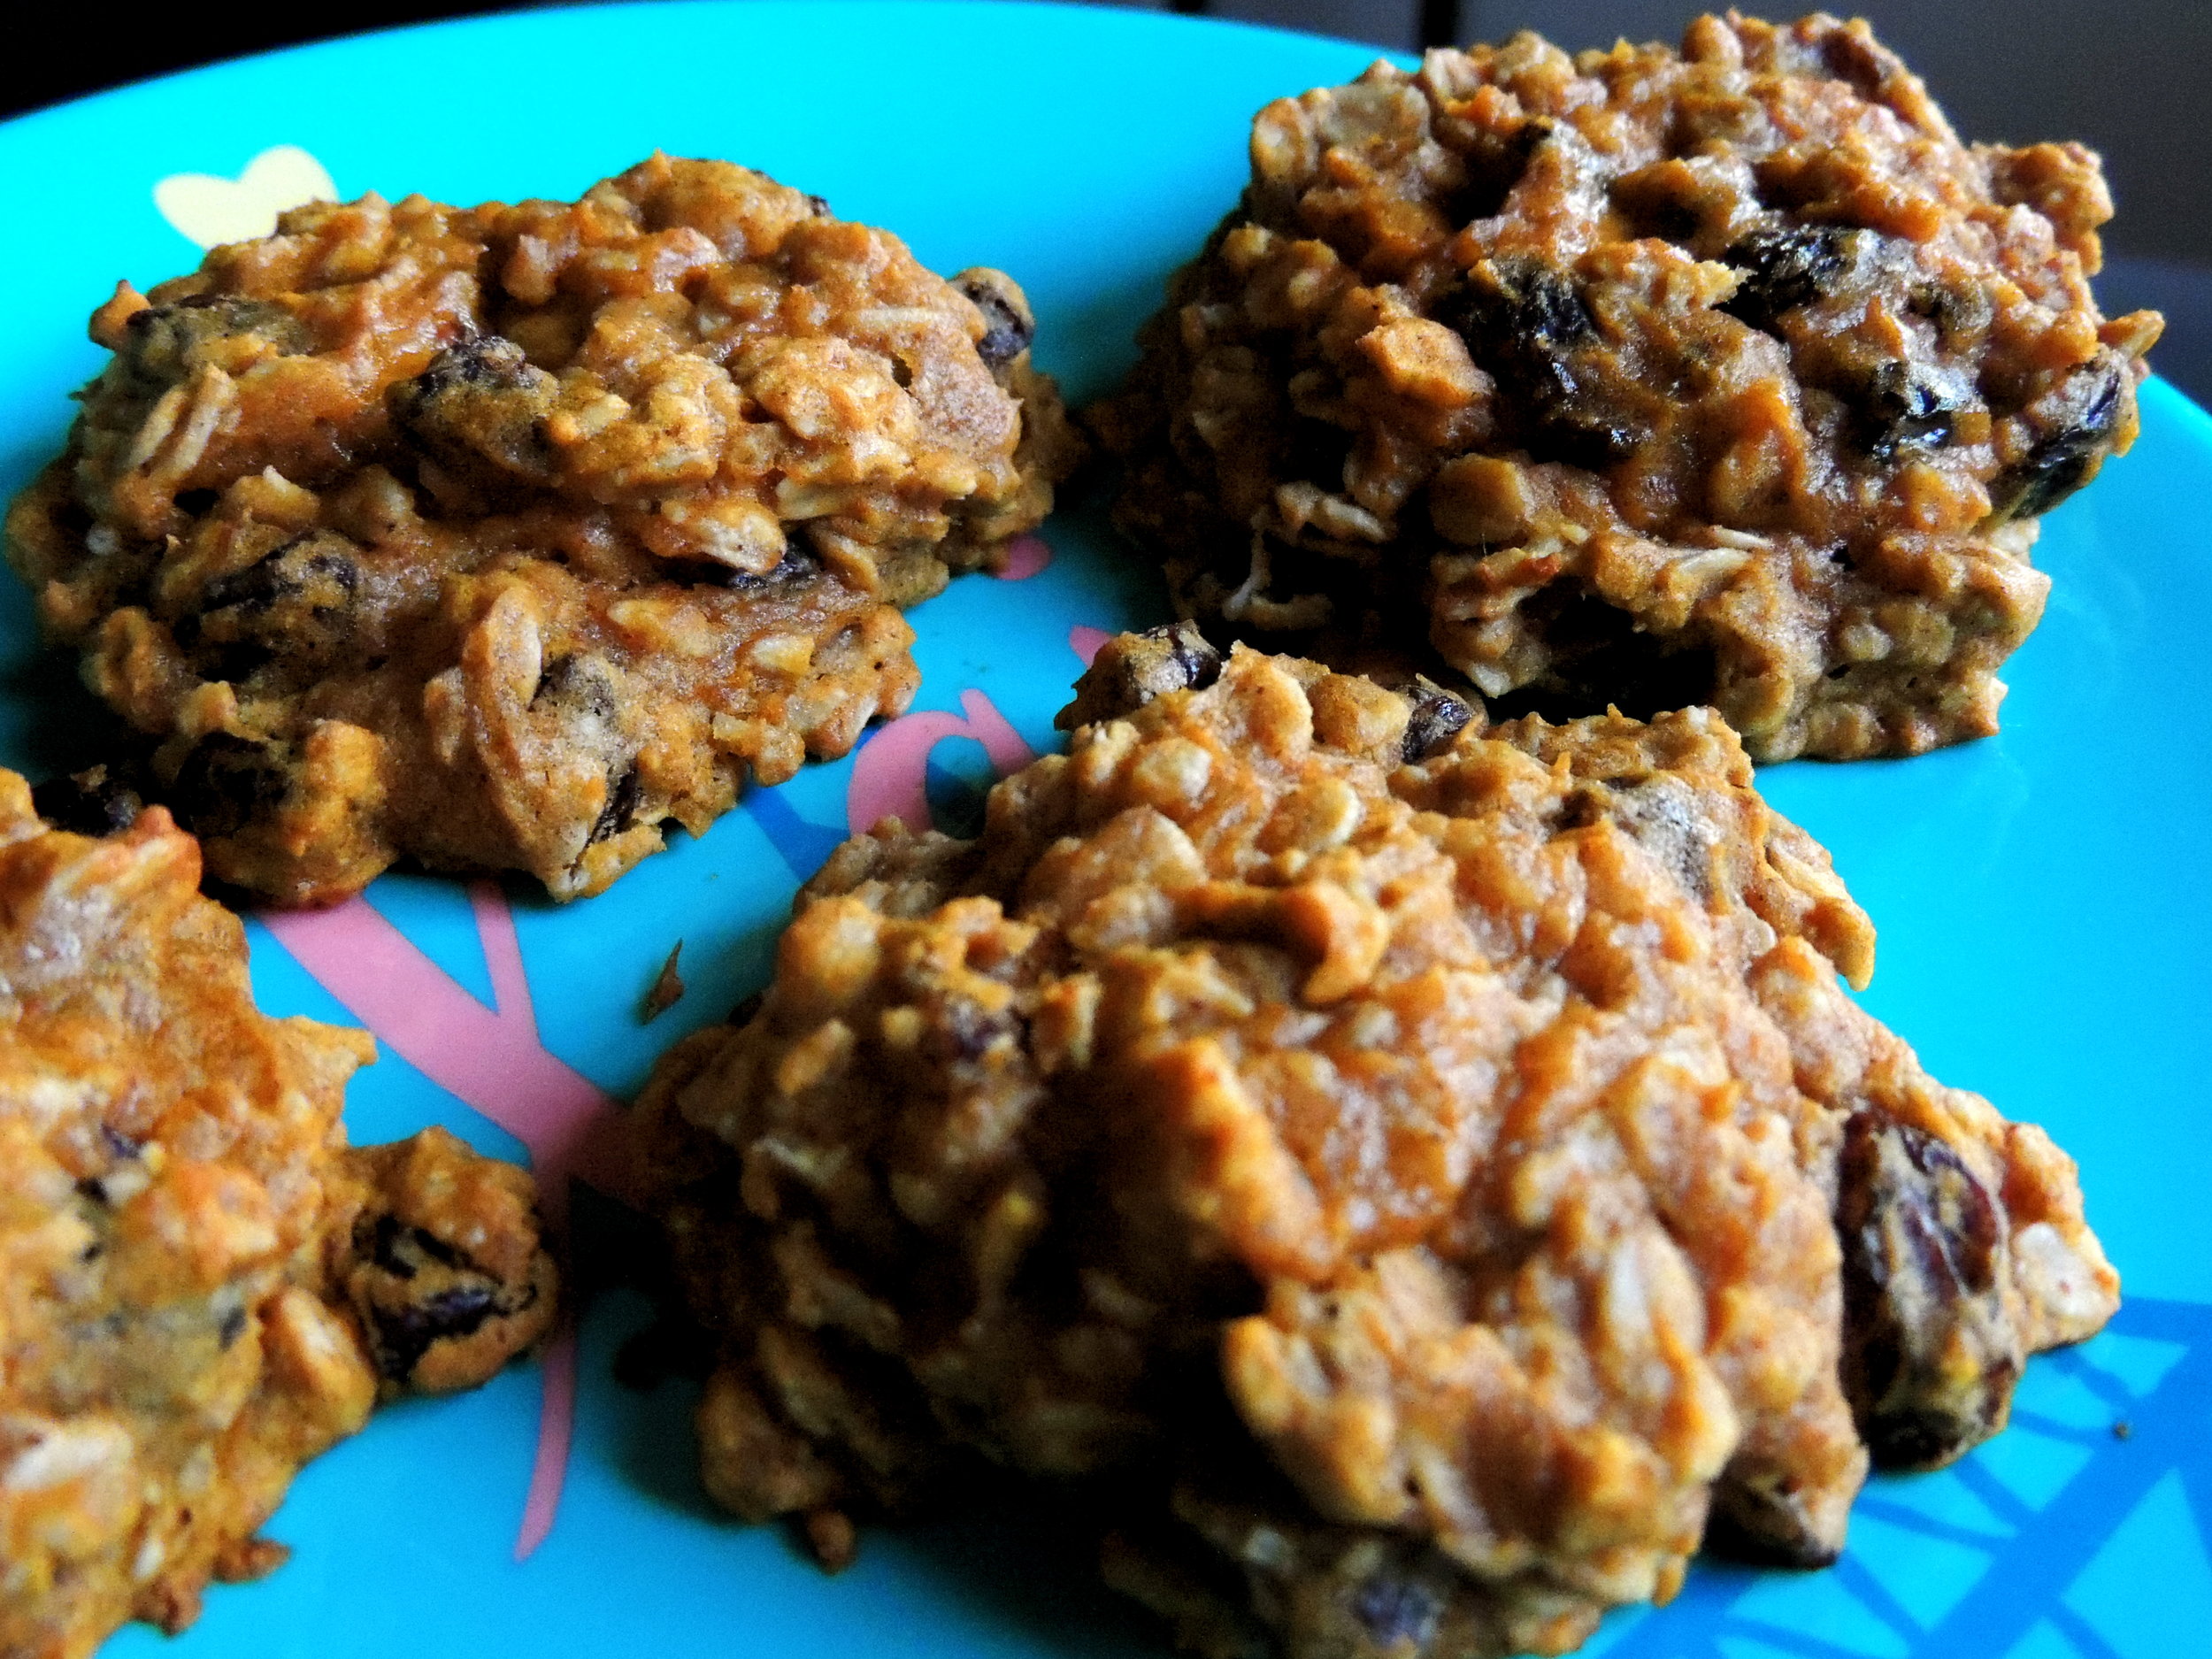
 Since it's kind of World Nutella Week (but when is it NOT Nutella week, am I right?) I decided to make cookies for my work chums (aka recipe testers) using this heavenly hazelnut spread as my anchor. The test? Salted Nutella Oatmeal Cookies.
 Testing a recipe is kind of scary, isn't it? You honestly never really know how it's going to go until those cookies (or whatever you're baking) have are done. You could get the timing wrong, you could add too much flour and as a result they're too dry, you could have been heavy-handed with the vanilla, killing it. Tons of things could go wrong, and yet, tons of things could also go right. Nothing ventured, nothing gained and all that.
When I first started baking (that is, when I finally started making things that were actually edible, and couldn't double as door stops and paper weights...) I thought that my food heroes spent hours in the kitchen, taking different flours together and mixing it with ingredients. Kind of like a mad scientist with those really long rubber gloves, cooking chemicals on burners in their labs. But now, after lots of time watching the greats I realized: all the best recipes are based on the classics. For instance, the classic rice crispy treat recipe on the back of the cereal box. Great bakers take that recipe as the base and say: what makes this better? For one, brown butter. A great baker is one who takes a recipe, tries it, then improves upon it because at the end of the day, it's about making something taste out--of-this-world. The recipe I based these cookies off of was for a classic oatmeal raisin cookie.
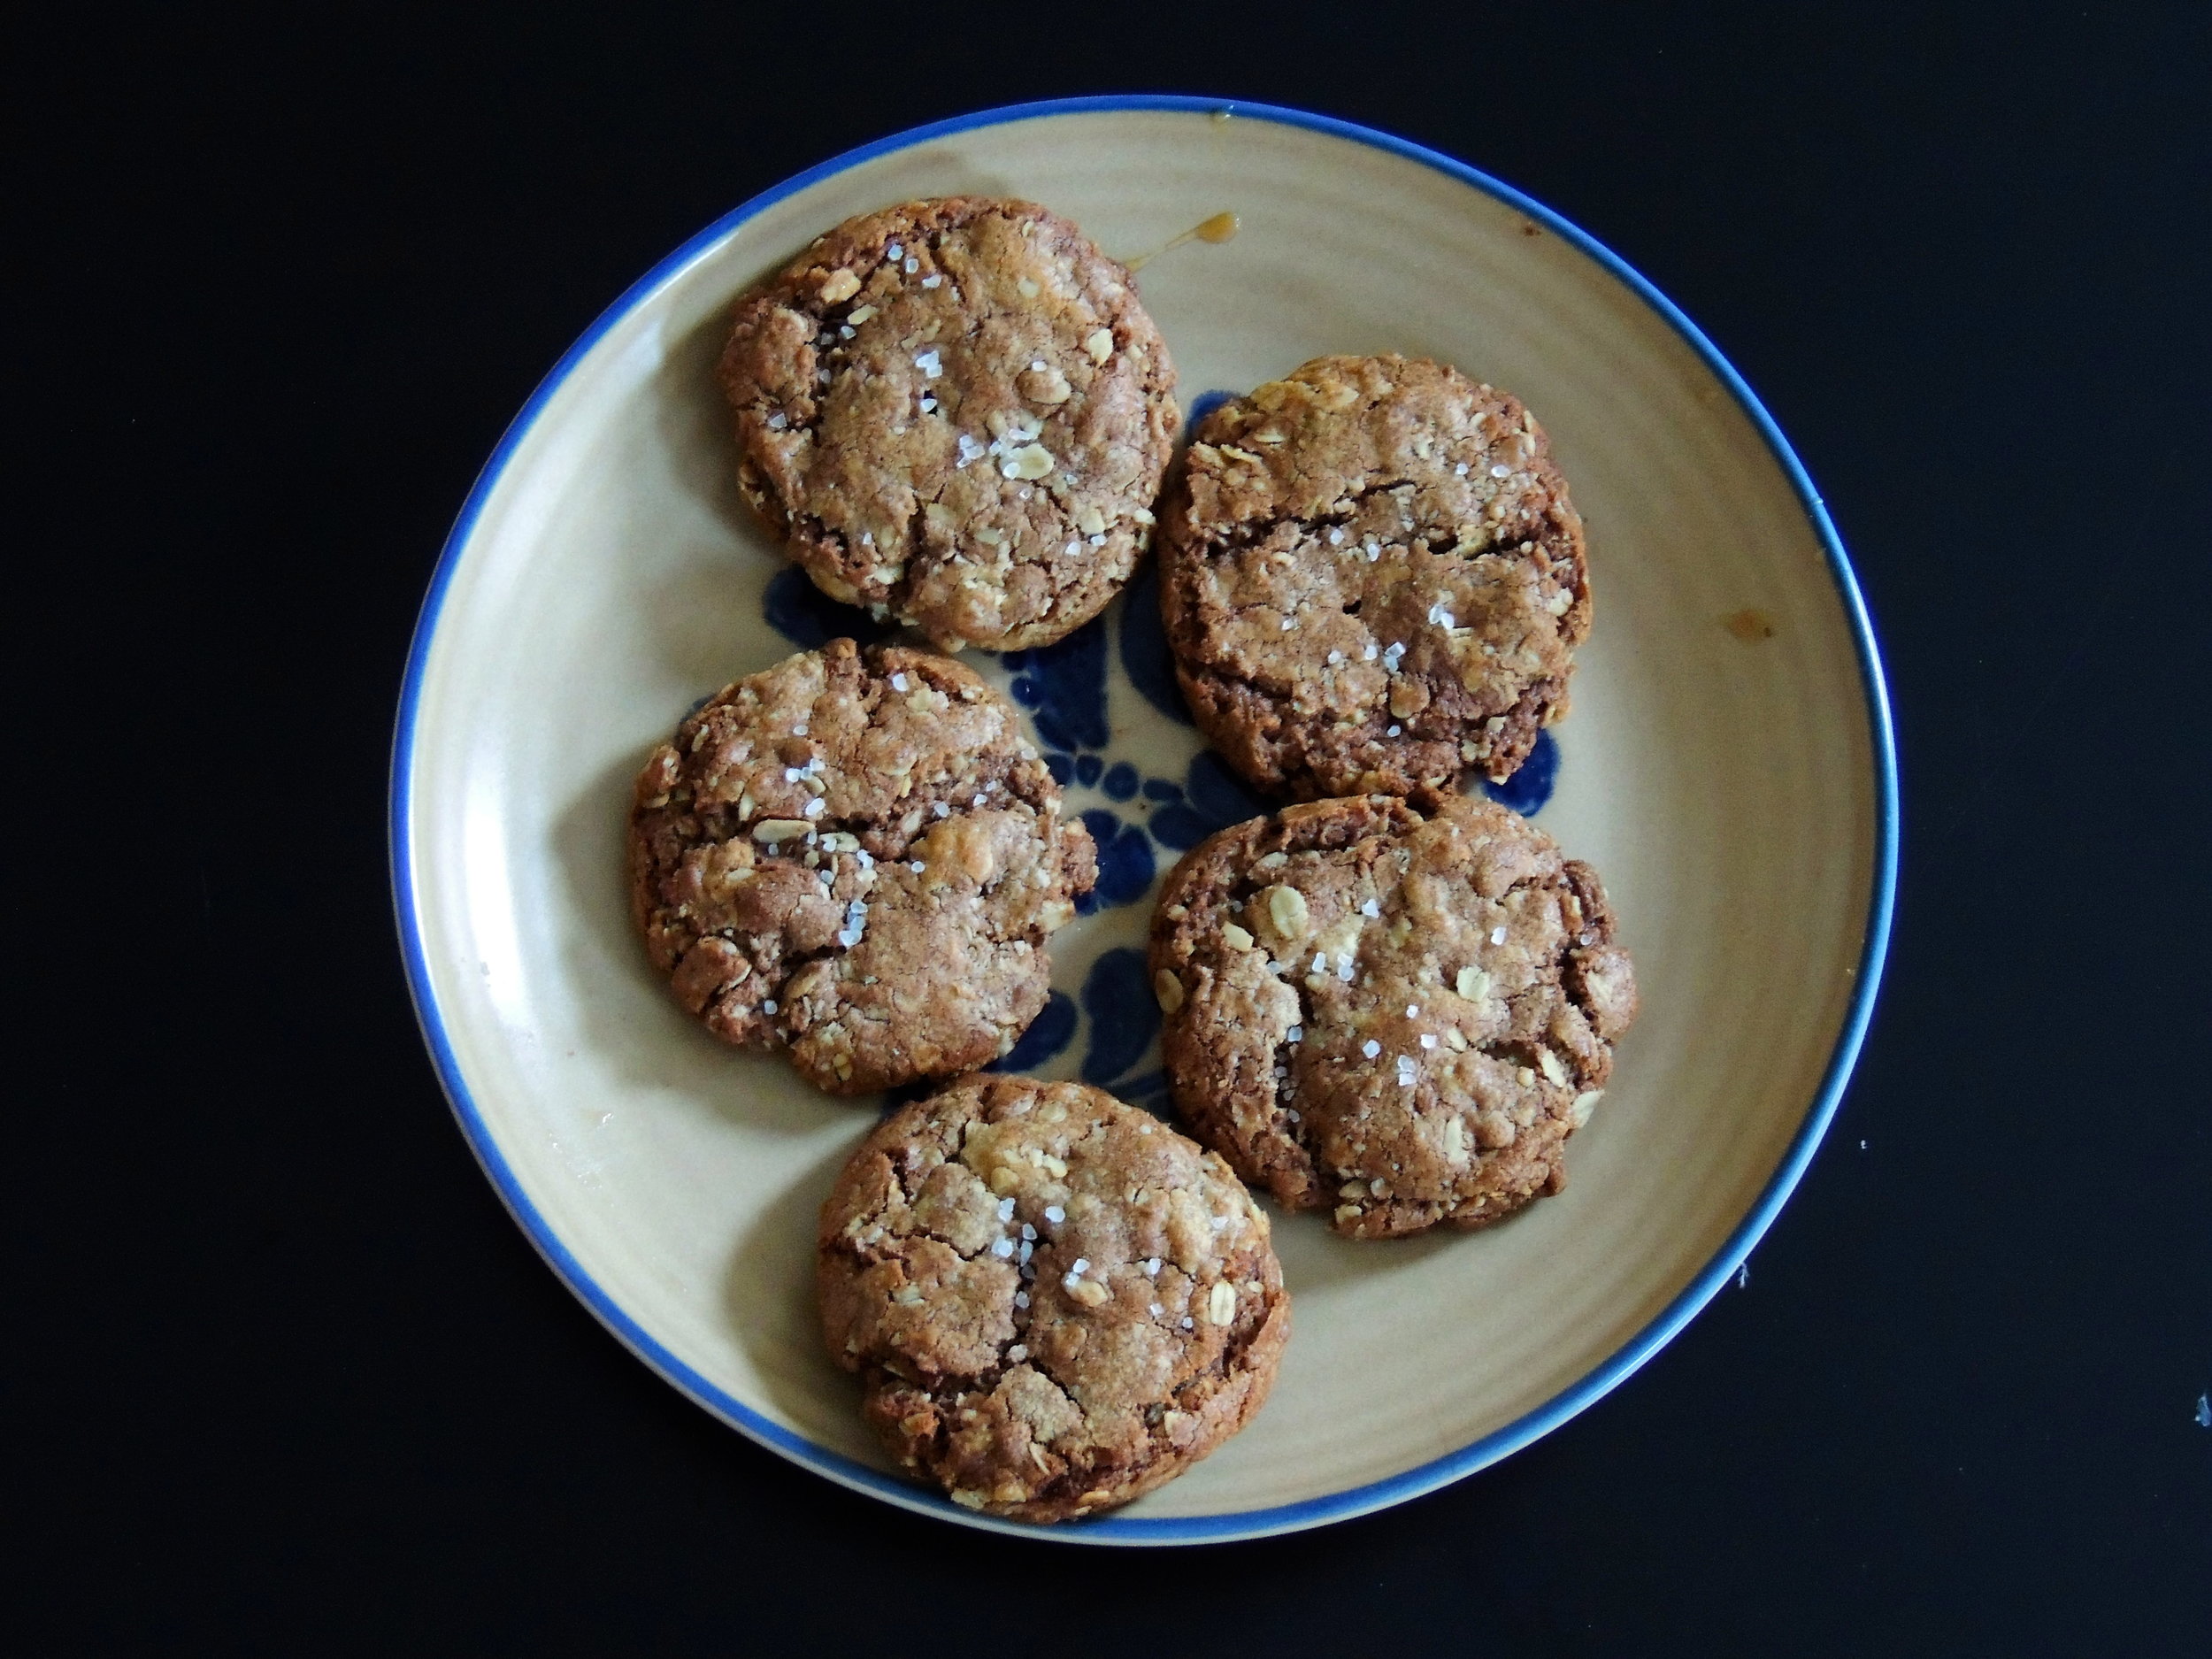
I should be honest: I may or may not have just wanted to buy a tub of nutella so that I could eat it by the spoonfuls in my kitchen...which I did. Twice. But after that, I used about a cup worth of it to make these cookies...then scooped out the remainder of the jar with my finger. No nutella was wasted in the testing of this recipe.
 Have I ever mentioned that sea salt is my favorite ingredient? Put it on some dark, dark chocolate with caramel, and I'll marry you. (No, I won't.) It was the perfect topping for cookies that are extra sweet. Not only is it a great contrast, but it also brings out the flavor of the nutella even more. It's like magic. Delicious, salty magic. I would also like to note that no matter how much you love sea salt, do not let yourself get carried away. I was so excited once that sea salt had taken my dark chocolate oatmeal cookies to the next level, that I pinched a bunch with my fingers and threw it in my mouth. That was a terrible decision. Learn from my mistakes.
Tomorrow my dear work chums will be my taste testers. After some workshopping, these babies will be up on the blog.
Happy friday!! Eat some nutella today. (by the spoonful. It's the weekend, who cares?)
P.S. This is my 100th post. I can't believe it.

 People of Earth: I am here to tell you that there is life beyond Kraft Macaroni and Cheese.
That being said, sometimes it's just more comforting (and less time consuming) to throw a pot of classic Kraft on the stove with whole milk and a little extra cheddar, but for the sake of this post, we're going to go to the next level.
People of Earth: I am here to tell you that there is life beyond Kraft Macaroni and Cheese.
That being said, sometimes it's just more comforting (and less time consuming) to throw a pot of classic Kraft on the stove with whole milk and a little extra cheddar, but for the sake of this post, we're going to go to the next level.

What sets this mac and cheese apart in one thing: Béchamel Sauce. Just four ingredients: flour, butter, milk, and salt. And it absolutely makes all the difference in the world. What it does, is add a bit of depth to the cheesiness. It's smooth, creamy, and, mixed with the cheese, the shining light in this classic dish. But keep in mind: you have to do a bit of multi-tasking to make this sauce. While the butter is melting, you have to watch the milk which should bubble, but not boil. And the very second that the butter is melted, you have to add the flour and whisk with all your might. Pay attention while you make it, and the reward will be huge.
 Look how rich and creamy that is! The only thing keeping me from diving face first into this pot was my fear of severe burns. That's the only thing.
 The wonderful thing about having a recipe for basic mac and cheese is that you can add in your favorite ingredients. For this, I decided on tons of spinach and turkey bacon. The only way you'll get me to eat my vegetables is with cheese (Is that the Midwesterner in me? I'm not sure.), so bring on the spinach...so long as there's a cup of cheddar chasing it into the pot.
To me, an essential part of your basic mac and cheese is that satisfying crunch. Toasted panko is perfect for this. About 1/2 sprinkled on top is just enough to add a little extra texture. Try it. You'll like it.

Last but not least, don't forget to pop this perfection in the oven for ten minutes. I'm getting hungry just thinking about it. Is it time for dinner yet?
Grown-Up Mac and Cheese with Spinach and Turkey Bacon
Ingredients:
Béchamel Sauce:
Bread Crumb Topping:
Mac and Cheese:
Béchamel Sauce Directions:
Heat the milk in a pot over medium heat until it just starts to bubble, but is not boiling, 3 to 4 minutes. Remove from heat. (Tip: while the milk is heating, get your flour ready!)
Heat the butter over medium heat in a separate, heavy-bottomed pot. When the butter has just melted, add the flour and whisk constantly until the mixture turns light brown, about 3 minutes. Remove from heat.
Slowly pour the warm milk, about 1 cup at a time, into the butter-flour mixture, whisking constantly. It will get very thick when you first add the milk, and thinner as you slowly pour in the entire 3 cups.
Once all the milk has been added, set the pot back over medium-high heat, and continue to whisk constantly. In the next 2 to 3 minutes the sauce should come together and become silky and thick. Use the spoon test to make sure it’s ready. To do this, dip a metal spoon into the sauce-if the sauce coats the spoon and doesn’t slide off like milk, you’ll know it’s ready. You should be able to run your finger along the spoon and have the impression remain. Add the salt.
The Mac Sauce is ready to use immediately and does not need to cool.
Toasting the Bread Crumbs
Preheat the oven to 400 degrees F
Place the bread crumbs on a baking sheet and set in the oven for 5 minutes, or until the crumbs have turned a golden brown. Set aside.
Preparing the Macaroni and Cheese:
Preheat the oven to 400 degrees F
Cook the pasta according to box instructions. Drain, rinse the pasta with cold water, then drain again.
While your pasta is cooking, now’s a good time to cook your bacon and spinach. What I like to do is: start cooking the bacon first. Once almost cooked through, I add the spinach to the pan. Tip: wring out your spinach as best as you can after rinsing, and before adding to the pan of bacon. It’ll sizzle.
Add the sauce and both cheeses to a large, heavy-bottomed pot and cook over medium heat. Stir until the cheese is barely melted, about 3 minutes. Slowly add the cooked pasta, stir, and continue cooking while stirring continuously until the pasta is hot and steaming, another 5 minutes. Add in the bacon and spinach, and stir. After fully incorporated, remove from heat.
Spoon the mac and cheese into an oven-safe dish, making sure it’s evenly spread. Sprinkle the panko crumbs on top.
Bake in the oven for 10-15 minutes until it starts bubbling on the edges.
Remove from oven, and dig in. You earned it!
Dish serves 4.
SOURCE: Very loosely adapted from the Mac + Cheese Cookbook: 50 Simple Recipes from Homeroom, America's Favorite Mac and Cheese Restaurant
Is there such a thing as too much cheese? Answer: No, absolutely not.
Joy the Baker has done a series of baking posts, and this is by far the best, so I just had to share! If you're like me, you started baking sort of blindly. I didn't know the secrets, I didn't have nearly enough mixing bowls, and I thought I was the only baker in the world with the most inadequate kitchen. But every kitchen has its limitations, unless you're a professional bakery (but sometimes limitations apply there as well!). What makes a good baker is recognizing those limitations, and working around them to succeed.
Check out the full post here.
Happy baking!
First, I have to apologize for my brief absence. The second I was seated next to a coughing, sneezing, sniffling gentleman on my plane ride back to Boston from Wisconsin, I knew that I was a goner. It took maybe an hour or two for the sickness to sink in, and I was out of commission for a full week. I'm just now starting to feel like myself, and if I ever see my row-mate again, I'm going to cough all over him.
Being sick for ages and ages limited my activity, and the one thing that I wanted the most while I was sick, was the one thing I was too exhausted to make: a cookie. I have a sweet tooth that cannot be denied, and because I refuse to buy anything from bakeries that I can't make myself, I was fresh out of luck. But now, now that I'm feeling better, I set out to complete my mission. And just in time as well, because my co-worker and I decided to throw an impromptu cookie party for the office! Fair, it'll just be us bringing cookies, but there will be cookies, and that's really all that matters.
If there's anything you know about me thus far, it's that I collect a lot of recipes, but I hardly ever do anything with them but stick them in my "Recipes" folder. I've got so many that my fingers start to get tired after a while from scrolling through. But today, as I searched and searched for a recipe that was simple enough to make, but still totally impressive, there was one special cookie that screamed out to me: Oatmeal Chocolate Chip S'Mores Cookies. YEAH, S'MORE. I've tasted a s'mores cupcake, but never a s'mores cookie. And today was the day.
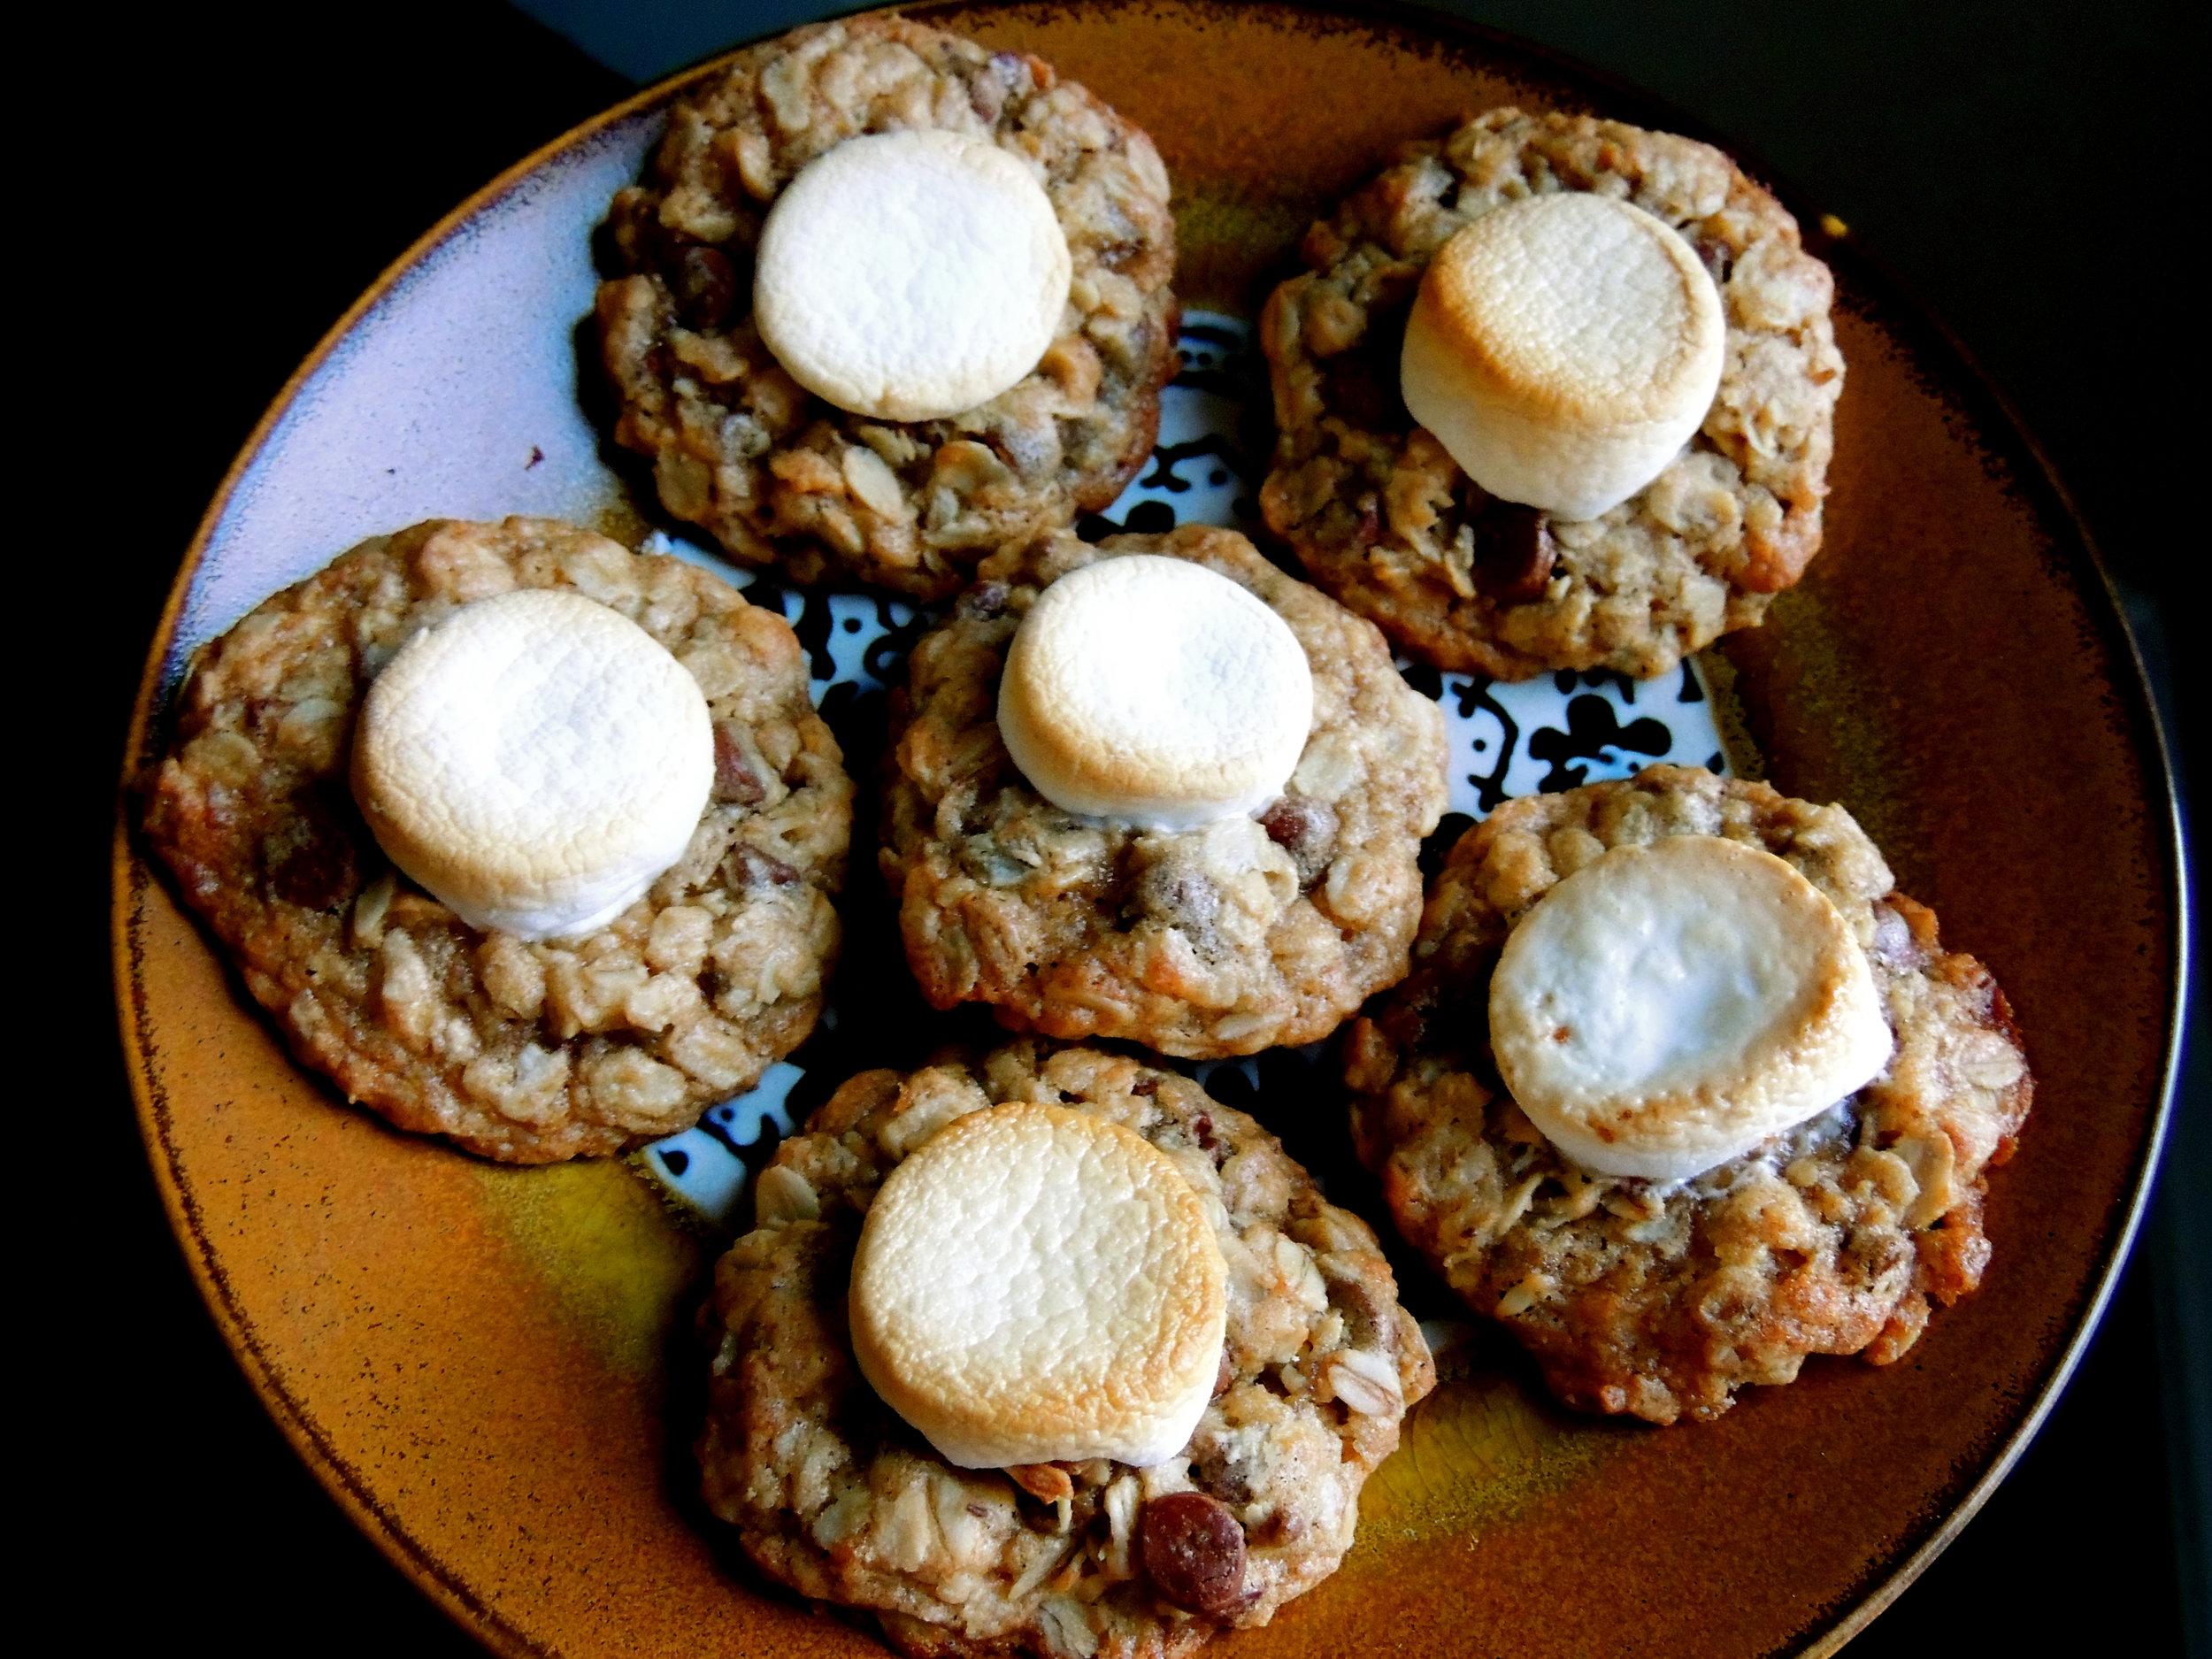
And for real, I can't believe how simple these cookies were to make, but also how INSANE THEY TASTED. There are few things better in this world than a toasted marshmallow, and I did it using the broiler on my oven. I tell you, my mind was blown. And I'm going to blow the minds of all my work chums tomorrow, mark my words.
Oatmeal Chocolate Chip S'Mores Cookies: totally into it.
What You'll Need:
Preheat the oven to 325°F. Prepare a baking sheet with parchment paper; set aside.
Using a stand mixer fi tted with the beater attachment, cream the butter and sugars at medium-low speed until well combined. Add in the eggs, one at a time, beating well after each addition. Add in the vanilla; combine well.
In a separate bowl, combine the fl our, baking soda, salt, and graham cracker crumbs.
Add the dry ingredients to the wet batter. Mix on low until just combined. Stir in the oats and chocolate chips.
Scoop rounded balls of batter onto the prepared sheets. The batter will spread, so be sure to leave ample space between. Bake for 13–15 minutes, or until the edges are very lightly browned.
Remove from the oven, and immediately top with a slice of marshmallow. Allow to cool on baking sheets. Before serving, place the pan under the oven broiler or use a kitchen torch to toast the marshmallows.
SOURCE: The Cake Blog
The cookies are safely tucked in their tin foil, and ready for a trip to the office tomorrow, and I'm snuggled in my blankets becaause it is positively freezing. And I'm totally slacking on my holiday movie-viewing, so if you'll excuse me, I've got a date with The Santa Clause before bed.
HAPPY BAKING!!
 Thanksgiving is all about tradition, whether it be old or new. And while I was planning on starting a new tradition at my house (one that included delicious pumpkin pie because there is literally nothing better in this entire world), I was overruled by a standing pie tradition: Southern-style Pecan Pie.
Apparently it's been a staple at our table since I was born, but I never noticed because my grandmothers have been making stellar sweet potato pies, and caramel pies with homemade icings for as long as I can remember. But this year, I spent Thanksgiving with just my immediate family in Wisconsin, and there could only be room for one dessert. And while I was hoping that dessert would be delicious, fall-appropriate pumpkin pie, a dad that only periodically ventured into the kitchen (probably to stay out of the crossfire of my mother and I both being in the kitchen), had other plans. But it's fine, because when you love to bake, it doesn't always really matter what it is.
 And anyway, I was just happy that I:
1) Finally got to contribute to the Thanksgiving Meal
2) Got to practice my pie-making skills!
Fact: a homemade pie crust always tastes better. It just does. Store-bought pie crusts are okay, but there is just no comparison when you taste the love (and butter!!!) that goes into a crust made especially for that pie, completely from scratch. And I have to say: for this being only the third time that I've made the pie crust, things went pretty smoothly.
Joy the Baker first taught me how to make a pie crust (and my first pie). Instead of rolling out the dough, she uses a "press-in" technique where she presses the dough into the pie plate. It's incredibly easy, and eliminates a few steps. But in the rest of my pie cookbooks, it's essential that you roll out the dough, then use the rolling pin as a tool to get it into the pie plate. And you know, the people on Food Network always make it look so insanely easy. Like, the dough always perfectly rolls up onto the rolling pin, and they simply and gracefully place the delicate crust into the plate. Well, I'm here to tell you that it's not that easy, I dropped the pie crust into the plate very ungracefully, and I actually had to flip a section of it that refused to stay on its side of the plate. But I made it without having to take it out and re-roll it, and all was well in the kitchen.
 This time around, I even got to take a stab at decorating the crust, something I hadn't tried before. And I loved it! Sure, the balls were all different sizes, and I left fingerprints in the dough, but isn't that what makes homemade crusts charming? Store-bought crusts lack a certain something, and I think that something is charm and character. Maybe even a little personality. That pie crust is totally unique, and I never, ever, will buy a store-bought crust again.
Okay, apparently this post has turned into a love letter for homemade pie crusts...sorry, I'm not sorry.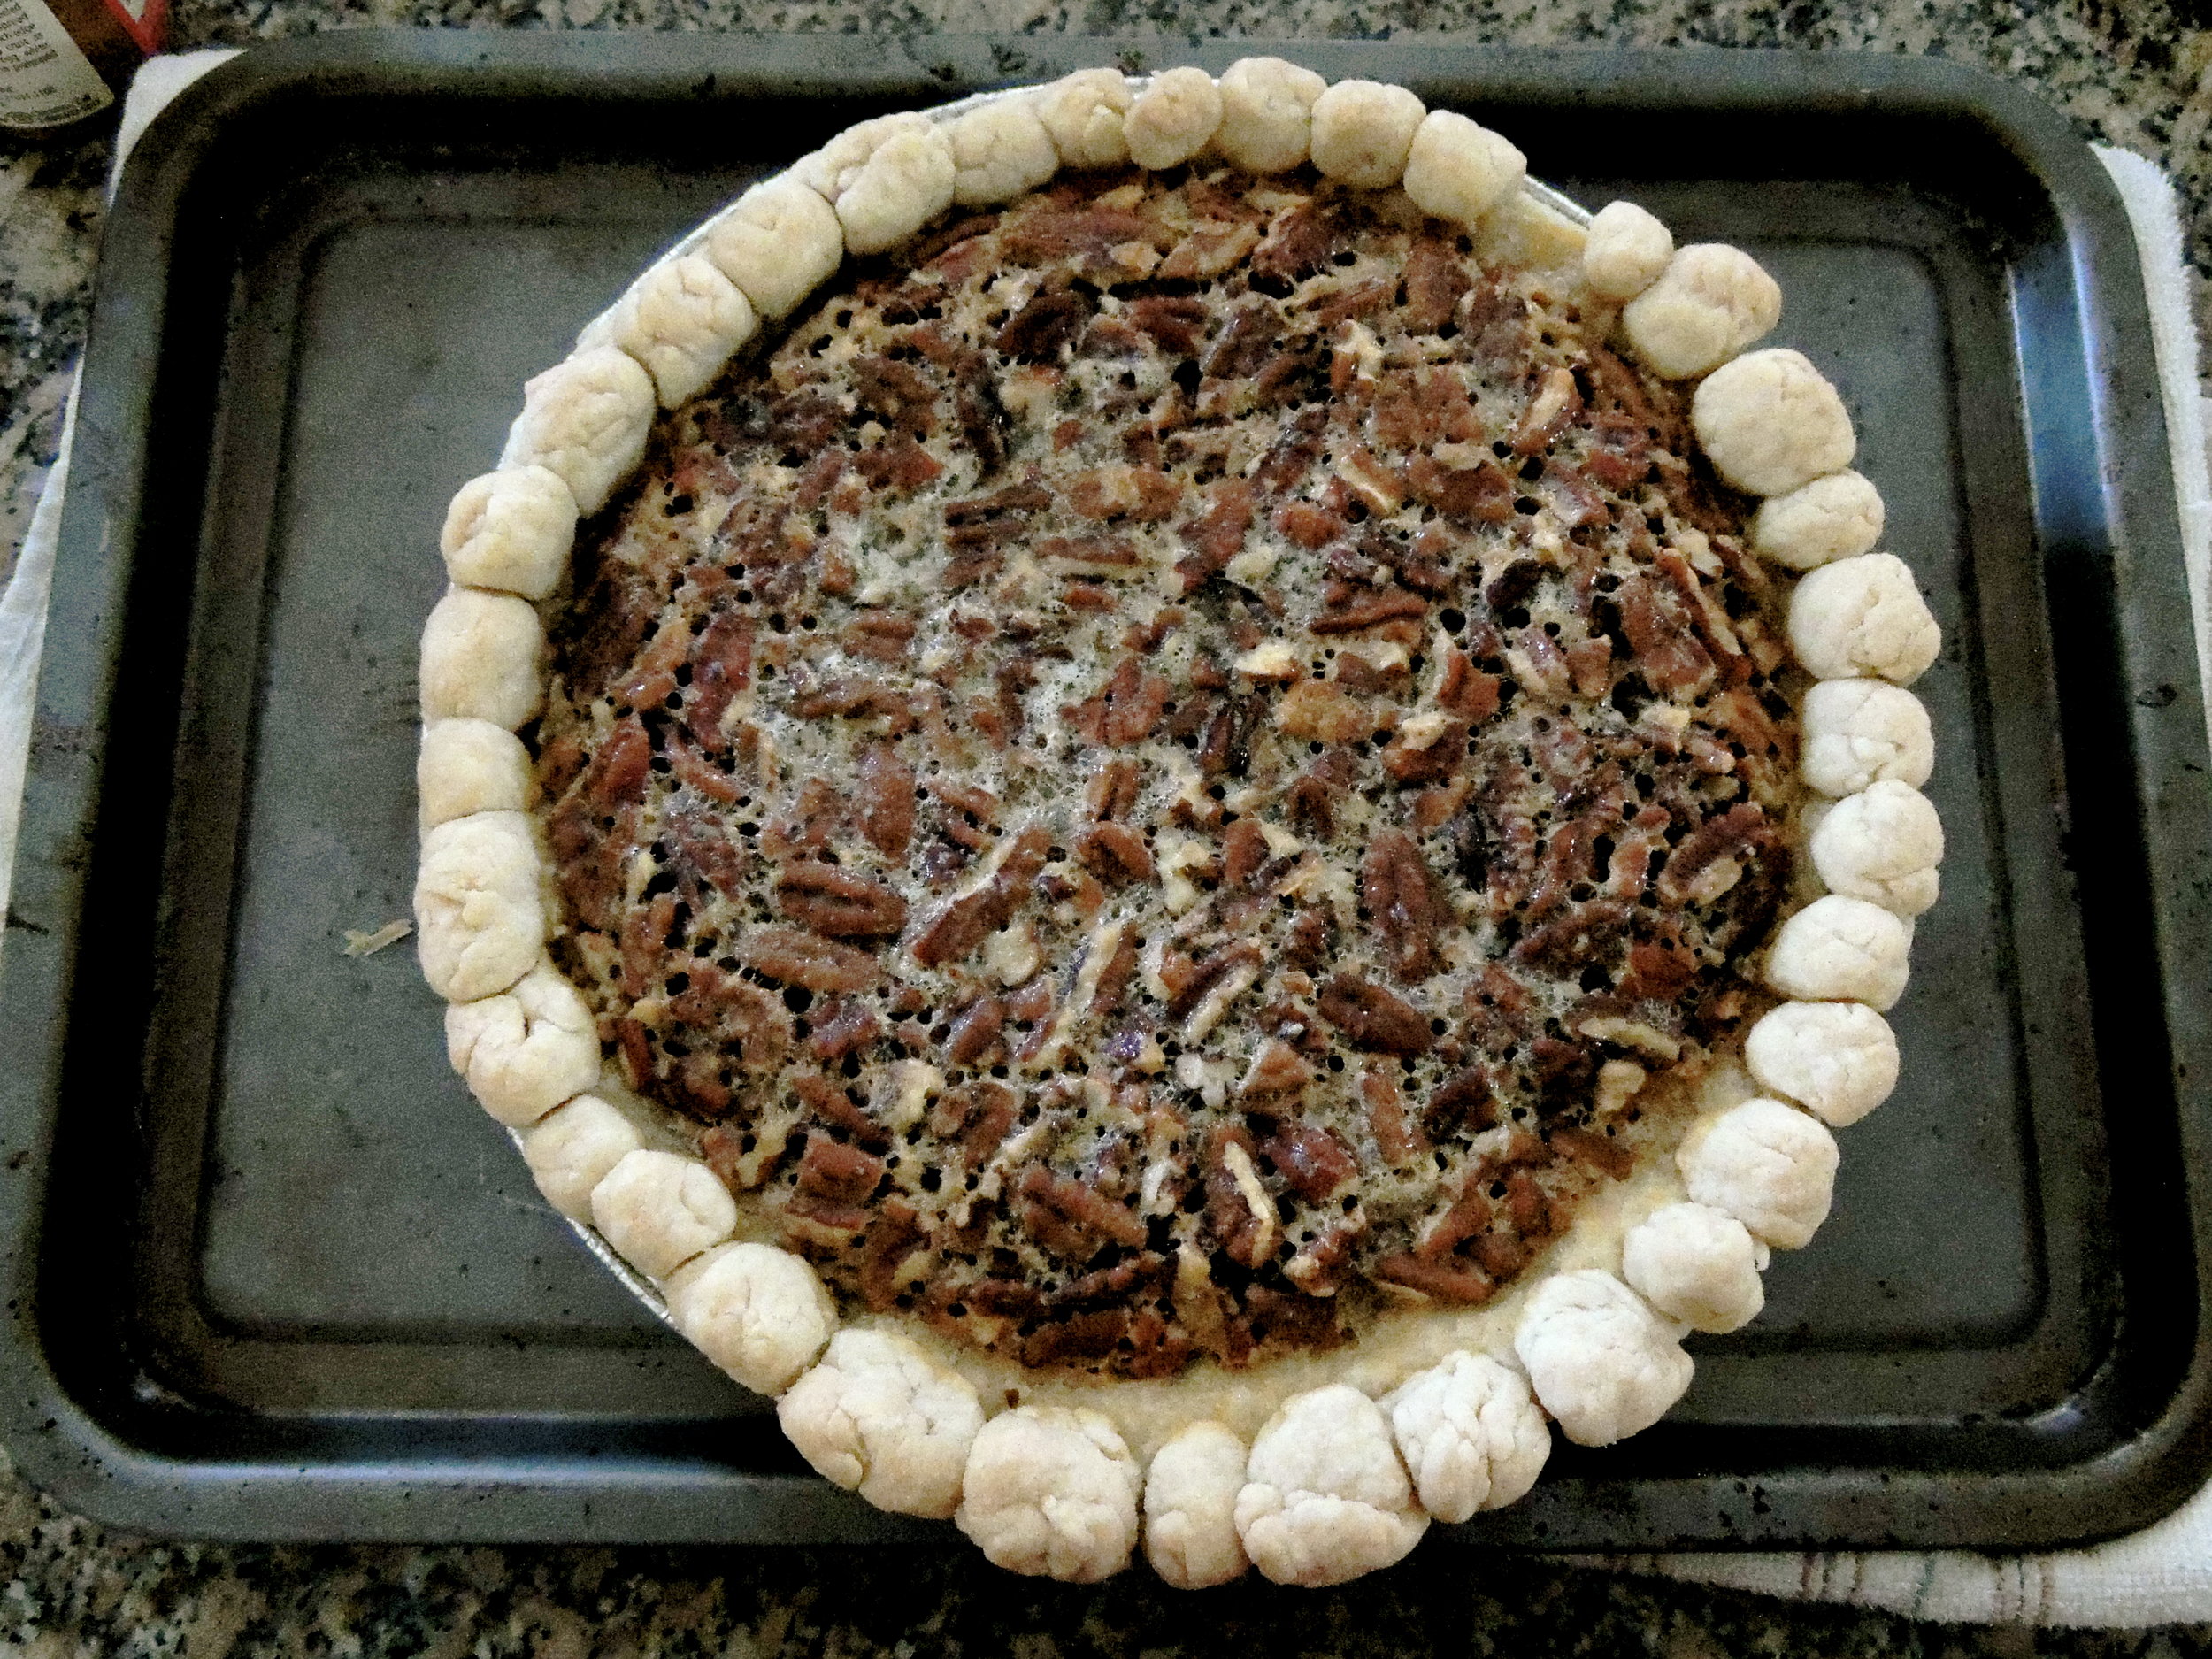
Pecan Pie is actually really easy to make. You just mix the butter and the sugar together, then literally throw the rest of the ingredients in the mixing bowl, and you're done.
And this pie was a big hit, if I do say so myself.
PECAN PIE:
What You'll Need:
-Preheat oven to 350 degrees F
-Cream sugar and butter
-Add remaining ingredients
-Bake for 40 minutes
Each recipe serves 6-8 people
SOURCE: Recipes from Miss Daisy's
I hope you all had a fantastic holiday, and that you're recovering from your food comas well!!
 I love granola bars. Love, love, love them. You can find them in my lunch bag as my 3:00 snack, my purse (to stave off the hungry and angry "Bear," that I become when I go shopping), and sometimes as a cereal substitute when I've run out of Cheerios. But stocking up on granola bars can get expensive (unless you're an Extreme Couponer. Seriously, I've been marathoning this show on Netflix, and I CANNOT get over how much these people save on their shopping trips. It's very tempting, but I have neither the time, nor the basement full of floor-to-ceiling shelving units it takes.). And while I'll never quit buying my Nature Valley bars cold turkey, I thought it best to at least give my wallet a rest, and learn to make them on my own for a while.
Enter this recipe: Pumpkin Granola Bars. Maybe I chose this recipe because I can't get enough of Pumpkin...Or maybe it's because I had a can in the fridge with the perfect amount left...Who knows, it's a mystery of life! (It's because I had a can of pumpkin left. Mystery solved.)
I love granola bars. Love, love, love them. You can find them in my lunch bag as my 3:00 snack, my purse (to stave off the hungry and angry "Bear," that I become when I go shopping), and sometimes as a cereal substitute when I've run out of Cheerios. But stocking up on granola bars can get expensive (unless you're an Extreme Couponer. Seriously, I've been marathoning this show on Netflix, and I CANNOT get over how much these people save on their shopping trips. It's very tempting, but I have neither the time, nor the basement full of floor-to-ceiling shelving units it takes.). And while I'll never quit buying my Nature Valley bars cold turkey, I thought it best to at least give my wallet a rest, and learn to make them on my own for a while.
Enter this recipe: Pumpkin Granola Bars. Maybe I chose this recipe because I can't get enough of Pumpkin...Or maybe it's because I had a can in the fridge with the perfect amount left...Who knows, it's a mystery of life! (It's because I had a can of pumpkin left. Mystery solved.)
 About a month back, our grocery store was having a sale on those big bags of Domino Brown sugar that I couldn't pass up. And in the moment, I was too BLINDED BY A GOOD DEAL, to read the label, and picked up two bags of DARK Brown Sugar, instead of LIGHT Brown Sugar. But by the time I set to work on making these granola bars, and realized my mistake, I had neither the strength, nor desire to walk the 2 minutes back over to the grocery store to buy a box. And anyway, I think my local grocery store is starting to see a little too much of me. So, I decided to substitute dark brown sugar instead, and see what happened. Not bad, I gotta say it.
 It was really interesting to learn some of the elements that go into granola bars. I'm not exactly sure what I thought it was that was holding them together, but I didn't realize what a huge part honey plays. It's the glue that binds the whole operation together and without it, you've got mushy, uncooked oatmeal with pieces of fruit in it. Also interesting, this recipe called for 1/4 cup applesauce. It helps keep some of the moisture during baking, and it makes all the difference.
 I liked that this recipe called for white chocolate chips for three reasons:
1. White chocolate chips were on sale today for $0.79
2. I don't think I've ever baked with white chocolate before.
3. I like white chocolate a lot. White Chocolate + Granola Mix= A really great idea!
And while the chocolate chip pieces melt away, their memory, and taste, are not forgotten. They add such a special sweetness to the mixture.
 I could not stop eating this once it was finished. As a result, I don't really have granola "bars" per se, but instead granola "chunks" or granola "weirdly shaped, unevenly sized pieces." No regrets, it's not for sharing. The only person that will be appreciating this first batch is me, and my taste buds are in no way picky when it comes to presentation.
These granola bars are delicious, were easy to make, and now probably a new staple in my pantry. But bakers beware: this granola is addicting, so keep your wit's about you!
Give it a try!
PUMPKIN GRANOLA BARS:
What You'll Need:
To Make:
Preheat oven to 350° F. Line a baking sheet (9x9 is suggested, but I think my sheet is 9x11, and it turned out fine. Use what you have!) with foil allowing for 1 inch to hang on the sides of the pan. Spray foil with Pam, or another non-stick cooking spray, and set aside.
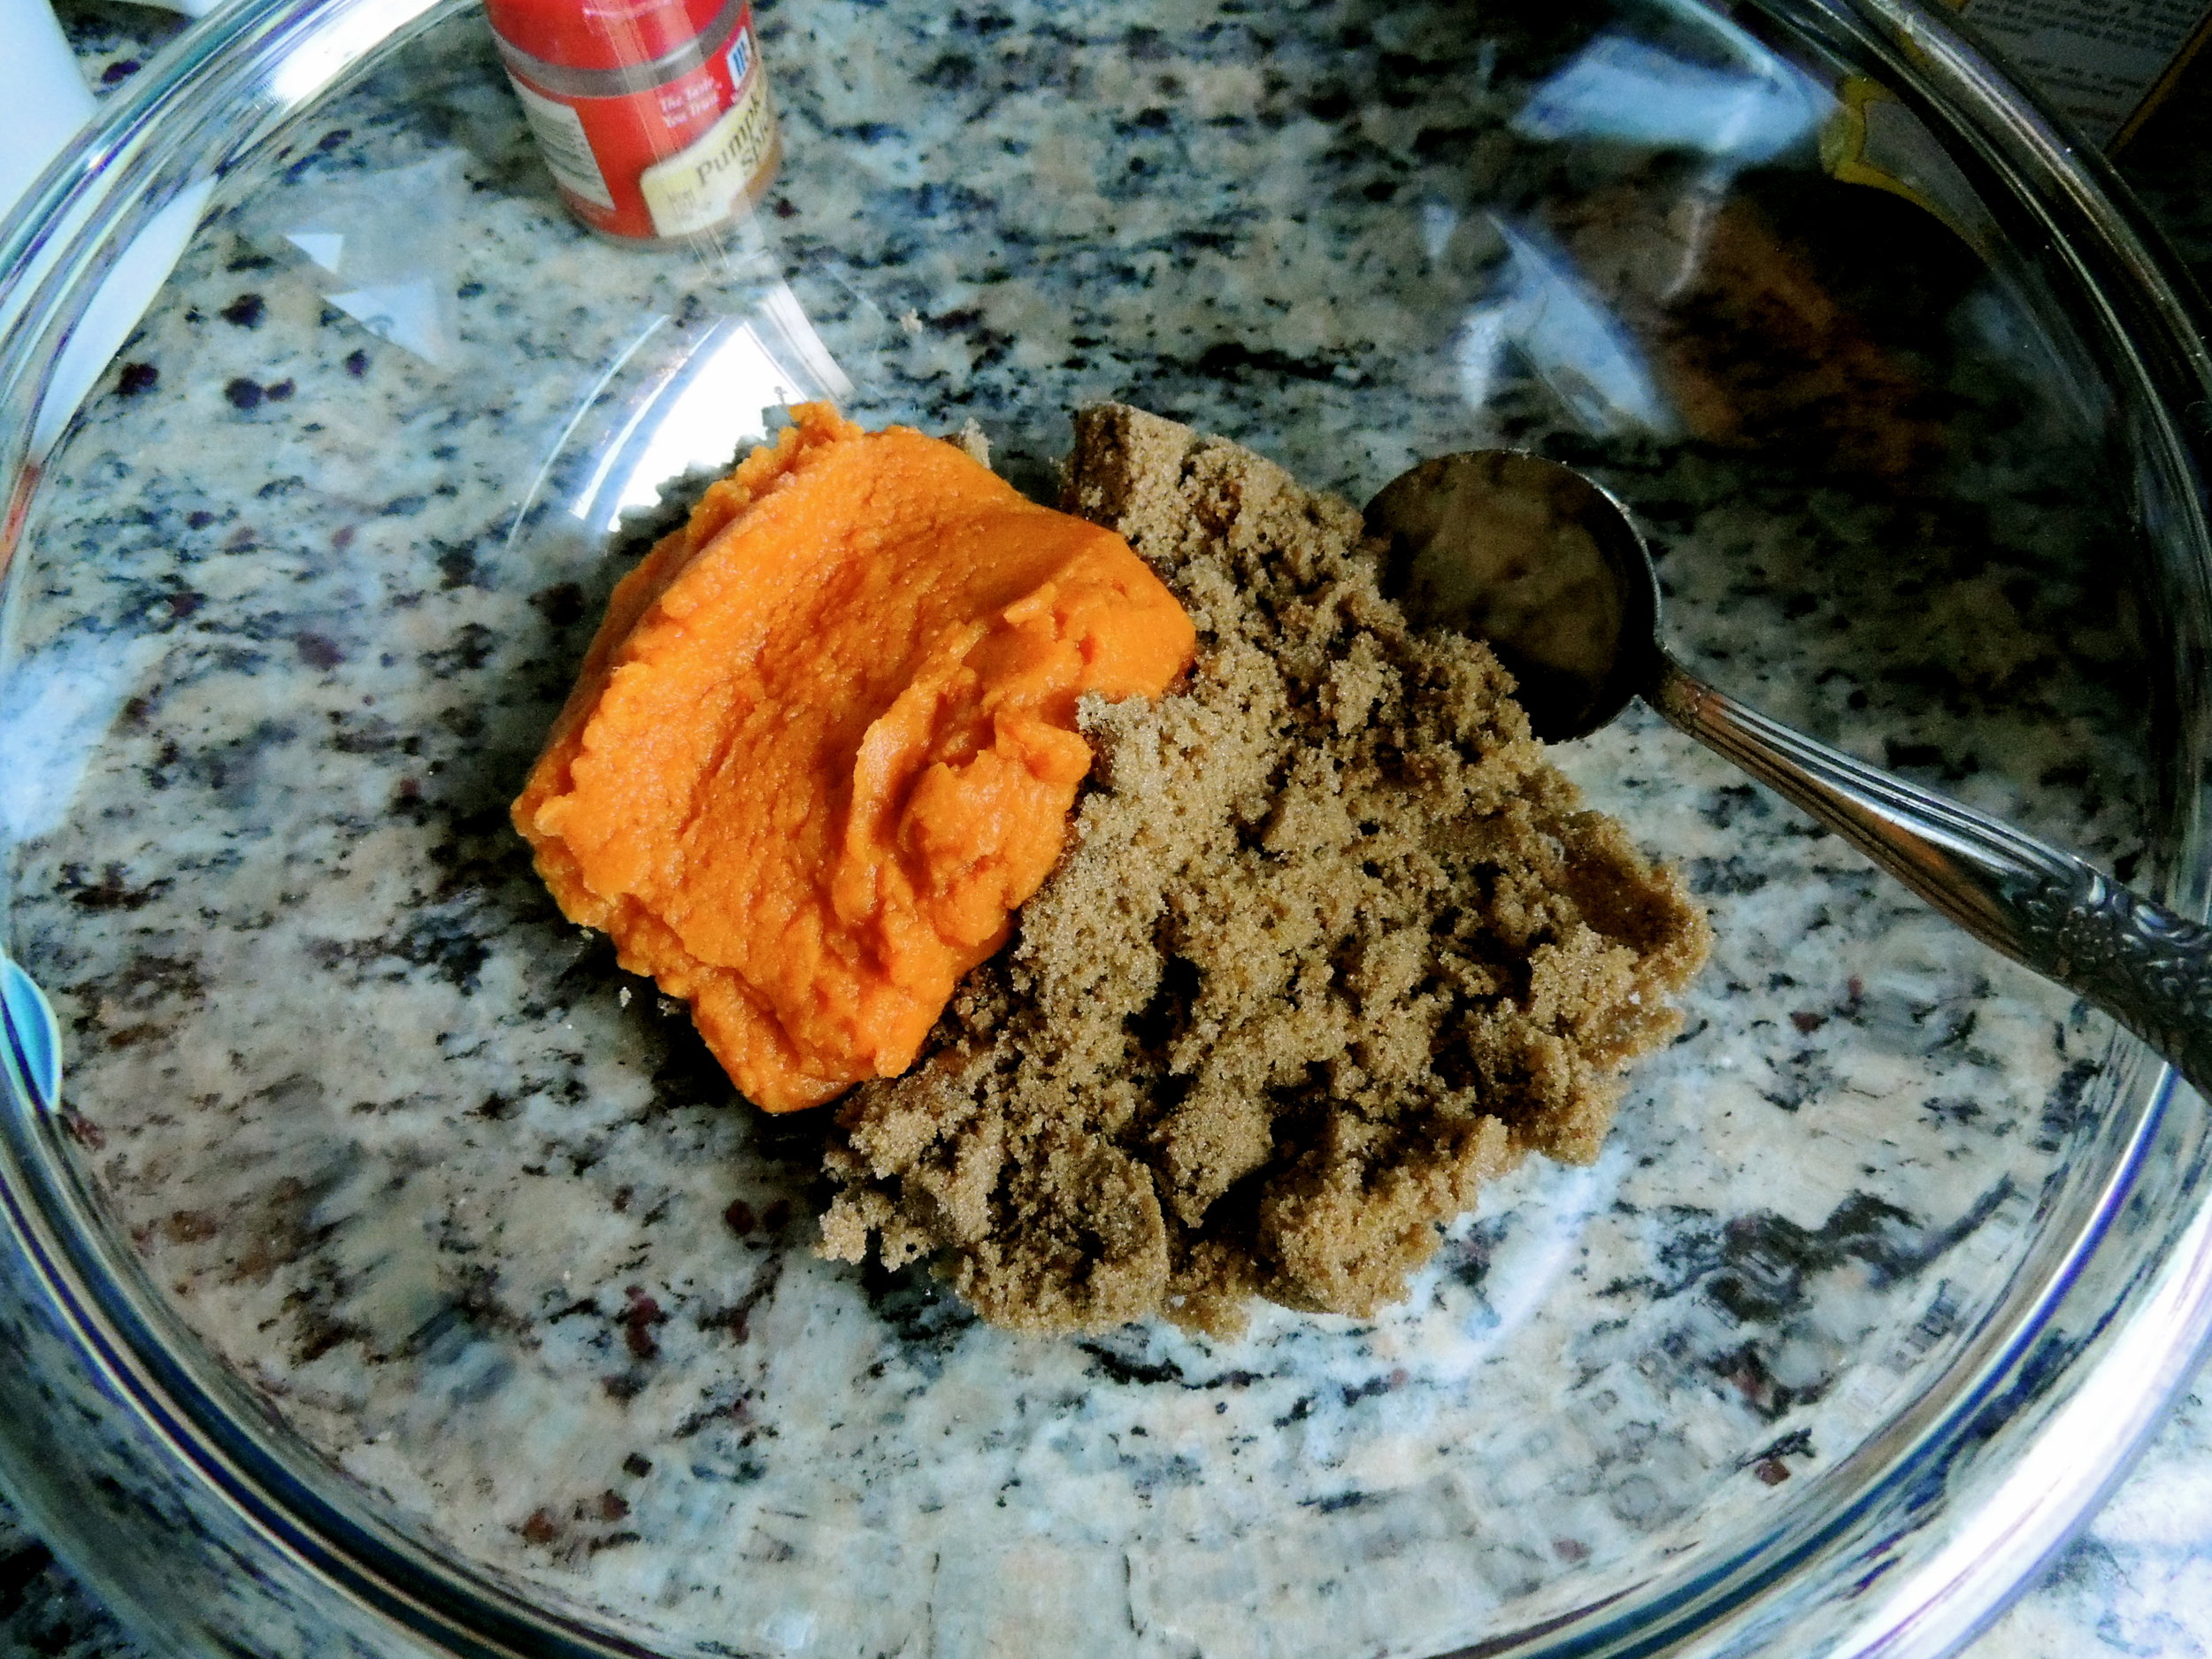
In a large bowl, combine oats, pumpkin pie spice, and salt. Set aside.
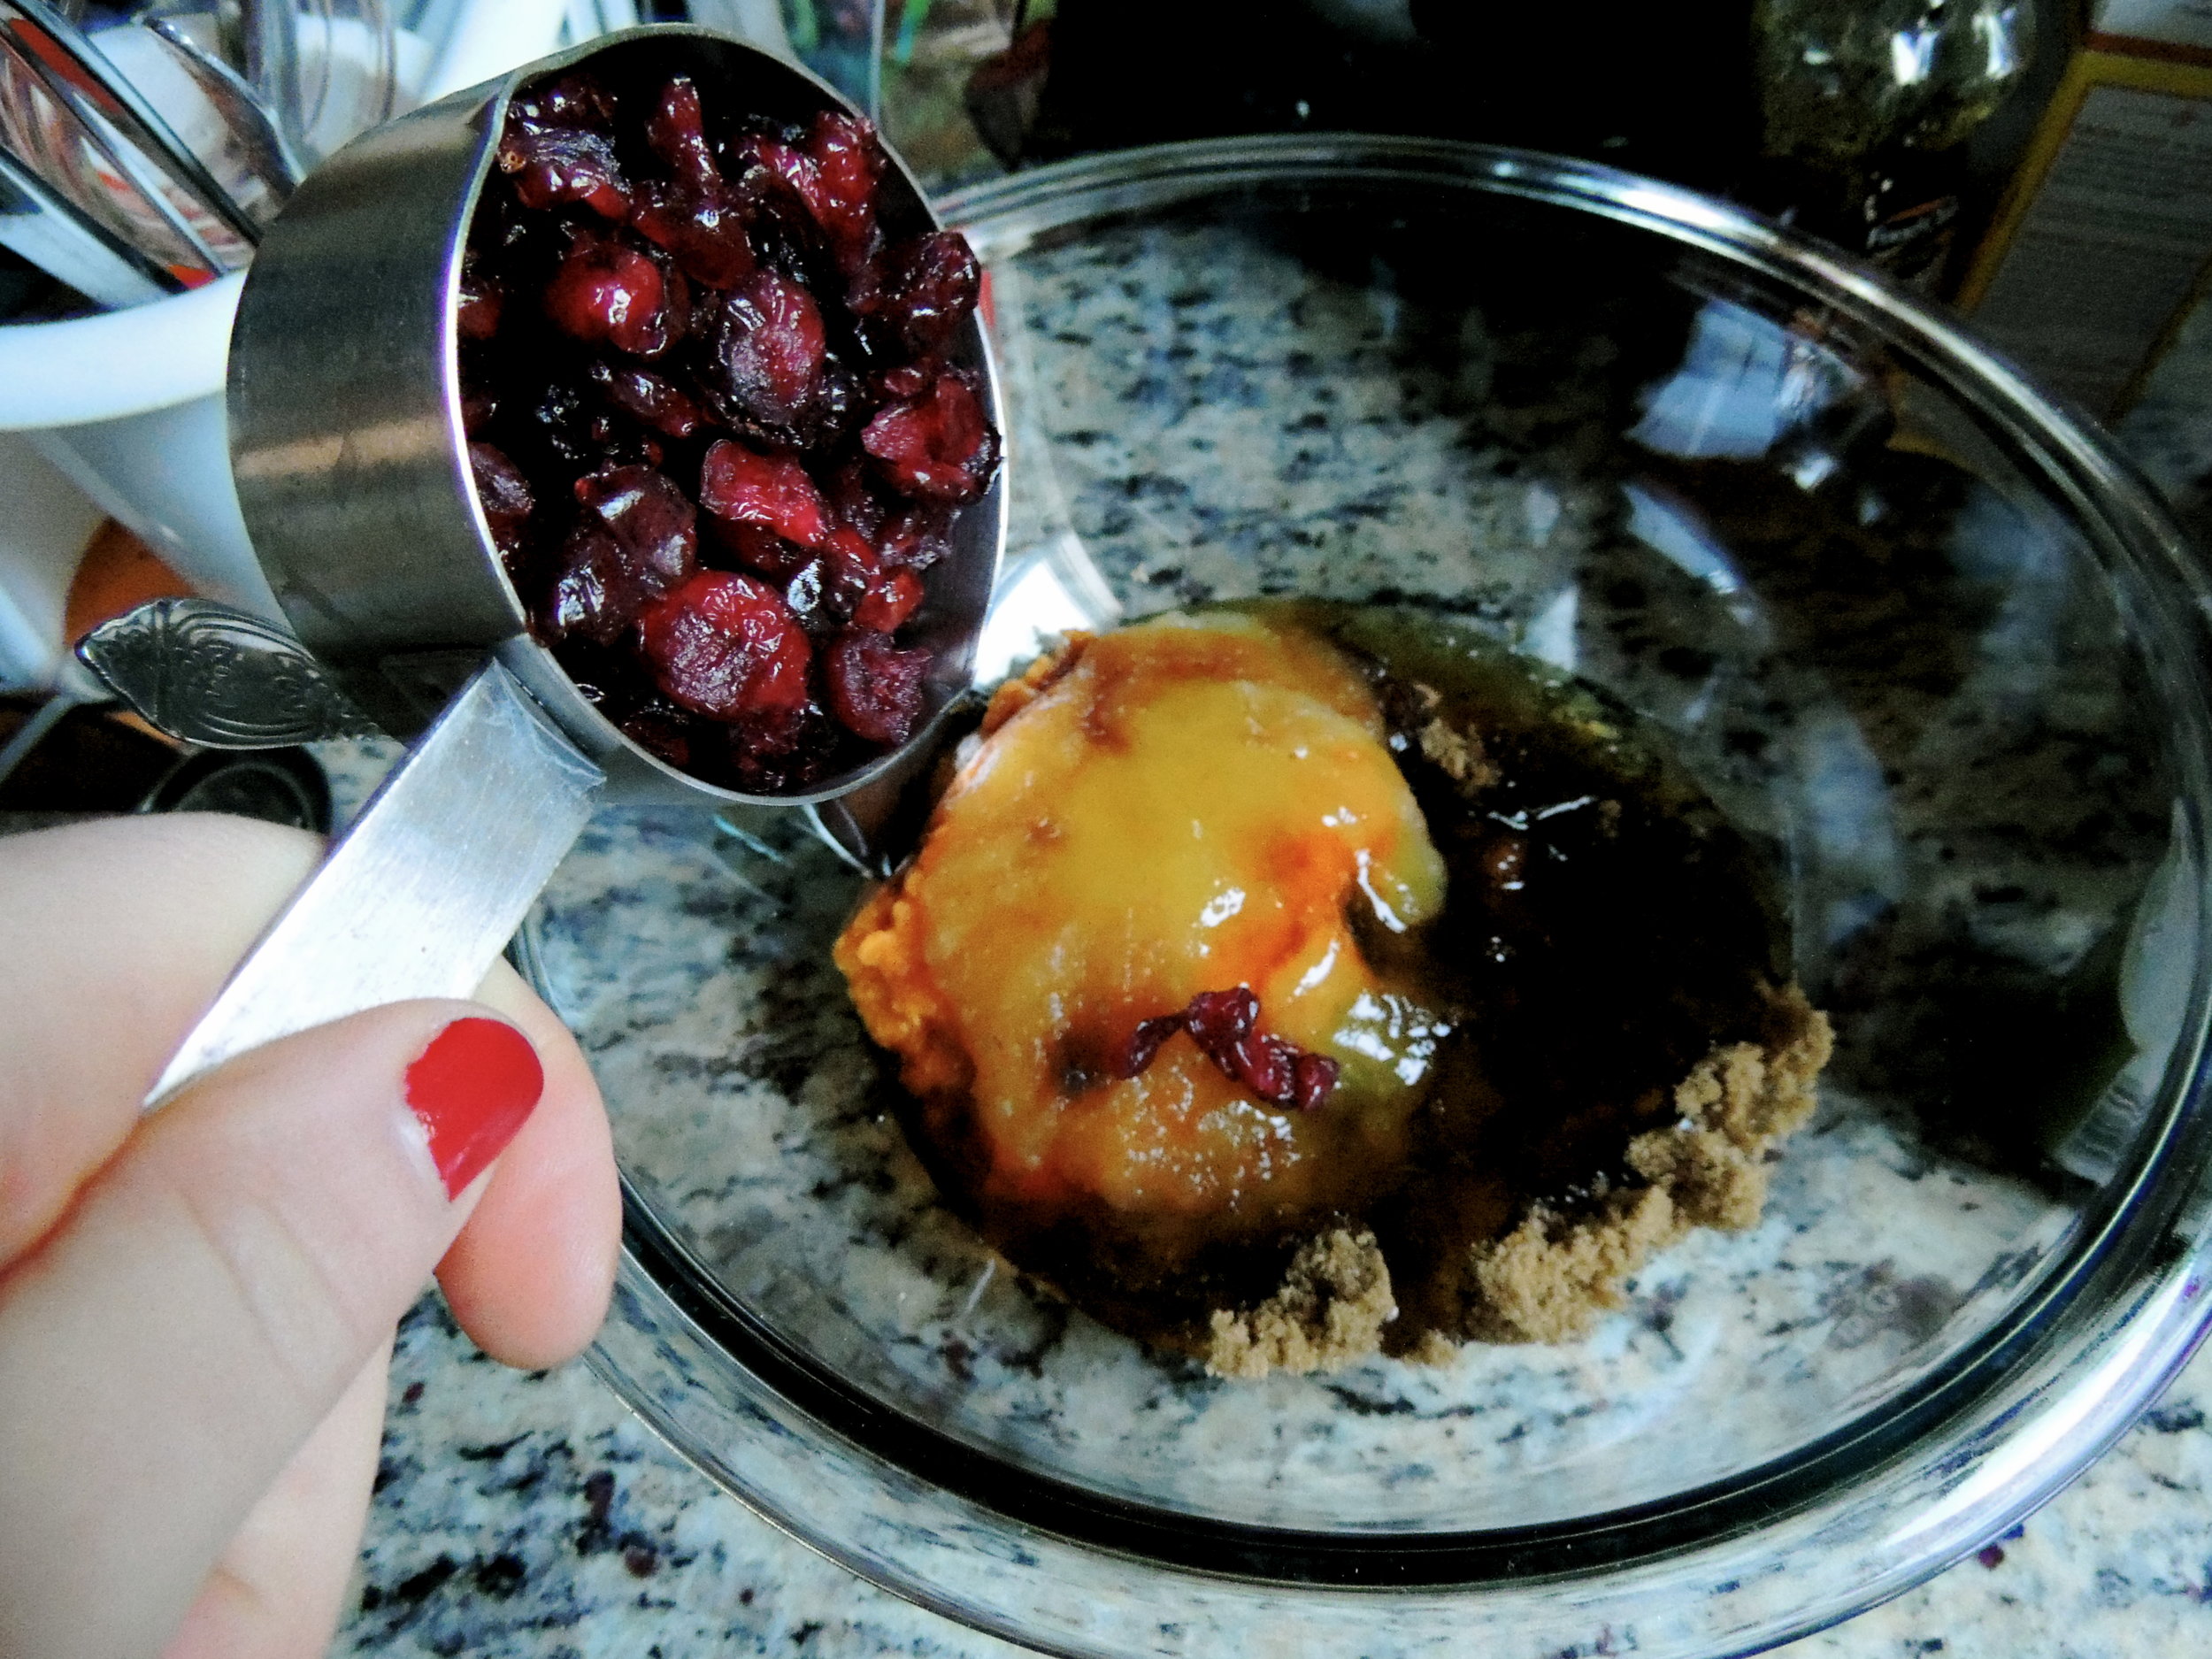
3. In a medium bowl, whisk together the brown sugar, pumpkin puree, applesauce, honey, and vanilla extract until smooth. Pour over oats and stir until oats are moistened. Stir in the cranberries and white chocolate chips.
4. Evenly press oat mixture onto the prepared baking sheet. Bake for 35-40 minutes, or until golden brown. Be sure not to under bake. Transfer to a cooling rack to cool completely.
5. Use a sharp knife to cut into bars. (Or just, eat it while you're impatiently waiting for it to cool, and make it into fun, unexpected shapes of granola like I did! Yeah!)
Source: Very minimally adapted from My Baking Addiction
Happy baking!
 The story really began on Sunday, when my friend Grace and I decided to hit up the neighborhood bakery, after completely stuffing ourselves at brunch. No regrets, the weekends are the days that I feast. My neighborhood has the CUTEST bakery with tons of handwritten signs everywhere, and a really great pastry selection. What I had in mind for a post-brunch treat was a cannoli because hey, if you're going to have dessert after essentially having dessert, you have to go all out. But these days, I leave cannolis to the experts in the North End, and no where else. Instead, I locked eyes on (well, eye to baked good) a pumpkin raisin cookie. It just so happens that a few days before, I'd heard talk of a pumpkin aatmeal raisin cookie, and I'd been dying to try one ever since. But when I asked the salesperson if the cookie had oats, she shook her head "no," and sort of looked at me quizzically. Well, whatever, there was nothing else in the bakery I wanted more than that cookie, so I paid, and we left. And, I have to say it: I was super disappointed. I mean, I ate the whole thing obviously, but every bite was a reminder that I may have chosen the wrong thing at the bakery. It was missing one very important element: oats.
Honestly, think about it: had there been no pumpkin, it would have just been a raisin cookie. WHO EATS PLAIN RAISIN COOKIES? It's oatmeal raisin, or nothing. So as I took my last bite, I looked over at Grace and said, "I think I'm going to remake this cookie."
So I did.

I started my baking adventure like I always do: running furiously to the store in search of ingredients that I definetly should have collected before I decided to start baking. And I often embarrass myself once I get there. This particular time, after going up and down two aisles twice looking for raisins, I finally found someone that worked there, who told me to go to Produce. And after looking in Produce for .2 seconds, I decided to ask for help. Now, let me just preface this by saying that my trip to the store yesterday was the first time I'd been out all day, so I was still adjusting to being around other people, and also speaking out loud. Here was my interaction with the (pretty cute, by the way) salesperson in Produce:
Me: Excuse me, could you tell me where the grapes are?
SP: Grapes? Sure they're just------
Me: OH NOPE. SORRY, I meant raisins! Ha, y'know like OLD GRAPES? HAHA
SP: ...Um. Okay, yeah, they're over here. Follow me...
Me: Yep. okay then...
So yeah, THAT happened. Nevertheless, I got my raisins. And I set to work!
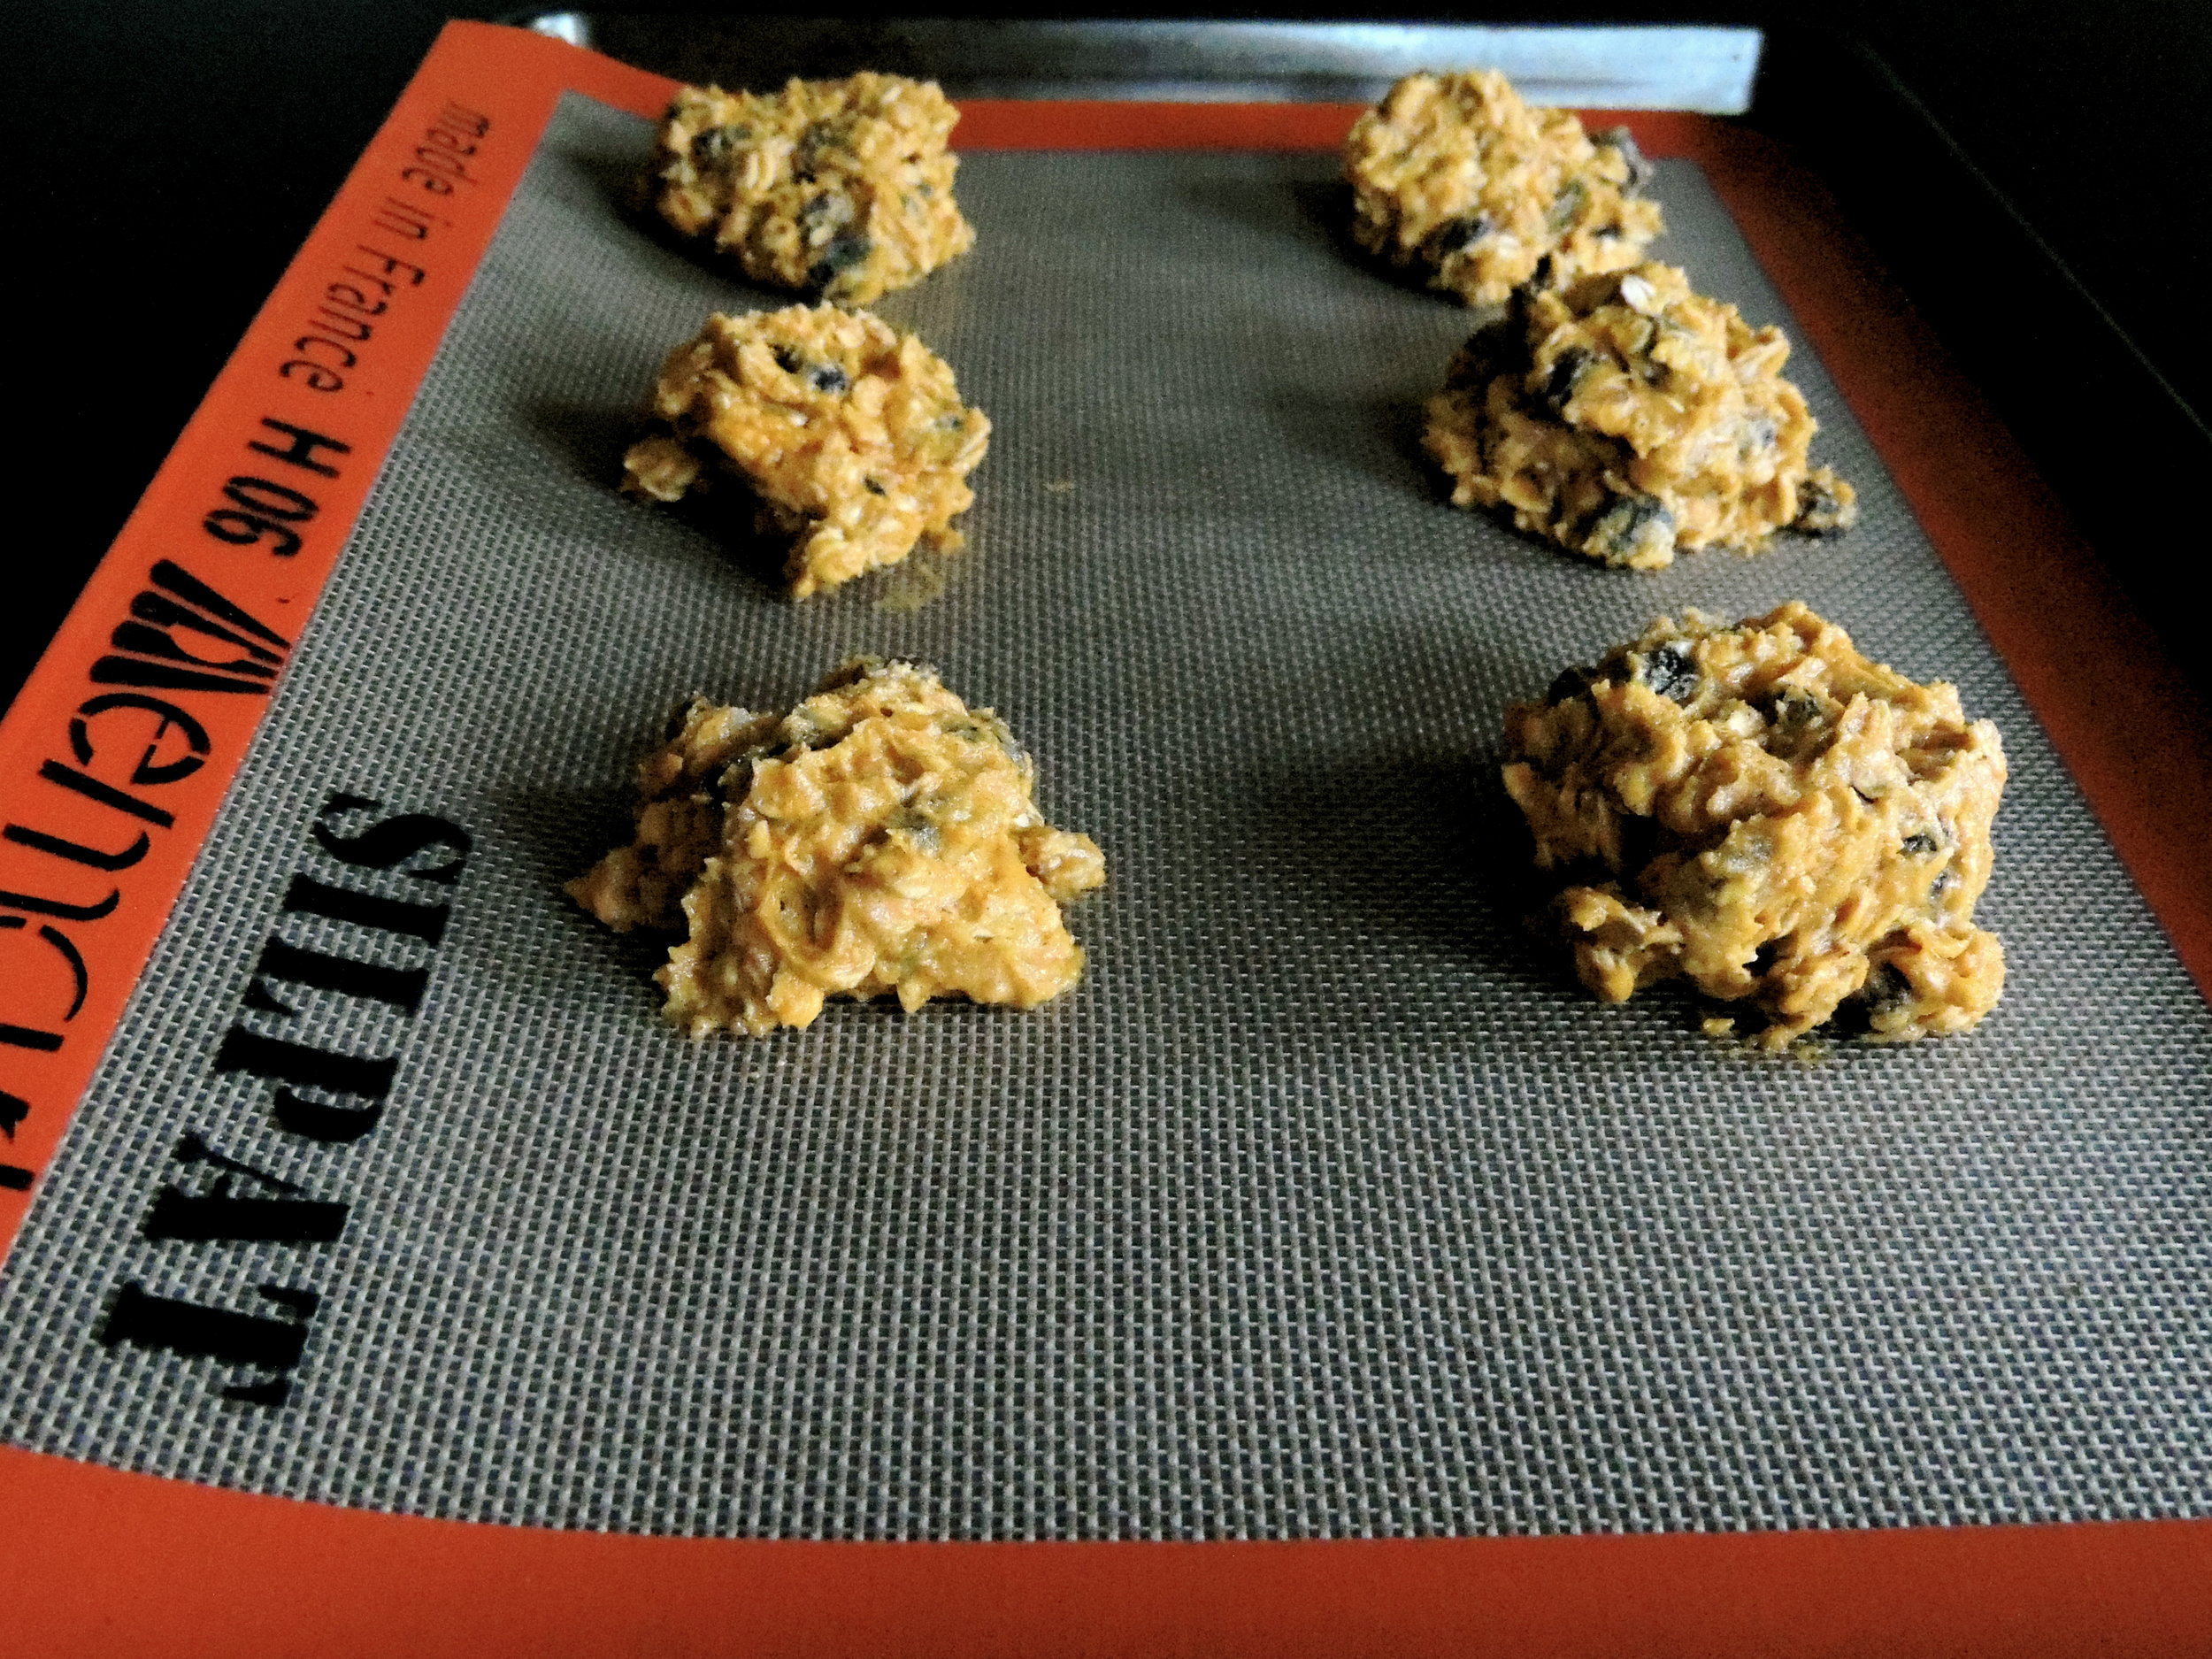 A few hours later, I had warm, chewy, Pumpkin Oatmeal Raisin cookies. And better than the bakery's cookies by a mile, if I do say so myself.

 I'm taking these little pieces of Fall goodness to work with me so that my Official Recipe Tasters (aka my co-workers and roommates) can give me the final word. I'm going to share this recipe, I promise!
HAPPY THURSDAY, GUYS! The weekend's almost here!
 There comes a time in every young baker's life when he or she has watched enough food-related shows on television and Netflix and decides that maybe it's time to start creating recipes of their very own...
...That time for me came nine months ago, but for the sake of this post, we'll say that it didn't officially start until this weekend.
We've got brand new neighbors upstairs that just moved in about a week and a half ago. In our building, there aren't a ton of units, so for me, it's important that I get to know everyone. The last time I made an introduction with new neighbors, I made doughnuts. Those seemed to be a crowd-pleaser then, so I decided, "You know what? Why break what isn't broken? Doughnuts again it is!" But I didn't want to just make the same doughnuts that I made last time because that makes it a little less special. Instead, I tried to think of things that would compliment the vanilla base, yet still allow it to be unique and creative. I also wanted to dye the glaze a different color, but I'm not always so keen on using food coloring. Then it hit me: what about a strawberry glaze? You get the strawberry flavor, and when mixed with the white glaze, a great color! So I set to work.
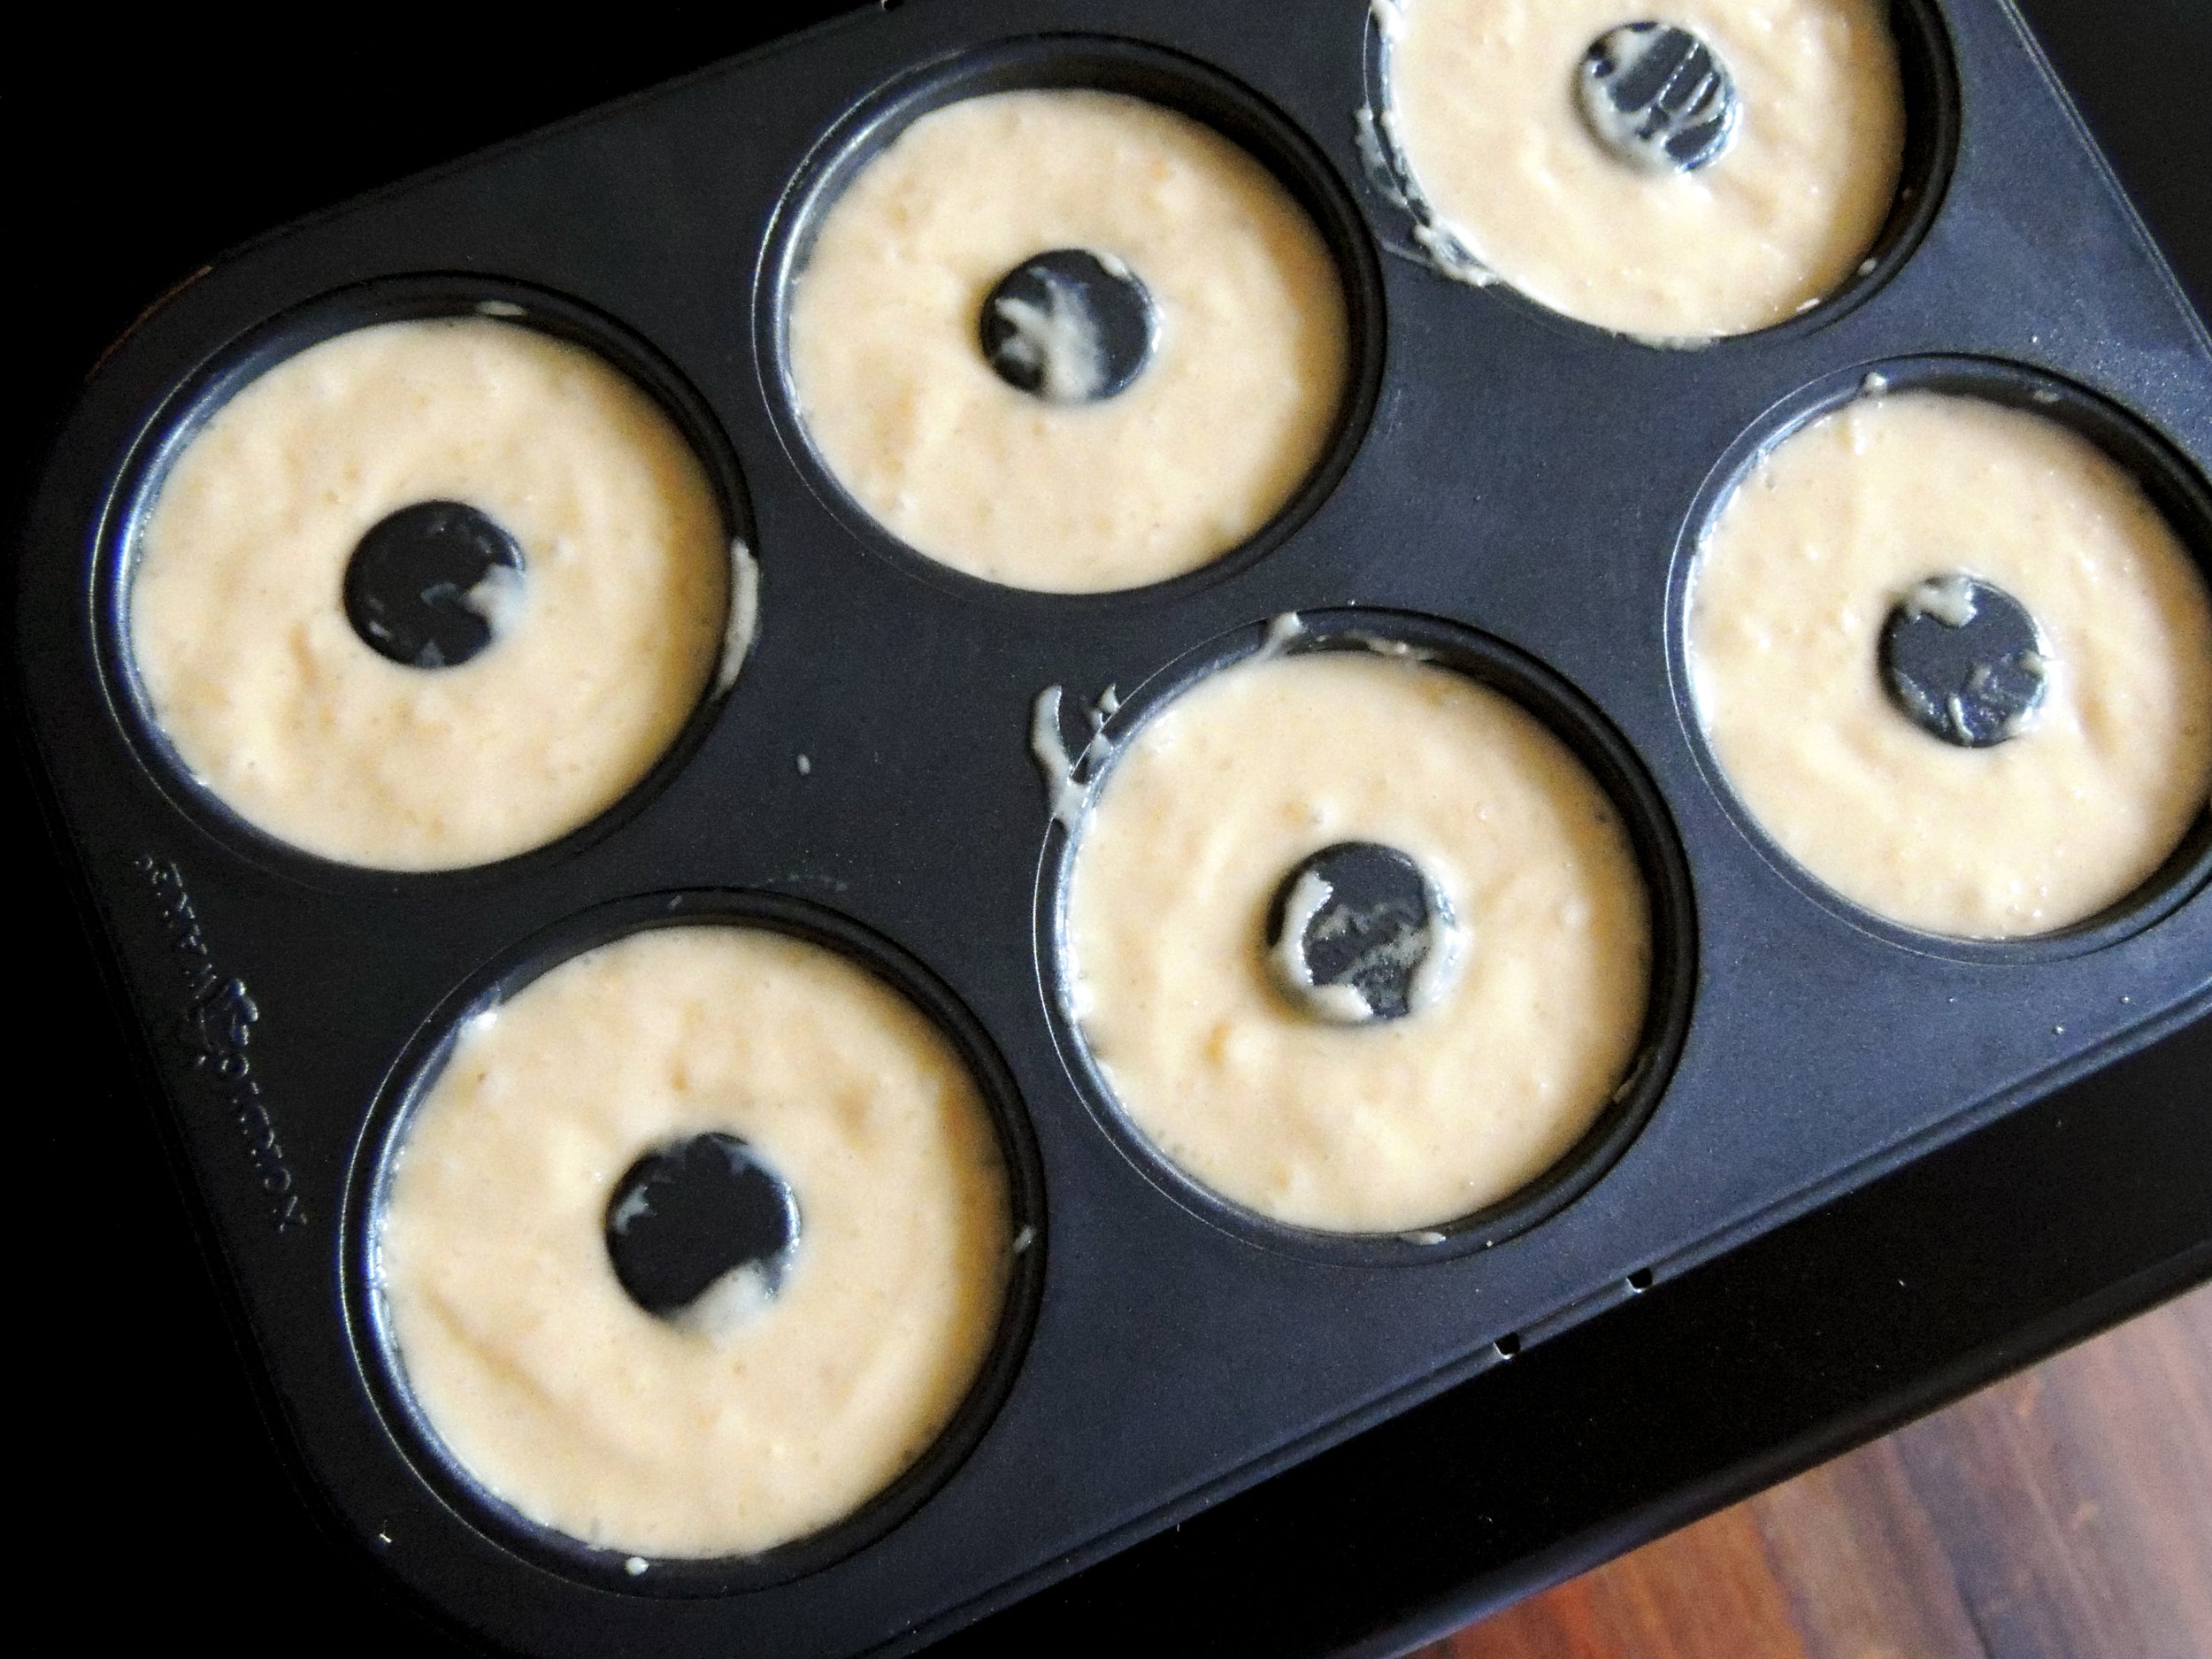 It's always such a breeze putting these babies together. I love that I didn't even have to use my mixer. Clean-up is never fun, so the less I use, the better it is.
 Twelve of these round rings of deliciousness later, it was time to start working on a glaze from scratch. No help from other recipes, just pure experimentation.
 Initially, I tried to think of a way to get the strawberry juice, but none of the pulp. (I suppose you could call it pulp, right?) So I thought about putting the frozen strawberries into a colander, then mashing them up with something to get the juice, and nothing but the juice. But that didn't work out so well at all. The colander's holes were a little too big for such an experiment, and I ended up just straining through mashed strawberry. Then I decided to strain it through a paper towel to at least TRY to get some of the juice, but that was worse. Finally, I decided that the glaze was the exact color that I wanted, so, so what? It's a glaze infused with fruit, and I should just own it.
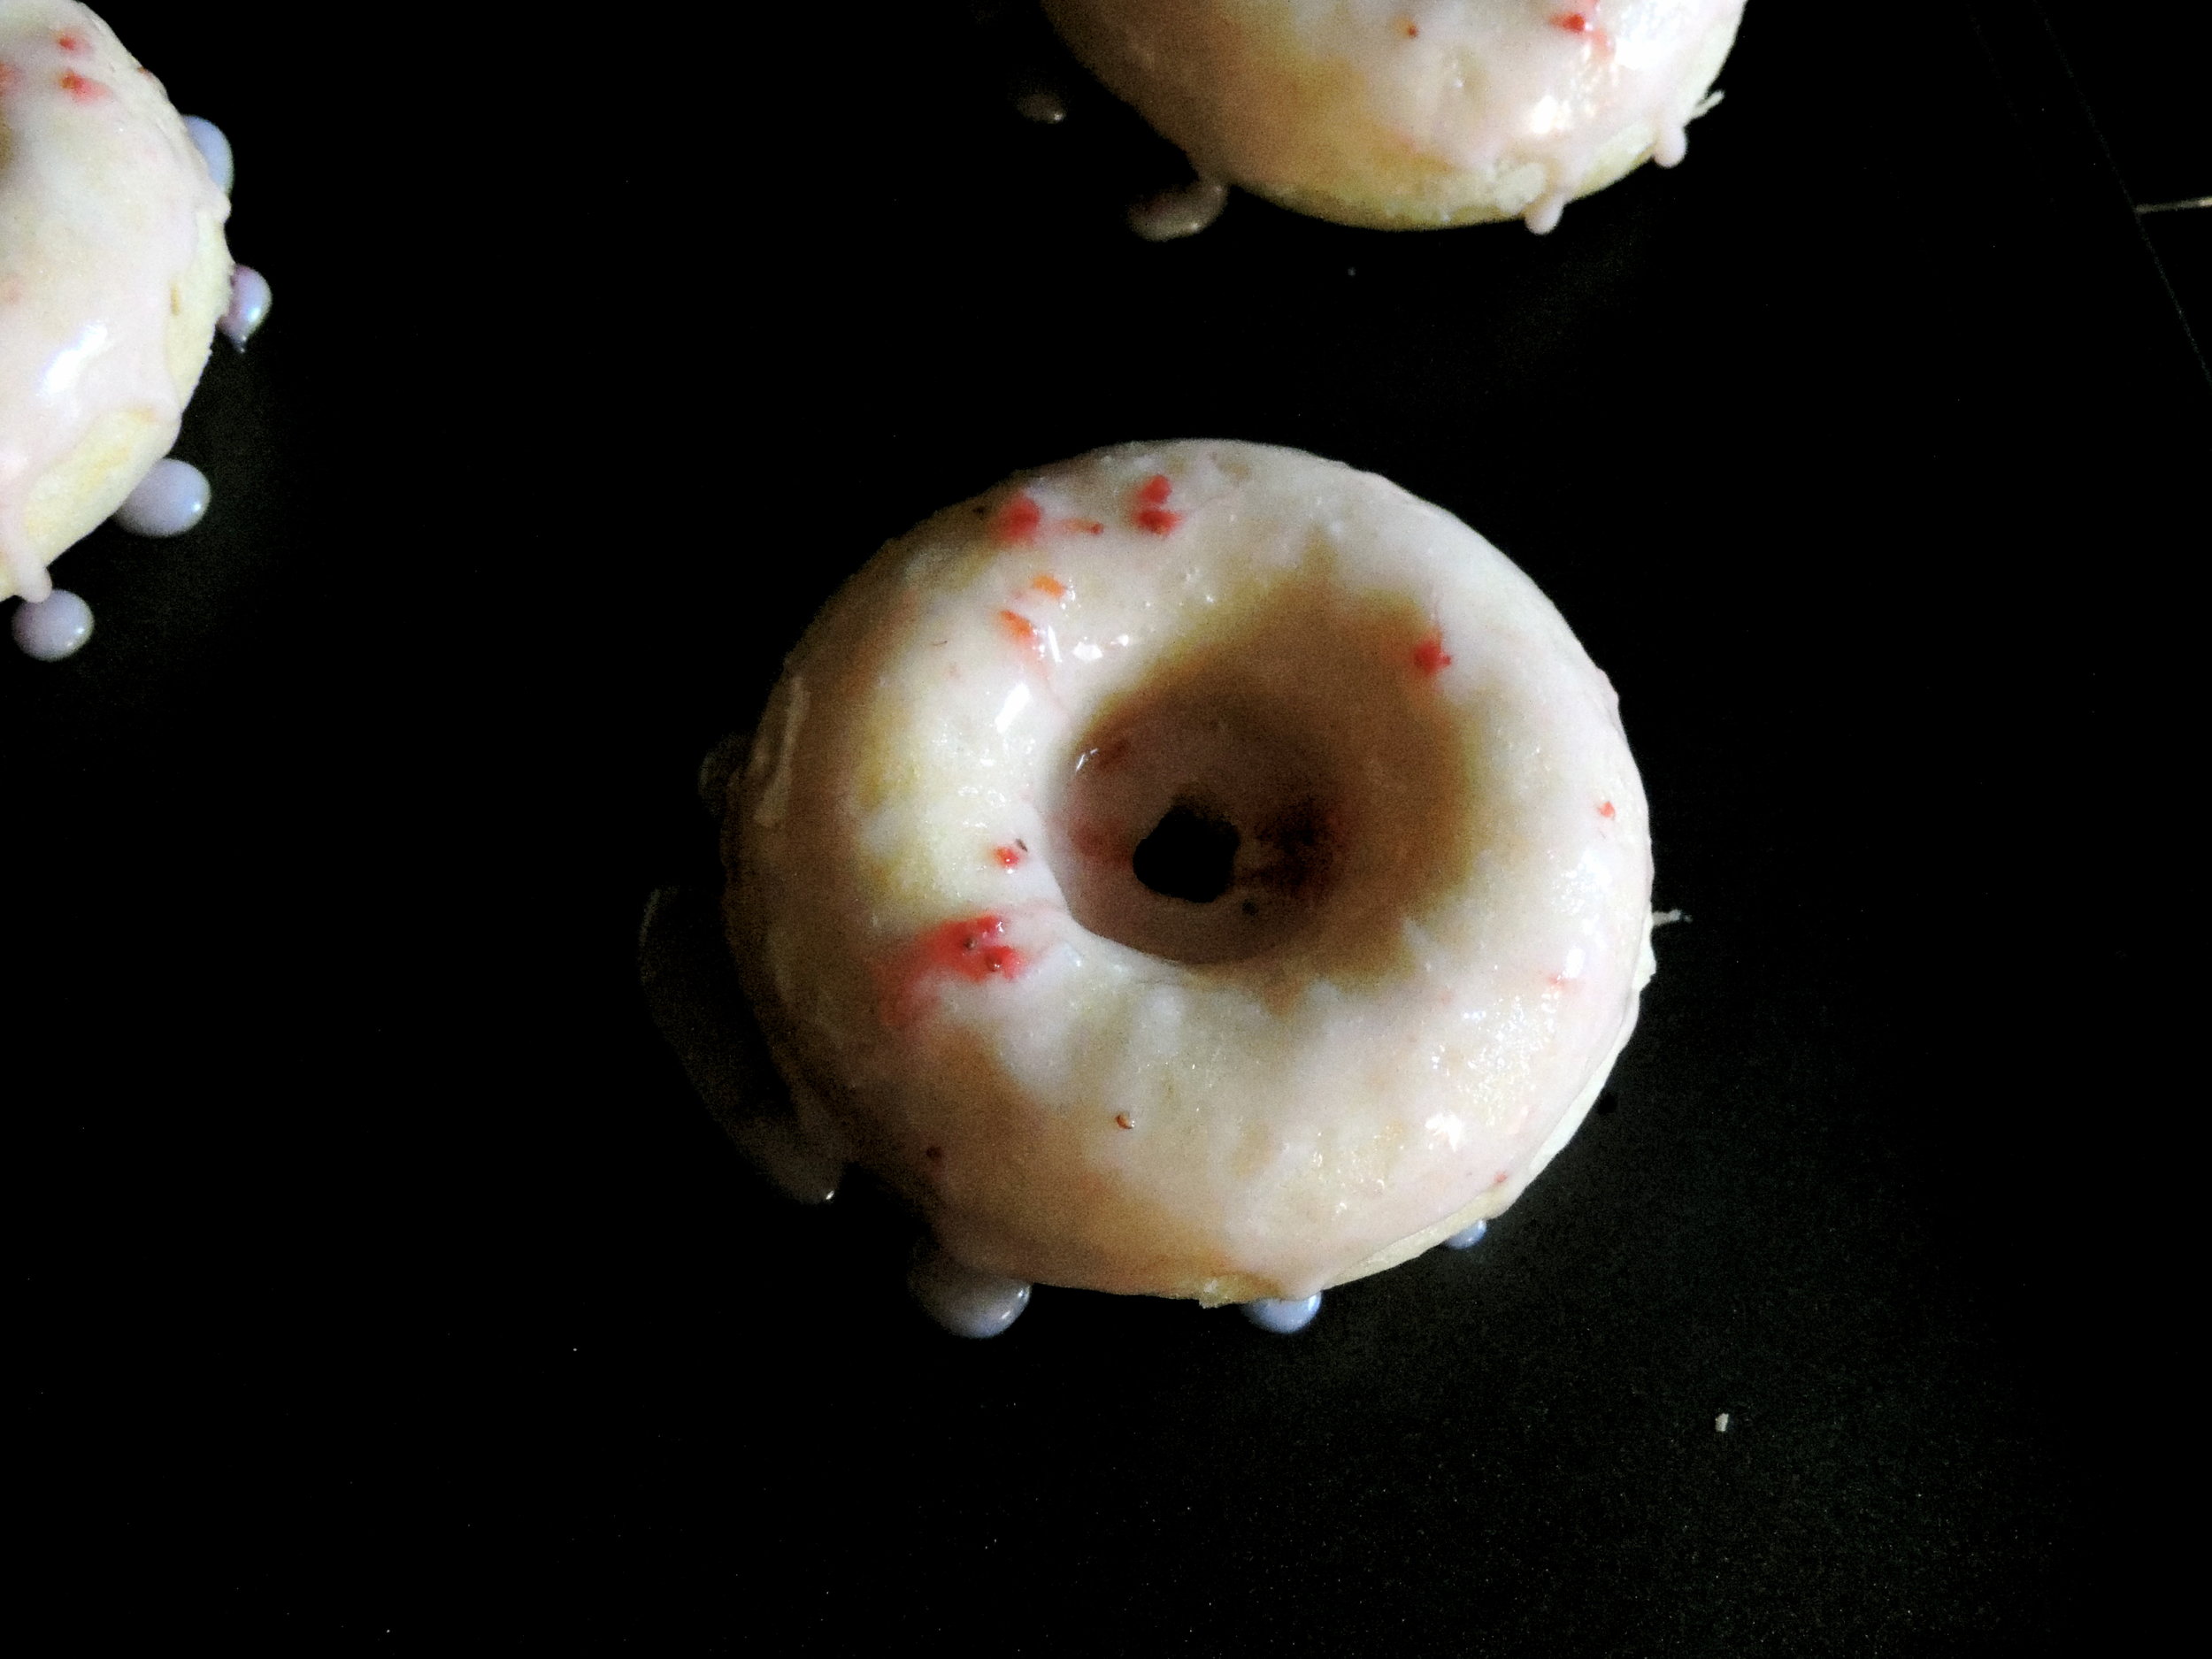
And "own it" I did! I dipped each doughnut into the glaze, then let it sit for about thirty minutes in the refrigerator. 
And I have to say it: It was a pretty great success!
Looking back, there just a few things I would change. For starters, in the doughnut recipe, I was afraid that if I added nutmeg, it might compete with the strawberry flavor. But as I bit into it, I realized that it needed something. So next time, maybe just a little nutmeg. Secondly, I needed WAY more strawberries. The flavor was more subtle that I would've liked. In my opinion, if you're going to say it's a strawberry glaze, it better deliver that strawberry with a punch. And third, maybe add some decoration. I added red sprinkles afterwards which seemed like a good idea at the time, until I realized that when red sprinkles get a little moist, they start to bleed. It messed up my colors!
But my neighbors loved the gesture, and brought us "Thank You" brownies the very next day, special-delivered by THE CUTEST DOG EVER, Piper!
This is the start of a beautiful friendship.
And a beautiful adventure, making my own recipes.
Happy Tuesday, guys!
P.S. It's snowing and sleeting today. What's going on in your neck of the woods?
Finally that time of year where it's getting a little too cold to be outside for long stretches of time, but not too cold to play in the leaves...and eventually snow. Did I hear correctly that Vermont is getting their first snowfall of the year this weekend? If so, good luck, Vermont! We've got a little warmth left here in Boston.
But as the cold starts to unpack it's belongings for the 4+ months ahead, now is a good time to start making a list of every single thing that I want to bake. You would not believe the amount of recipes I save to my "Bookmarks" everyday, and that's where most of them stay. I save so many that I forget they exist! Well, that's all about to change. And I need your help!
Are there any recipes that you just can't live without?? I'd love to know! Then, we can make it together and giggle a bunch while we pretend that we're not going to have another piece, cookie, bite, etc, but we totally do!
NEW RECIPES. ANNNNDDDDDD....GO!