Pumpkin Spice Scones

What to do when you have a ton of pumpkin puree leftover from making pumpkin pie? Make pumpkin spice scones, and have a happy breakfast-time for the rest of the week! Sounds like a plan.

We're getting snow, guys. The first snowfall of the year is upon us, and I don't actually think I'm ready for it. I mean, I'm a cold weather person for SURE, but you actually have to ease me into it! You can't just spring potentially six inches of snow on me like it's no big deal. First, a beautiful dusting. Then, an inch or two. Then, a beautiful blanket just in time for Christmas. THAT'S how it's supposed to go. Ah,well. We'll get it right next year.

At any rate, one of the nicer things about terrible weather is the comforting heat of the oven, and obviously the baked reward that emerges from it. And these scones? Great reward.

First of all, anything with pumpkin in it gets a big ol' stamp of approval from me no matter what. But to have it in a wedge, drizzled with deliciously-sweet spiced glaze, is extra special. Perfect for your coffee. Perfect for your life.

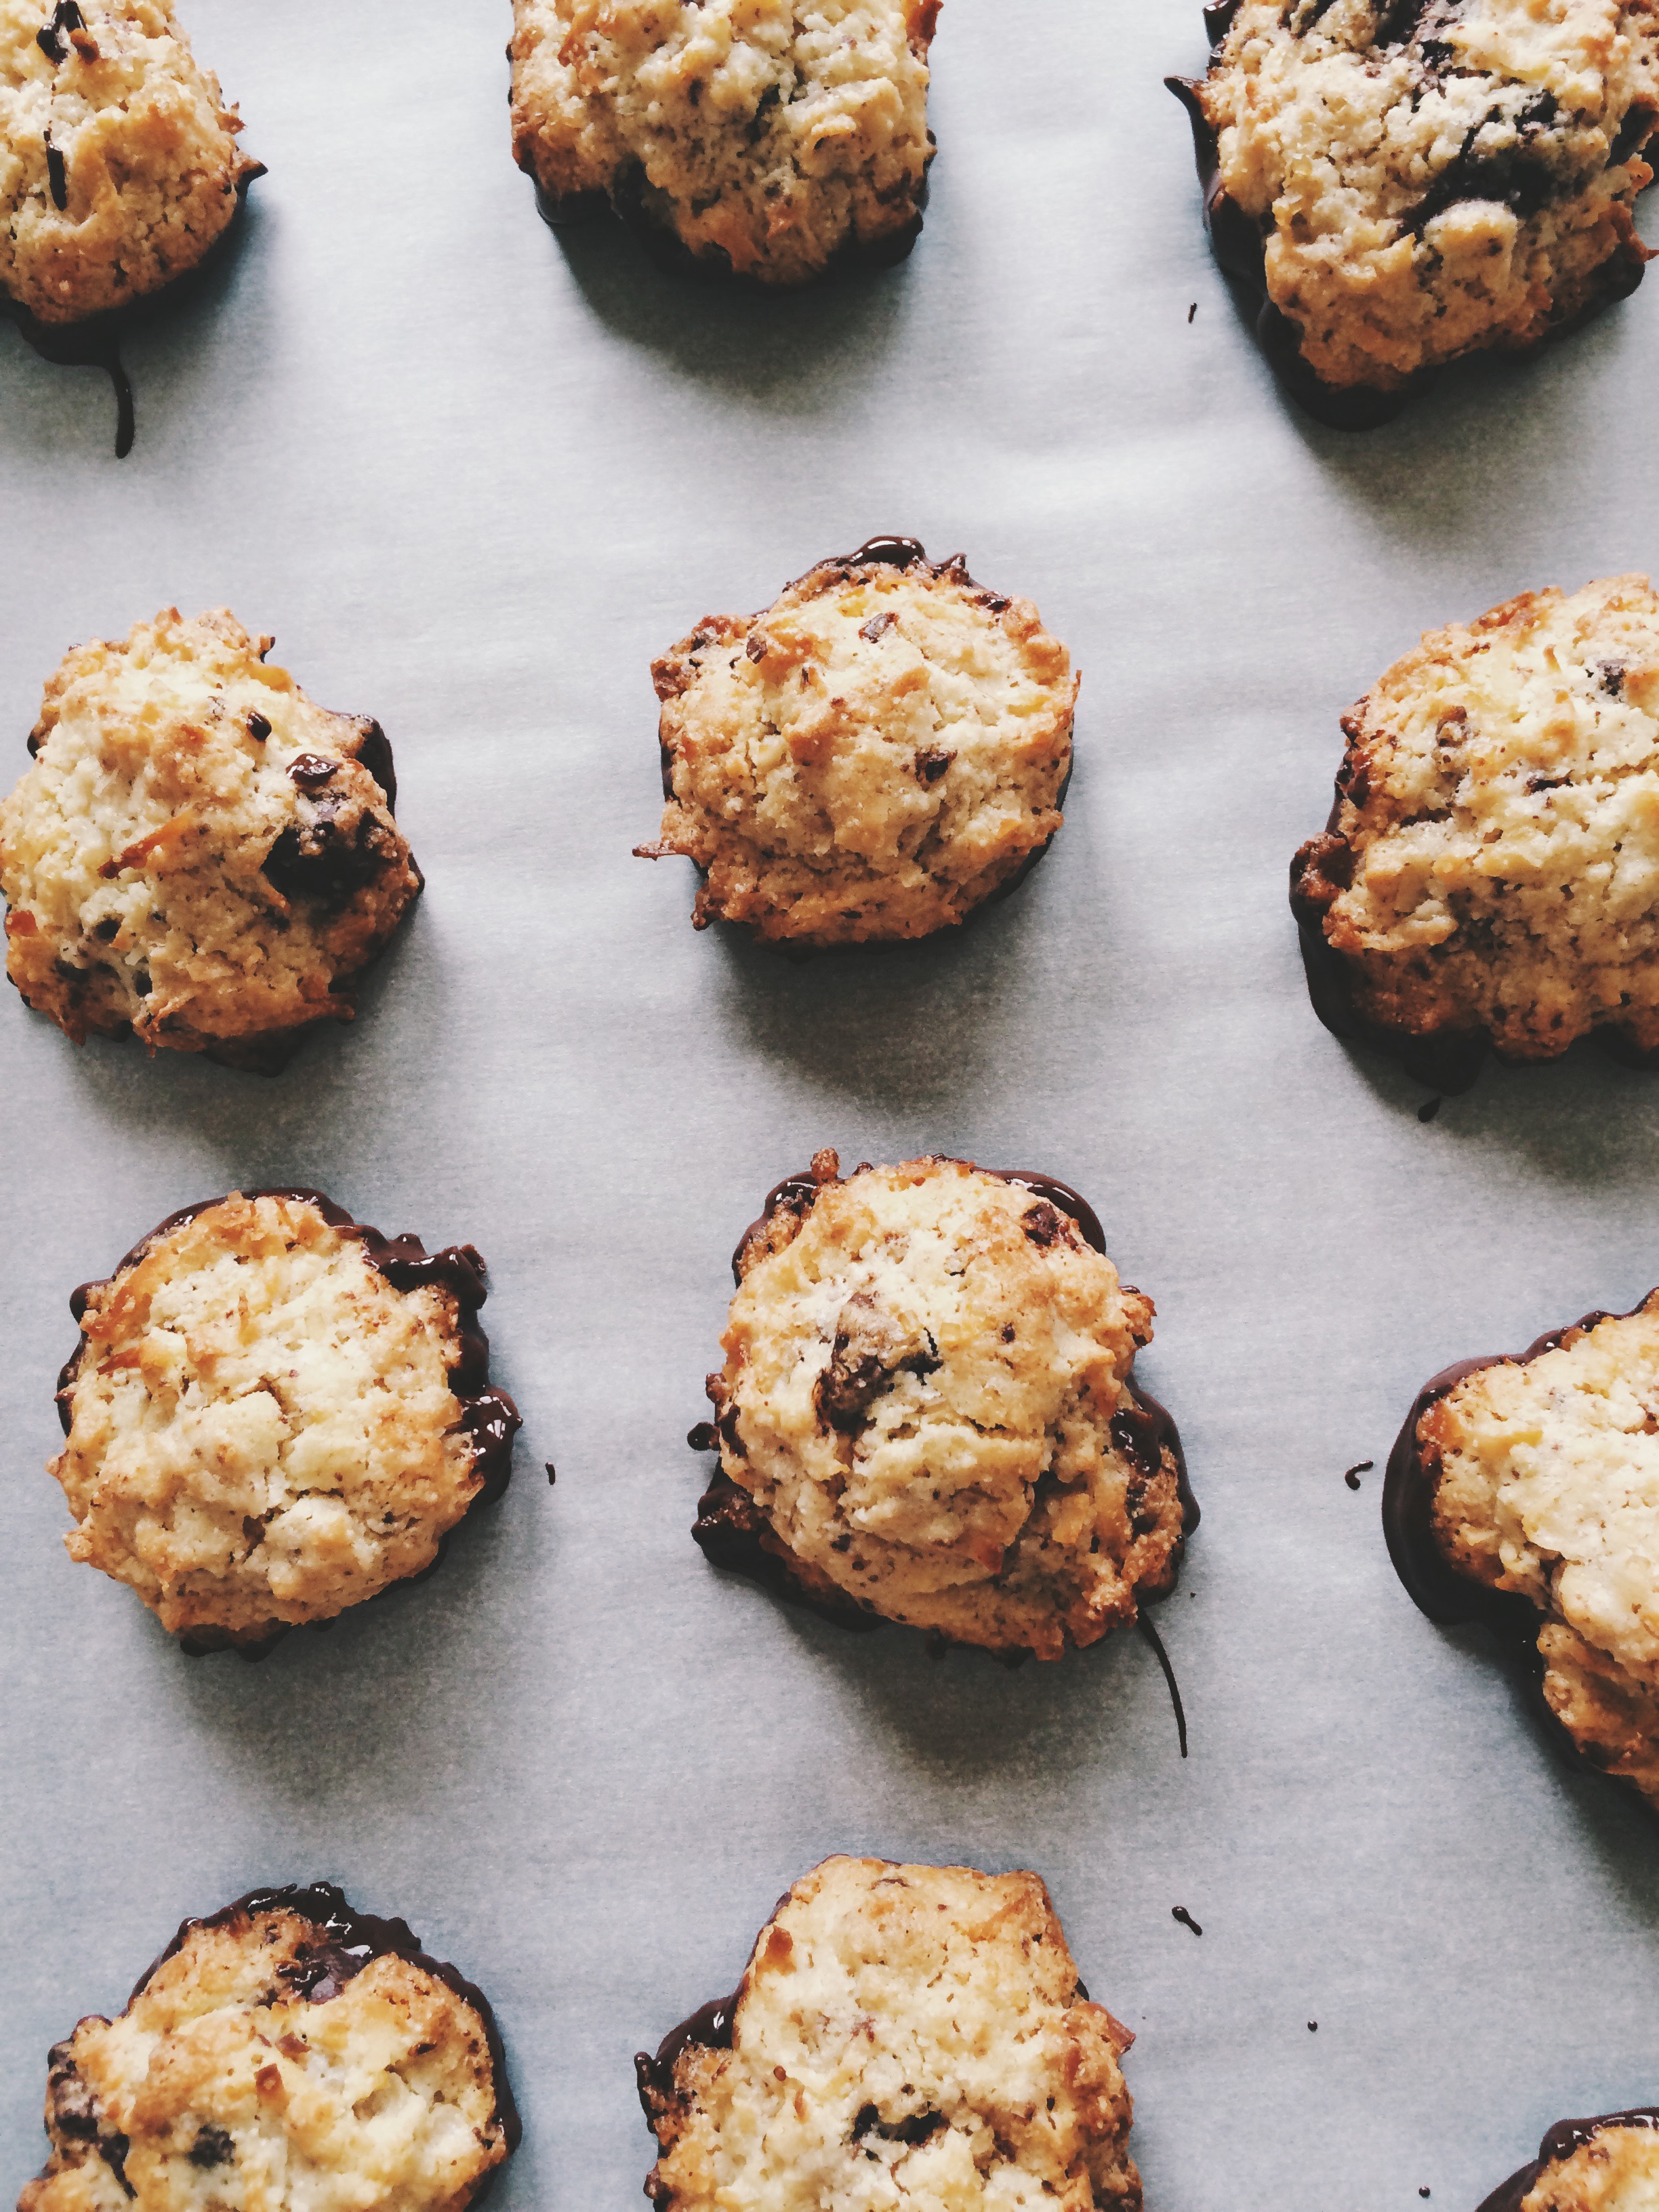
For those of us that love pumpkin bread, these scones will be right up your alley. Generally, scones are more on the biscuit side, but the moisture from the pumpkin puree actually shakes things up...in a good way. What you get with these is a crispy-on-the-edge, moist-in-the-middle combination that is totally divine. Just make sure to keep a close watch on these little guys--- too long in the oven and they'll dry out a little too much, losing what I think makes them so great.

If you're looking for a quick and DELICIOUS way to 1) make breakfast 2) use up precious pumpkin, these are totally the way to go.

Now, go. Go make them.

PUMPKIN SPICE SCONES

What You'll Need:

For the scones:

  • 1 3/4 cups all-purpose flour
  • 1/3 cup sugar
  • 2 teaspoons baking powder
  • 1/2 teaspoon baking soda
  • 1/4 teaspoon salt
  • 1 teaspoon cinnamon
  • 1/8 teaspoon ground cloves
  • 1/8 teaspoon ground ginger
  • 1/8 teaspoon nutmeg
  • 1/4 cup very cold unsalted butter, cut into 1/2 inch cubes
  • 1/2 cup pumpkin puree
  • 2 tablespoons buttermilk
  • 1 large egg, room temperature
  • 1 teaspoon vanilla extract

For the glaze:

  • 1 cup powdered sugar, sifted
  • 1/4 teaspoon cinnamon
  • 1 1/2 tablespoons milk
  • 1 tablespoon unsalted butter, melted
  • 1 tablespoon vanilla extract

DIRECTIONS

Preheat the oven to 400 degrees F. Line a baking sheet with parchment paper. Set aside.

Whisk together the flour, sugar, baking powder, baking soda, salt, and all the spices in a large bowl. Add your cubed butter into the bowl and, using either your fingers or a pastry cutter, cut in the butter until the mixture resembles a coarse meal. Set aside.

In a smaller bowl, whisk together the pumpkin, buttermilk, egg, and vanilla extract until well combined. Fold your wet ingredients into the bowl with your dry ingredients until just incorporated.

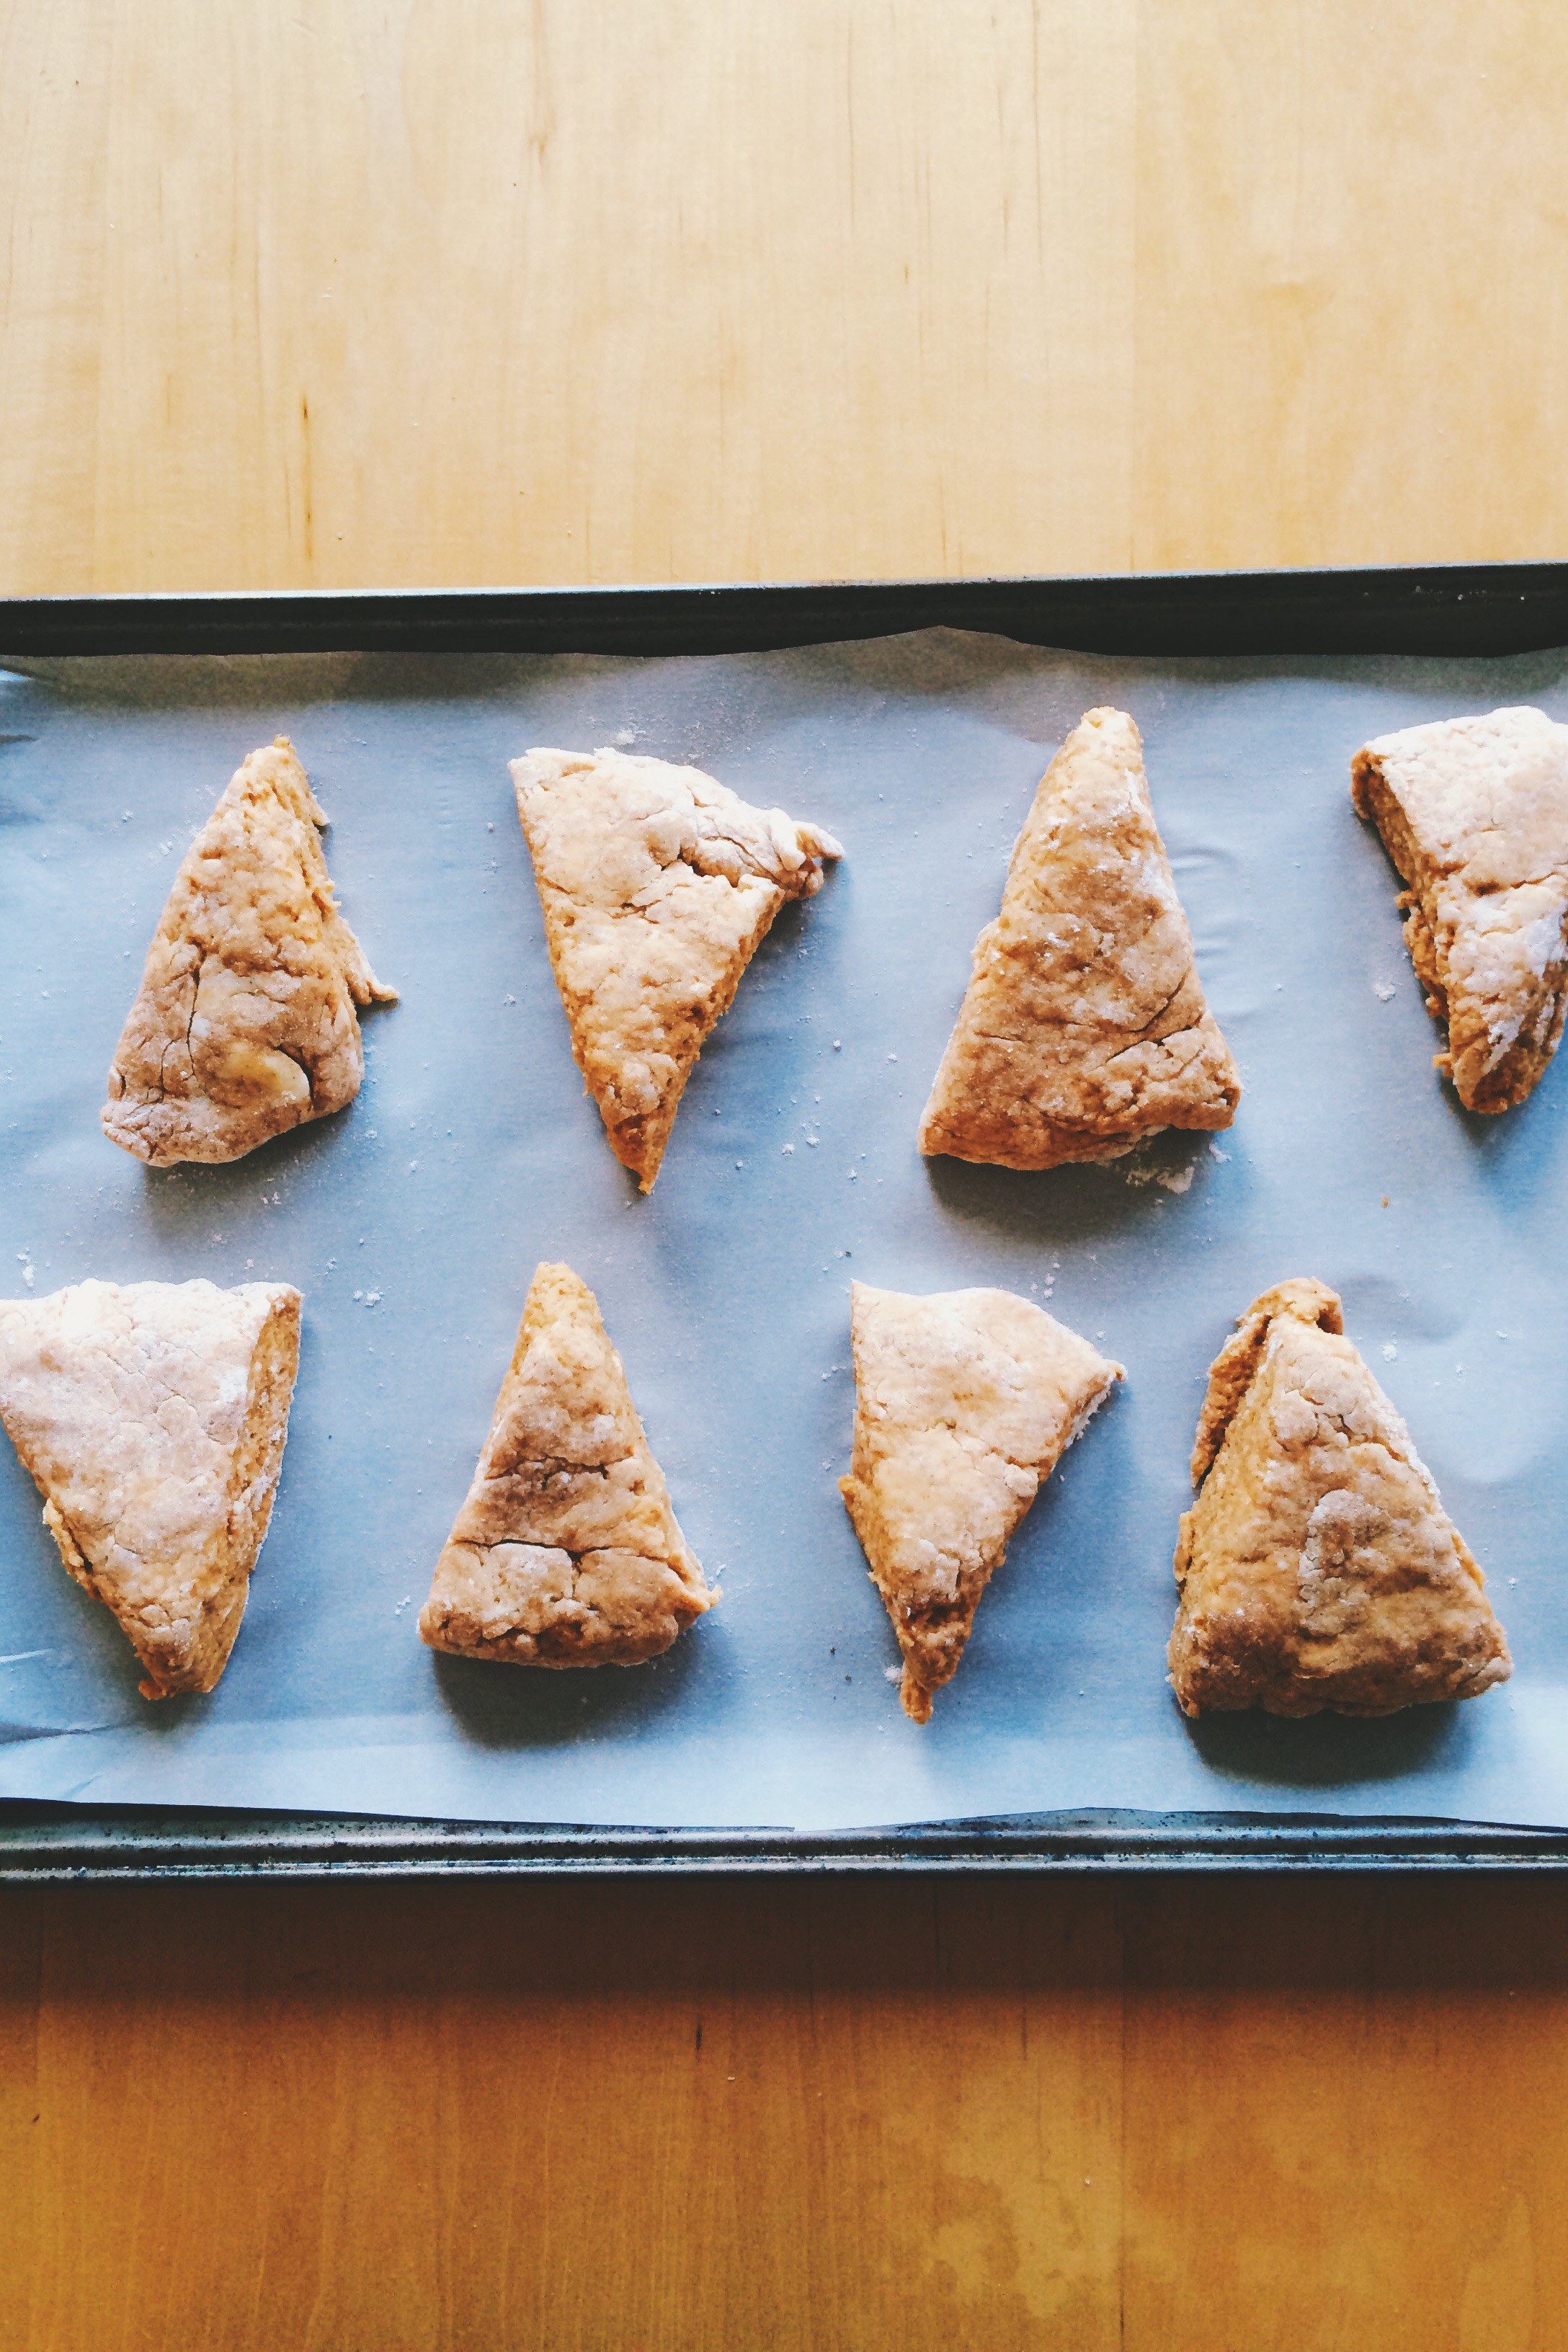
Using a floured wooden spoon, or a floured bench scraper, scrape the mixture out onto a a lightly floured surface. Using floured fingers, carefully pat the dough into a roughly-8 inch circle. Then, using either a floured knife, or floured bench scraper, cut the circle into eight equal wedges. Once your wedges are formed, transfer each to your prepared baking sheet. If you'd like, use a dry pastry brush to brush off any excess dough.

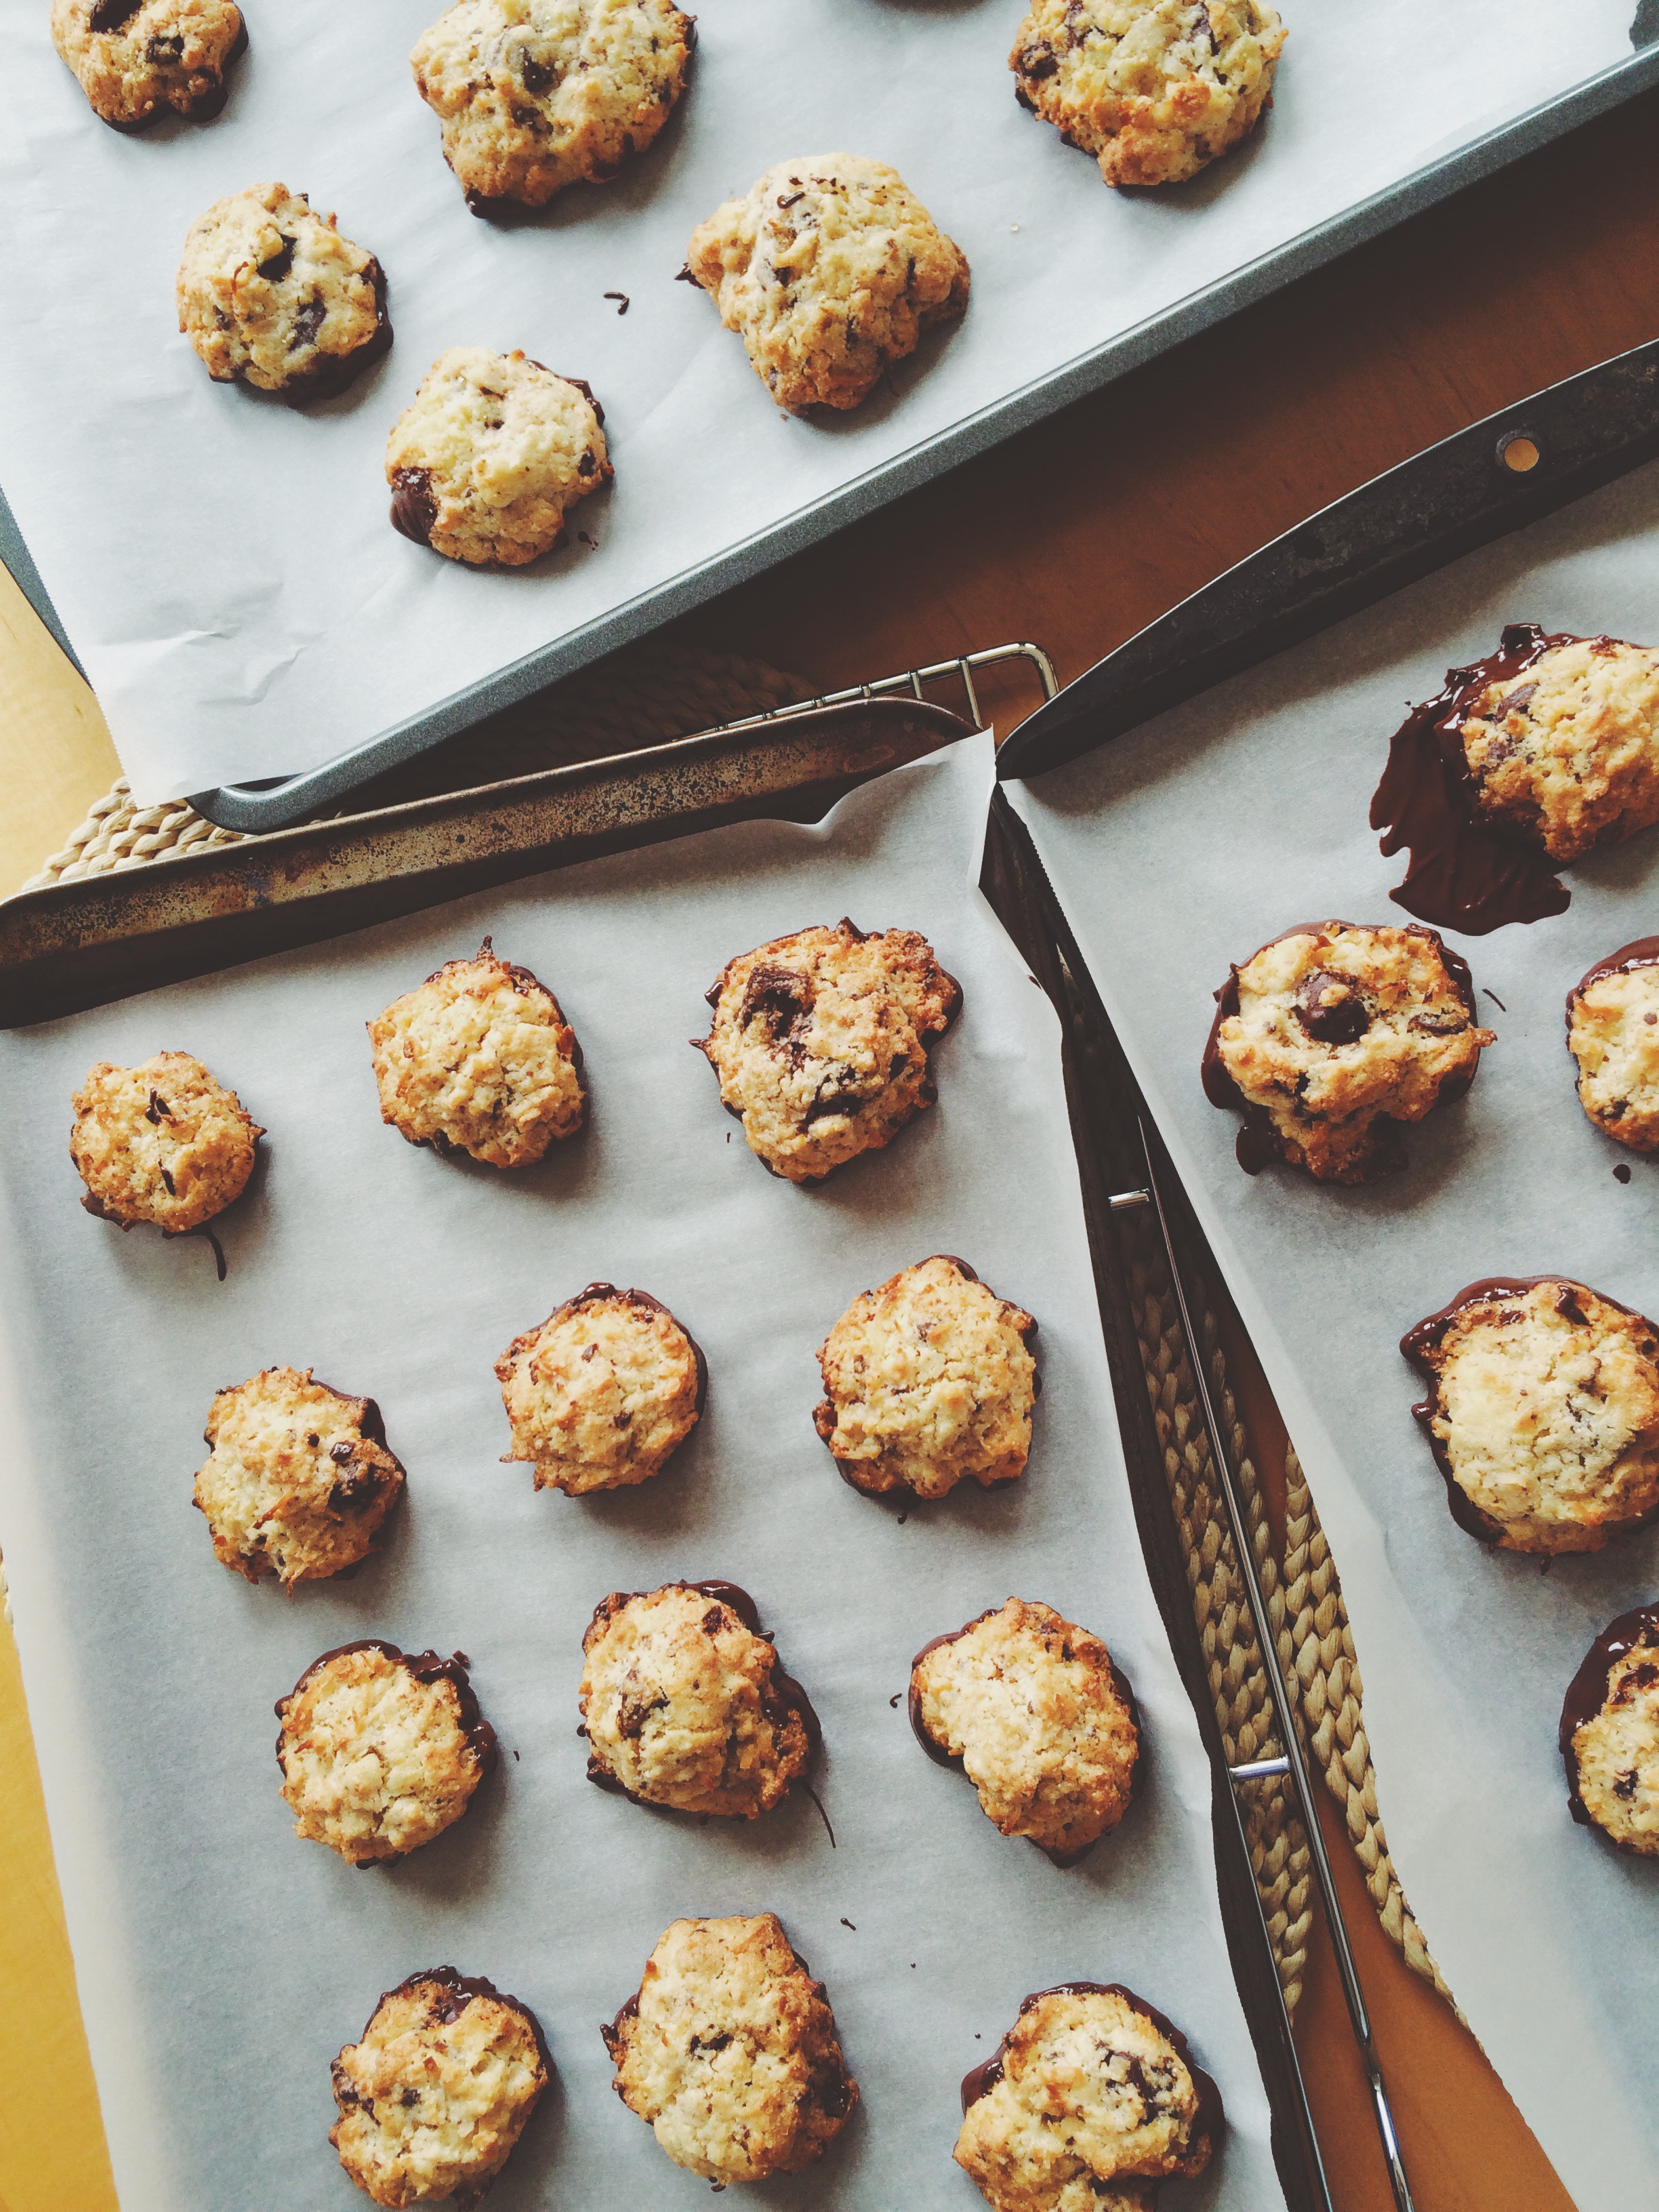
Bake until golden, about 15-17 minutes. Keep a close eye on them so they don't burn. Once out of the oven, let cool for two minutes on the baking sheet before transferring to a wire rack to cool.

While They're Cooling, Let's Make the Glaze!

Combine the sugar, cinnamon, milk, butter, and vanilla extract in a small bowl.

Final Step! Glaze Those Scones!

Place a baking sheet lined with wax paper under your wire cooling rack to catch any drippings. Add glaze to your scones in any design you'd like. Dip them in, or drizzle glaze over each top using a spoon. It's totally up to you! Once glazed, let set for at least 20 minutes.

To store: If you're not eating the scones the day you make them, store them unglazed in an airtight container for up to 2 days ahead of time, and  glaze just before you're ready to serve.


SOURCE: Adapted slightly from Tutti Dolci 

Gluten Free Spiced Pumpkin Pie

K, we should probably start talking about Thanksgiving now, no? And what's better to talk about when we talk about Thanksgiving, than the true table staple? Pumpkin Pie. My favorite.

There's a debate every year in which the people in my family argue the importance of double P. Some people love it, some people hate it. Maybe it's the texture? I'm not really sure. All I know is there better be a silky Pumpkin Pie with hand-whipped cream on the table on the last Thursday of every November, or someone's in trouble. And if I have to be the one to make it, then so be it. At least I'll sleep well knowing that I already have my dessert plate mapped out for maximum consumption. But lately I've been thinking about my gluten-intolerant friends: what do they do when a flaky all-butter crust (my go-to for every pie), or a sweet and buttery graham cracker crust is not an option?

Last weekend we attended a Ladies' Day event in Milwaukee which my mother helped plan, and I volunteered to bake. Everything was going great, meal-plan wise until I was informed that there were gluten allergies and thus, the desserts must be completely gluten-free. I quickly assured her that it wouldn't be a problem, but I'll be honest: I was nervous. Despite the fact that I have a best friend who is gluten-intolerant, whenever food is involved, it's usually someone else making it and I don't have to worry about it. I made her flour-less chocolate cake once (it was DIVINE), but that was it.

Would I really have to buy new flours and ingredients that I probably would never use again? Or worse, use BOXED CAKE MIX?

I shudder to think. (Hi, I'm dramatic.)

Luckily, I was flipping through the pages of the November 2015 issue of Martha Stewart Living and came across the answer to all of my problems: Gluten-Free Pumpkin Pie! I was ecstatic of course. One, because you know how much I love pie and use any excuse to make it. And two, because I could use ingredients I have on hand absolutely all the time! I ran it by the committee, was told that I would have to make three, and was sent on my way.

I may have spent seven hours in the kitchen, but there's nothing I love more than making pie.

Now, what makes this pie GF you may ask? The CRUST! Three cups of Rice Chex (naturally and wonderfully GF), butter, brown sugar, and a little salt. Pulse those together in a food processor (I have a baby one that holds 4 cups), then spread into a pie plate, and bake it for 12 minutes to set. It's SUPER EASY, and CRAZY DELICIOUS. That brown sugar caramelizes in the oven, making the crust buttery and sweet with a hint of a crunch still. And pair that with the sweet pumpkin-y custard that is the filling, plus  the homemade whipped cream that was carefully piped onto the top, and it's just perfect.

I tell ya, it was a total hit amongst the gluten-lovers and gluten-intolerant alike, for we could all stuff our faces with pie in harmony.

Make it for Thanksgiving, make it forever.


GLUTEN-FREE SPICED PUMPKIN PIE 

What You'll Need:

Pie Crust:

  • 3 cups Rice Chex
  • 5 tablespoons unsalted butter, melted
  • 5 tablespoons packed light-brown sugar
  • 1/4 teaspoon coarse salt (I used coarse kosher salt)

Spiced Pumpkin Pie:

  • 1 1/2 cups unsweetened pumpkin puree
  • 3 large eggs, room temperature
  • 3/4 cup packed light-brown sugar
  • 1 tablespoon cornstarch
  • 1/2 teaspoon coarse salt (I used coarse kosher salt)
  • 1 teaspoon ground cinnamon
  • 1/4 teaspoon grated nutmeg
  • 1 cup whole milk

DIRECTIONS

First, let's make the pie crust:

Preheat the oven to 375 degrees

Pulse together the cereal in a food processor until finely ground. Then add the melted butter, brown sugar, and salt. Pulse until well combined.

Press the crust mixture evenly into the bottom and up the sides of a 9-inch pie pan. Bake until golden brown about 12 minutes. Set on a wire rack to cool completely.

OKAY, PIE TIME!

Reduce the oven temperature to 325 degrees F.

In a large bowl, whisk together the pumpkin puree and eggs.

In a smaller bowl, stir together the sugar, cornstarch, salt, cinnamon, and nutmeg. Transfer the dry ingredients into the bowl with the pumpkin-egg mixture, and mix until well combined. Then, whisk in the milk.

Place your cooled pie pan on a rimmed baking sheet to reduce the chance of your filling spilling out on the way to the oven. CAREFULLY pour filling into the center of the crust for more even spreading. DO NOT OVERFILL. You may have some filling leftover, and that's okay! You do not want an overflow in the oven, trust me.

Transfer your pie on the baking sheet to the oven and bake until filling is just set, ABOUT 50-55 minutes, but KEEP AN EYE ON IT. If a custard-based pie (like this one) is over-baked, it will crack, and no one wants that. (But if it does crack, you can always cover it with whipped cream, so don't fret.)

Set on a wire rack to cool completely.

Once cooled, pipe or spread on some homemade whipped cream if you're into it, and transfer pie to the fridge to chill before serving.

(MAKE AHEAD: This pie can be made up to 2 days ahead of time. KEEP REFRIGERATED.)

SOURCE: Slightly adapted from Martha Stewart Living

Last-Minute Halloween: Easy Lady Fingers

If you're trying to be kind of festive, but find yourself running out of time this Hallow's Eve, you should TOTALLY make some lady fingys. It's SUPER EASY: Just a basic sugar cookie recipe, a little food coloring, a paint brush, and some slivered almonds, and you're done!

The movie marathon is starting in a few hours (I may be the only one that watches, but so be it), and I refused to celebrate one of the best holidays without at least SOMETHING kind of creepy and festive. And I love cookies. So here we are.

What's super great about these (besides how simple they are to make) is that you really can't mess up. Halloween isn't about being perfect, in fact, the more imperfect the better! When you're rolling out your fingers, it's up to you how you want them to look. Do you want them to be bent and out of shape with brownish-yellow nails, or perfectly manicured with your favorite color like you've just brought them home from the salon? It's totally up to you. Go all out!

Since I made these for my family, I figured I should keep things kind of tame (I've seen examples of lady fingers where the ends have been dipped in raspberry jelly to look like they'd just been severed off the hand!), but next year? Next year we're upping the ante.

Until then, this is the perfect last-minute Halloween project for you and your friends, served however you'd like. Maybe all in a bowl? Or, you can be like me, and use it as a prop to point to things I want, but am too lazy to get myself. It's whatever you choose!

HAPPY HALLOWEEN, GUYS!! Be safe. Make sure all the kids that come to your door know how adorable they look, because they always do.


LADY FINGERS 

What You'll Need:

  • Food-safe paintbrush
  • 1-2 tablespoons red food coloring (or your favorite color, OR leave them plain)
  • 30 blanched almond slivers
  • 2 large eggs, at room temperature
  • 1/2 teaspoon vanilla extract
  • 1 stick unsalted butter, at room temperature
  • 1/2 cup confectioners' sugar
  • 5 tablespoons granulated sugar
  • Pinch of salt
  • 1 2/3 cups all-purpose flour

DIRECTIONS

Place food coloring in a small bowl, and, using a small food-safe paintbrush, color one side of each almond. Set aside on a sheet of wax paper to dry.

Separate one egg. Set the egg white in the fridge; we'll need it later. In a small bowl, whisk together the yolk, remaining egg, and vanilla extract until well combined. Set aside.

In the bowl of a stand mixer fitted with the paddle attachment (or using a hand mixer, or a wooden spoon), combine the butter, both sugars, and salt. Beat on medium speed until well combined. Next, add the egg mixture and mix until well combined and smooth, about 2-3 minutes. Add the flour, then mix on low speed until JUST combined.

Wrap the dough in plastic wrap, then chill in the fridge for 25-30 minutes to firm up.

While the dough is chilling, preheat the oven to 350 degrees F, and line two cookie sheets with parchment paper.

Once your dough has chilled, divide the dough in half, working with one half at a time. Keep the remaining half in the fridge wrapped in plastic wrap until you're ready to use it. Lightly flour your work station.

Using a knife or bench scraper, divide the first half into 15 pieces. Roll each piece back and forth with your palms into a finger shape (whether they be really thin fingers, or really short fingers, or really craggily fingers, it's up to you!), about 3-4 inches long. Pinch the dough in two places on one end to create knuckles. Lightly score each finger with the back of the knife to create the natural lines we have in our fingers. Push down on the nail bed LIGHTLY to make it easier to attach the fingernails later. Transfer fingers to the cookie sheets, and repeat the process with the other half of dough. (Note: Make sure to work kind of quickly when making the fingers because the dough warms up really fast, making it harder to work with!)

Once all of your fingers have been formed, brush the egg white from earlier lightly over each finger to create a light browning once they're in the oven. Position each almond nail, then push down to attach (Be careful not to push to0 hard so you don't a. chip a nail or b. misshape the finger). If you find that the nail isn't attaching, add a little more egg white to the area to create a sort of glue.

Bake in the oven until slightly browned, about 10-12 minutes. Let cool completely.

Enjoy!

SOURCE: Adapted from Martha Stewart 

Quiche Lorraine

A while back, Williams-Sonoma was having a fantastic sale that I considered would be a crime not to participate in. Why scour the website daily if I'm not going to end up getting anything when the times comes to get it at a discounted rate (and with free shipping no less)? So, there I was, browsing the baking section when there IT was: a beautiful, french tart pan. Up until that point I could only bookmark all the tart recipes I came across and wonder, what if? But now, now was the time to take action, so in went the pan into my cart, with all the tart possibilities finally becoming attainable. And then it arrived and I said, "It's way too nice to use. Better save it for a special occasion. Back in the box you go!"

That was months ago.

Honestly, that always happens. I pine over something for what seems like forever, to the point where it's the only thing I can search for, and then I get it, and I deem it way too nice to use. "I NEED AN OCCASION TO BREAK IT IN," I'll insist. But then no occasion is ever good enough, so whatever it is waits and waits to be used. But that has to change, so I made Quiche Lorraine.

I love this tart pan, and I'm so excited that the first thing I decided to make was Quiche Lorraine for dinner. It's so good, and so simple to make. Plus, it can be served or cold depending on the setting. It may be getting a little chillier outside, but we've still got some warmish days in the forecast that are pretty perfect for a picnic. Trust me, take it from someone who lives in the Midwest, these are the golden weather days. Soon all we'll have is snow piles and distant memories of when the temperature was a steamy 50 degrees. And if given the choice to eat outside while the trees are beautiful hues of yellow, red, and orange, you take it.

Here's something that broke from tradition: I used pancetta instead of lardons. One because I love pancetta and will take any excuse to use it, and two, because lardons in 5 oz containers are a little hard to get my hands on around here. And as it turns out, pancetta really, really works. It still gives you the salty, crispiness that lardons give you, but it doesn't overpower. I may have to alter the salt levels in the egg mix, but I think it really all comes down to personal preference.

And remember: Quiche Lorraine is just egg, heavy cream, bacon, and a little salt and pepper. If you add anything else, it's no longer Quiche Lorraine. Still delicious, but no longer Quiche Lorraine.


QUICHE LORRAINE

What You'll Need:

For the Pastry

  • 6 tablespoons butter, softened and at room temperature
  • 1 teaspoon sugar
  • A pinch of salt
  • 1 1/2 cups AP flour
  • 2 eggs, separated
  • Cup of ice water

For the Quiche Filling

  • 5 oz pancetta (or lardons if you're lucky enough to find it!)
  • 4 eggs and 2 egg yolks
  • 1 1/4 cups heavy cream
  • 1 tsp salt
  • Black pepper to taste

First, Make the Pastry:

Using a wooden spoon, beat together the butter, sugar and salt in a medium bowl until smooth. Mix in the flour, followed by  the egg yolks, and 2 tablespoons of ice water. Mix together until a smooth ball forms, only kneading the dough as much as necessary to bring it together. If the dough seems a bit dry, you can add more water, but be careful not to make the dough too wet.

Once the dough has come together, wrap in plastic wrap and chill overnight. (If you don't have the time, make sure to at least let it chill for an hour. )

When It's Time for Quiche:

Preheat the oven to 350 degrees F.

When you are ready to roll out the dough, take it out of the fridge and let it rest on the countertop for at least 30 minutes to make it easier to work with. Roll out the pastry dough between two even sheets of parchment paper until it is 1/4 inch thick, and use it to carefully line your tart pan. If you have any extra pastry dough, use it to patch up any cracks. Brush the sides  and pastry base with the leftover egg whites. Pop your tart pan back into the refrigerator while you prepare the filling.

To make the filling, fry the pancetta in a frying pan until golden brown and crispy, then, using a slotted spoon, transfer to a plate lined with paper towels to drain off any excess grease.

In a bowl, lightly beat the egg and egg yolks, then add the heavy cream, then the seasoning. Beat again until everything is mixed together well.

Remove the tart pan from the fridge, then scatter the cooled pancetta all around in the pastry shell. Next, pour in the egg mixture.

CAREFULLY transfer the quiche to the oven (I placed it on a baking sheet both for stability, and to catch any overflows), and bake for 30-45 minutes, depending on your oven. MAKE SURE to keep an eye on it so that it doesn't stay too long in the oven and crack. A perfect quiche has a golden brown top, and is set. No  one wants cracked quiche.

This quiche can be served warm or cold.

SOURCE:  Adapted slightly from The Little Paris Kitchen: 120 Simple but Classic French Recipes, by Rachel Khoo

Follow my blog with Bloglovin

Bite-Size Biscotti

I really, really like my beautician. Partially because she's one of the only people in this world who I would trust to dye my hair just-so, and partially because I've known her for a big chunk of my life. She likes me, and I like her, and she likes my baking, so I like her even more. When true-blue baking season starts up, the kitchen is always filled with more treats than my family could ever possibly eat, and I always pick out the best of the best to bring to her. Lately she's really been dropping hints that I've been slacking in the baked-good-delivery department, so I'm stepping up my game.

I love biscotti. It's crunchy and delicious, and there are so many flavor combinations out there that I'll never become bored with it. It's the perfect companion to cold-weather beverages, and since my tea kettle has seen a lot more action lately, I thought I would give these a shot.

Traditional biscotti can be time consuming, and nerve-wracking. If you don't get the first bake right, it can throw off the entire process. After all, you don't eat soft biscotti, you're looking for that satisfying crunch. If you still want the crunch, but don't have all day, try the mini version. These are just as satisfying, but it'll only take you a few hours, and most of that time is spent impatiently checking to see if the chocolate has set so you can dig in. Patience is your friend when baking, now and forever.

It should be noted that in this recipe, it calls for the zest of grapefruit, but  I think any citrus you've got laying around will do. It's not so much about the grapefruit as it is the presence of citrus that makes these biscotti bites stand out. I zested that grapefruit until I could zest no more because it was $1.25 and I was going to get my money's worth or die trying. (Dramatic, sorry.)

These bite-sized biscotti are for all fans of the salt-chocolate-cocunut-citrus-more chocolate flavor combination. May your teaspoons be heaping, your cookies crunchy,  your chocolate smoothly-tempered, and your tummies full of the quintessential coffeehouse treat. There are going to be some happy faces at the beauty shop tomorrow.

BITE-SIZED BISCOTTI

What You'll Need:

  • 1 1/4 cups all-purpose flour
  • 1 1/4 cups fine cornmeal (I used white cornmeal)
  • 1/2 teaspoon baking powder
  • 1/2 teaspoon coarse salt
  • 3/4 stick (12 tablespoons) unsalted butter, at room temperature
  • 1 cup granulated sugar
  • 2 large eggs, at room temperature
  • 1 1/2 cups sweetened shredded coconut
  • 2 tablespoons grapefuit zest (or two tablespoons of zest of your choice. Could be orange!)
  • 11 ounces bittersweet chocolate, finely chopped
  • Sanding sugar (I used Demerara because that's what I had in my pantry!), for sprinkling

DIRECTIONS 

Preheat oven to 350 degrees F.

In a medium bowl, whisk together flour, cornmeal, baking powder, and coarse salt. Set aside.

In the bowl of a standing mixer with the paddle attachment, beat the butter on medium speed until pale and fluffy, about 3 minutes. Add eggs, one at a time, until well combined. Next add the flour mixture and beat on low until just combined. Beat in the coconut, grapefruit zest, and about 5 ounces of the bittersweet chocolate. Mix until everything is evenly distributed.

Drop generous heaping teaspoonfuls of biscotti dough on parchment-lined baking sheets. Set each dough ball about 1 inch apart. Sprinkle the tops of each with a generous sprinkling of sanding sugar. Refrigerate for 30 minutes. (Note: I don't have an industrial-size refrigerator, so my fridge only holds so many baking sheets. My solution: scoop the remainder of your dough into a bowl and refrigerate. It'll still be cold enough to form dough balls that keep their shape in the oven.)

Bake, rotating sheets halfway through, until golden brown. This should take about 18-20 minutes depending on your oven.

Let cool completely on wire racks.

Once your biscotti bites have completely cooled, temper the remaining amount of bittersweet chocolate, stirring until smooth. Remove from heat. Dip the bottoms of the cookies in the melted chocolate, scraping off any excess chocolate with a spoon, or using the edge of the bowl. Set each on clean parchment-lined baking sheets. Refrigerate until chocolate is set, about 30 minutes. (Note: I didn't refrigerate again. Instead, I let them to set in a cool place in the house. It took a little longer, but I didn't have to take all of my food out of the fridge again.)

To Store: These can be be stored in a single layer for up to one week.

SOURCE: Martha Stewart

Double Apple + Pear Pie

So, I've given this a lot of thought and, in ten years time, I want to be referred to as The Pie Queen.  I know it's a lofty goal, but we all need dreams, right? I've had visions lately of winning state fairs, and a beyond giant wedding pie. Or a cake disguised as a pie. I'm still working out the details.

There's just something about pie that puts me in the best mood. More than anything else I bake, pie really makes me feel like I've actually put tangible love into something to give to others. Do you ever feel like that? And apple pie is just so classic. If we try hard enough, maybe making one will speed up Fall a little bit, for what is Fall without apple pie? Just a season when everything dies, that's what.

Now, let's talk about adding a pear to your apple pie. Never in a million trillion years would I have thought of doing it, and now I can't believe that it isn't the norm. It's genius. Not only does adding a pear bring more complexity to an already pretty complex pie (due to the use of two different kinds of apples), but in the words of Pie School's author, Kate Lebo, "Your guests won't be able to tell where the flavor is coming from." You get to have a secret, and isn't that always fun? (Unless it's peanuts. Nut allergies aren't so fun. Best to let the cat out of the bag when it comes to peanuts.)

My suggestion with this pie is that you make it a hundred times before Fall and Winter are over. And if that seems like too many times, I don't know why we're friends in the first place.

Double Apple-Pear pie is at its best when served warm, and preferably with your favorite hot drink.    Throw in a scoop of freshly-made vanilla bean ice cream for good measure. Mmmm. Be right back, gonna go make one.


DOUBLE APPLE + PEAR PIE

What You'll Need:

  • Super Flaky Pie Crust
  • 3 Granny Smith apples, peeled, cored, and thinly sliced
  • 2 Golden Delicious apples, peeled, cored, and thinly sliced
  • 1 Bartlett pear, peeled,cored, and thinly sliced
  • Juice of 1/2 lemon (1 to 2 tablespoons)
  • 3/4 cup granulated sugar
  • 1/2 teaspoon ground cinnamon
  • 1/4 teaspoon ground nutmeg
  • Generous pinch of salt
  • 3 tablespoons AP flour
  • 2 tablespoons chilled unsalted butter, cut into small pieces
  • Egg white wash (1 egg white, beaten, mixed with one teaspoon water)
  • Demerara sugar for sprinkling

Directions

Make your pie crust. Chill overnight.

Roll out the bottom crust and place it in a 9 inch pie dish. Trim the edges, then refrigerate while you make the filling.

Preheat the oven to 425 degrees F.

Put your apple and pear slices in a bowl, and squeeze the lemon juice evenly on top to prevent browning. Stir in the granulated sugar, cinnamon, nutmeg, and salt. This would be a good time to taste and adjust your flavors as needed. Once you've got your filling just right, add the flour and set the filling aside.

Take your bottom crust out of the refrigerator, and set aside. Roll out your top crust.

Using a slotted spoon, place the apple-pear filling in the bottom crust, gently pressing down to make sure there's enough room for all the filling. It may not look like it will all fit, but trust me it will. Pour the liquid from the filling evenly over the apples, then dot the filling with the cut up pieces of unsalted butter.

Carefully drape the top crust over your bottom crust, then trim and crimp the edges. Make sure to cut generous slits over the top crust so that there is plenty of space for steam to escape. Brush the crust with the egg white wash, then sprinkle generously with Demerara sugar.

Bake the pie in the middle of the oven for 15-20 minutes, until the crust is blond and blistered. Rotate the pie front to back, then reduce the oven temperature to 375 degrees F. Bake for an additional 35-45 minutes, until the crust is deeply golden brown and the juices are bubbling.

Cool on a wire rack for at least two hours. Serve warm.

To store: Keep the pie loosely wrapped on the counter for up to 3 days.


SOURCE: Pie School: Lessons in Fruit, Flour, and Butter

Vanilla Bean Cake Doughnuts

You know what's hard to make? Doughnuts. Seriously, I have so much more respect for the contestants on Donut Showdown now that I've tried it at home. And they're under time constraints! Dough is sticky, flour goes everywhere, oil is HOT, and finding the perfect glaze consistency takes practice. It all takes practice. Is it worth it in the end? You bet. My life was filled with homemade fried dough for several days, and that's all a girl could want.

I've been thinking. I really want my life to look like that scene in Marie Antoinette where all the women do is sit around playing cards, drinking champagne out of coupe glasses, gorging themselves on the most beautiful, fresh-fresh-fresh pastries and candies you've ever seen. And they're doing all this while wearing three pounds' worth of silk, tulle, and ruffles. Oh, and mile-high hair. I've always been a fan of big hair. Ask my beautician. And when I would say "Let them eat cake," no one would be upset with me because I would then immediately follow it up with actual cake. I'd be the most beloved queen in all the land.

Truth be told, it'll be quite some time before I'm Versailles-level good at making doughnuts and other beautifully complicated pastries. I will say though, that for only my second time frying dough in the kitchen, things didn't turn out badly at all. There could've been a little less rolling and re-rolling involved in the dough-cutting stage.. Oh, and I'm still working on my fear of hot oil, but baby steps. Rome wasn't built in a day (and while we're on the topic of Rome, neither is good pizza).

One of my favorite things to get at my local bakery is a classic cake doughnut. More than anything else, I adore a good cake doughnut. Especially when it's Fall and tastes like pumpkins and apple cider and cinnamon sugar. In the summer, I prefer my doughnuts covered in rainbow nonpareils and vanilla glaze. Throw in the comforting speckling of fresh vanilla bean seeds, and you've got me. To be able to make my favorite treat in the comfort of my own home, curlers in hair, 40s Big Band blaring in the background, is such a splendid concept.

Now, I like you, so I won't lie to you and say that it's particularly easy, or that it isn't time-consuming. But I mean, It's REALLY worth it. Your reward is DOUGHNUTS at the end! That's my incentive for everything, but in this scenario, doughnuts is the actual GUARENTEE. Yes, I do have a few new tiny burn marks from absent-mindedly plopping doughnut holes into 350 degree oil, but I just ran one hand under some very cold water, and popped two slightly-cooled doughnut holes in my mouth with the other. I felt exponentially better after that.

Bottom line: make your own doughnuts. Tell me how it goes.

Why don't you try this Vanilla Bean Cake Doughnut recipe from one of my favorite blogs, Apt.2B Baking Co!


Meyer Lemon-Blueberry Hand Pies


Finally, FINALLY our local grocer has stepped up their produce game and brought me something I've been wanting for months: Meyer lemons. And, while we're at it, the best blueberries I've seen all summer. Without hesitation, I plopped two of each into the cart with no immediate plan, but complete intent to make something spectacular with my purchases. I've learned my lesson too many times before; if you see it, get it, because you may never see it again. And that rings pretty true since I stopped by the store again, and those New Zealand Meyer lemons were nowhere to be seen. Maybe I didn't look around enough. Or maybe they just disappeared as quickly as they'd appeared.

At any rate, it occurred to be that the possibilities were pretty endless for my blueberry-lemon pairing, but if I really wanted to get good at making pies then I ought to make one. For once though, I just wasn't interested in a regular 9-inch pie. Instead, I wanted something with a lot more mobility, and something that could be picnic-ready if/when the occasion arose. So, I went with hand pies. I'm a gal on-the-go, and expect my pies to accommodate that!

If you're wondering how my pie skills are coming along, the quick answer is: slowly, but surely. As simple as it seems to make a pie, no matter the form, it takes a lot of practice. I still struggle with gathering dough to form the disks, which should be so simple, but it gives me so much trouble. And sometimes I handle the dough wayyyy too much, but I'm working on it. I sense a lot of practice pies in my future, and what on earth could be better than that?

Meyer Lemons are a special fruit indeed. To me they're sort of like, if a mandarin orange and the brightest lemon ever, had a baby. They're slightly sweeter than your average lemon, and bring a very unique type of citrus note to any dish you make. And since citrus and blueberries go hand-in-hand. they make these flaky, buttery hand pies a wonderful treat for any time of the day. And the most beautiful part of it all is that you can serve them warm, or pack them up in a basket and serve at room temperature.

It's always nice to have an any-time dessert literally in the palm of your hand.

You can find the recipe here at BonAppetit.com! <------ This recipe calls for a regular lemon, but a Meyer lemon works so beautifully!

CAN YOU BELIEVE IT'S AUGUST ALREADY??


Blackberry Cobbler

blackberry cobbler 1 Hi, we're embracing seasonality now. It was a GREAT week at the market for produce, and to celebrate, I decided to put a bunch of sugar and fruit into a bowl together, then throw it in a pan. Maybe it's a pie. Most definitely, it's a cobbler.

I'd never made cobbler before this, but I've eaten plenty. Most notably was an unbelievable peach cobbler with the most heavenly blend of spices the world has ever seen. I'm STILL trying to figure it out ten years later, and of course the excellent baker who introduced me to the best peach cobbler ever, is nowhere to be found. Inspired by this, and also still on my "variations of pie" kick, I decided to embrace the beautiful blackberries practically screaming at me to take them home, and cook them at high temperatures. So into the basket they went.

blackberry cobbler2

My favorite thing about cobblers is how unbelievably easy they are to make. Honestly, so easy. Your filling gets mixed with a few ingredients, and then you let it rest covered for 15 minutes. Then, you make a biscuit mixture using just a few ingredients. Once everything is done, and you've buttered your pan, you spoon in your filling, then  your mixture on top, pour (CAREFULLY! It spills!) a couple tablespoons of melted butter on top to give it that beautiful brown color, and you pop it in the oven. Perhaps the only complicated part of the recipe, and I mean comparatively speaking, is that you must keep up with the baking time because your cobbler will bake at two different temperatures before it's finished. The hardest part? This is pretty important: you must, and I mean you MUST let your cobbler cool completely. I know, I know, it'll be hard, but you've just got to. Your filling needs time to set, and really solidify its flavors. Letting it cool will be like the caterpillar finally emerging from its cocoon as a beautiful butterfly. The pie is a butterfly. Give it time to look and taste beautiful.

blackberrycobbler3

We must also take a brief moment to not only talk about the topping, but to really appreciate it. It's not crumbly like you may be accustomed to. It's more like a biscuit, and therefore sooo much better. If you've ever enjoyed freshly baked biscuits with a generous smearing of freshly made jam, then this cobbler is for you. It's buttery, it's flaky, it's DELICIOUS. It's soft, and SO GOOD with that sweet-but-not-too-sweet blackberry filling. It all just works. And honestly, if you ask me, this cobbler show-stopper is even better the next day.

Hey, don't you have a cobbler to make?


BLACKBERRY COBBLER

What You'll Need:

FILLING:

  • 4 1/2 half-pints of blackberries (6 ounces each)
  • 1 cup granulated sugar
  • 1/4 cup cornstarch
  • 2 tablespoons all-purpose flour
  • 1 teaspoon ground cinnamon

TOPPING

  • 1 cup all-purpose flour
  • 1 teaspoon baking powder
  • 1/4 teaspoon baking soda
  • 1/4 teaspoon fine sea salt
  • 3 tablespoons unsalted butter, cubed
  • 3/4 cup buttermilk
  • 3 tablespoons unsalted butter, melted

DIRECTIONS:

First Things First:

-Butter a 9-inch pie pan really well. Set aside

-Preheat the oven to 425 degrees F.

Okay, Now Let's Make the Filling:

-Combine the blackberries, sugar, cornstarch, flour, and ground cinnamon in a medium-sized bowl. Carefully stir together until all the dry ingredients are well-mixed, and the berries are well-coated.

-Cover with cling wrap, and let rest for 15 minutes.

That's Done. Shall We Make the Topping?

-Combine the flour, baking powder, baking soda,  and fine sea salt in a medium-sized bowl.

-Using a pastry cutter, fork, or even your hands ( I've been using my hands a lot more lately!) quickly cut the butter cubes into the mixture until it is crumbly, and you've got pieces that are pea-sixzed or smaller.

-Make a well in the center of your mixture. Slowly pour the buttermilk into the center, and use a large spoon to gently mix it all together until all the dry ingredients are just combined. Your topping will look very wet at this point, but that's just what we want.

-This is a good time to melt the extra 3 tablespoons of unsalted butter.

Now Let's Put it all Together! 

-Spoon your blackberry mixture evenly into the prepared pie pan.

-Using a large spoon, dollop about three tablespoons of the biscuit mixture into mounds all around the surface of your blackberry mixture. This doesn't have to be an exact science (Goodness knows mine did not completely turn out the same size), just make sure your mounds of biscuit topping have been evenly distributed all across the top; we want everyone to get plenty of topping on their plates!

-Carefully pour your melted butter all across the top of your biscuit topping so that you'll get a nice, even brown color when it bakes. Be EXTRA CAREFUL because that melted butter is sneaky and will slide right off of the pie and onto the countertop. It's not fun to clean up.

-Bake your pie at 425 degrees F for 15 minutes, then reduce the heat to 350 degrees F for an additional 30 minutes.

-Cool for at LEAST 1 hour, though I think the longer you let it cool and rest, the better.

Serve with either your favorite vanilla ice cream, or some delicious homemade whipped cream. ENJOY.


SOURCE: A Year of Pies: A Seasonal Tour of Home Baked Pies

Blueberry-Pecan Galette

blueberry-pecan3 My new obsession? Pies. I am SO into pies right now.  It's not even that I love eating them (though that's obviously always a bonus); it's so much more than that. When making pie dough, you're able to set aside that pastry blender, and just dig in with your hands. It's direct contact with the thing you're creating, and it just doesn't get more personal and literally hand-made than that. A fresh, flaky, all-butter pie crust is a blank canvas, and the possibilities are truly endless. The idea of filling it with ANYTHING is just so exciting to me.

I might love pie, but that, doesn't  mean that I'm particularly good at it...yet. See, that's actually the funny thing about pie: it's not as easy to make as it looks. You've got a lot working against you; butter melting in the dough because you're handling it too much. Adding too much, or even too LITTLE, water to your pie crust. Overworking the dough. UNDERworking the dough. Filling spilling over the sides while it's baking. Honestly, the possibilities of pies to make are endless, and the possibilities of things going wrong when making said pie are also, yes, endless. But you must be brave, little baker. Be brave. Don't apologize. Make your pie with confidence. And, if you're still feeling a little iffy, take a step back, and make a galette.

blueberry-pecan 1

The beauty of the galette is: the more rustic, the better. If you're just so-so at pie decoration, you've got nothing to worry about. All you need is your favorite fruit filling, a little heavy cream, some sugar to sprinkle, and some expert edge-folding abilities. That's it. You just roll out your crust, pop it on your baking sheet, add your filling, brush on your heavy cream to give it that deep, beautiful browned crust, sprinkle a little sugar, and pop it in the oven. It's the perfect anytime almost-pie.

Now, you could go with a classic all-butter crust, but why do that when you can make things a little more interesting with pecan? Toasting whole pecans in the oven for 15 minutes before crushing them brings an extra level of flavor, and gives the crust a little texture that pairs well with the softness of the blueberries when baked. Pair this galette with a scoop of your favorite vanilla bean ice cream, or some homemade whipped cream (I put mine in the freezer!) and totally go to town.

So, we've done sweet. What do you say we try a savory galette next time?

blueberry-pecan4


BLUEBERRY-PECAN GALETTE

What You'll Need:

  • 1/2 cup pecans
  • 1 cup plus 2 tablespoons all-purpose flour
  • 2 teaspoons sugar
  • 1/2 teaspoon kosher salt
  • 1/4 teaspoon ground cinnamon
  • 1/2 cup (1 stick) chilled unsalted butter, cut into cubes
  • 12 ounces blueberries (about 2 cups)
  • 1 tablespoon cornstarch
  • 1 1/2 teaspoons lemon juice
  • 1/4 cup sugar, plus more for sprinkling
  • 2 tablespoons milk or heavy cream

Find the recipe on Bon Appetit!